
TL V6-3.5L (2007)
-
Replace any damaged parts with new ones.
-
Check the overlap between the headliner and B-pillar upper trim, and if necessary, adjust it.
-
Make sure the pin (G) on the front seat belt shoulder anchor adjuster (H) and the hole (I) on the back of the slider are engaged when installing
the B-pillar upper trim.
-
Make sure the trim hooks are installed into holes in the side curtain airbag B-pillar bracket securely.
-
Push the clips into place securely.
-
Before attaching the front seat belt lower anchor, make sure there are no twists or kinks in the belts.
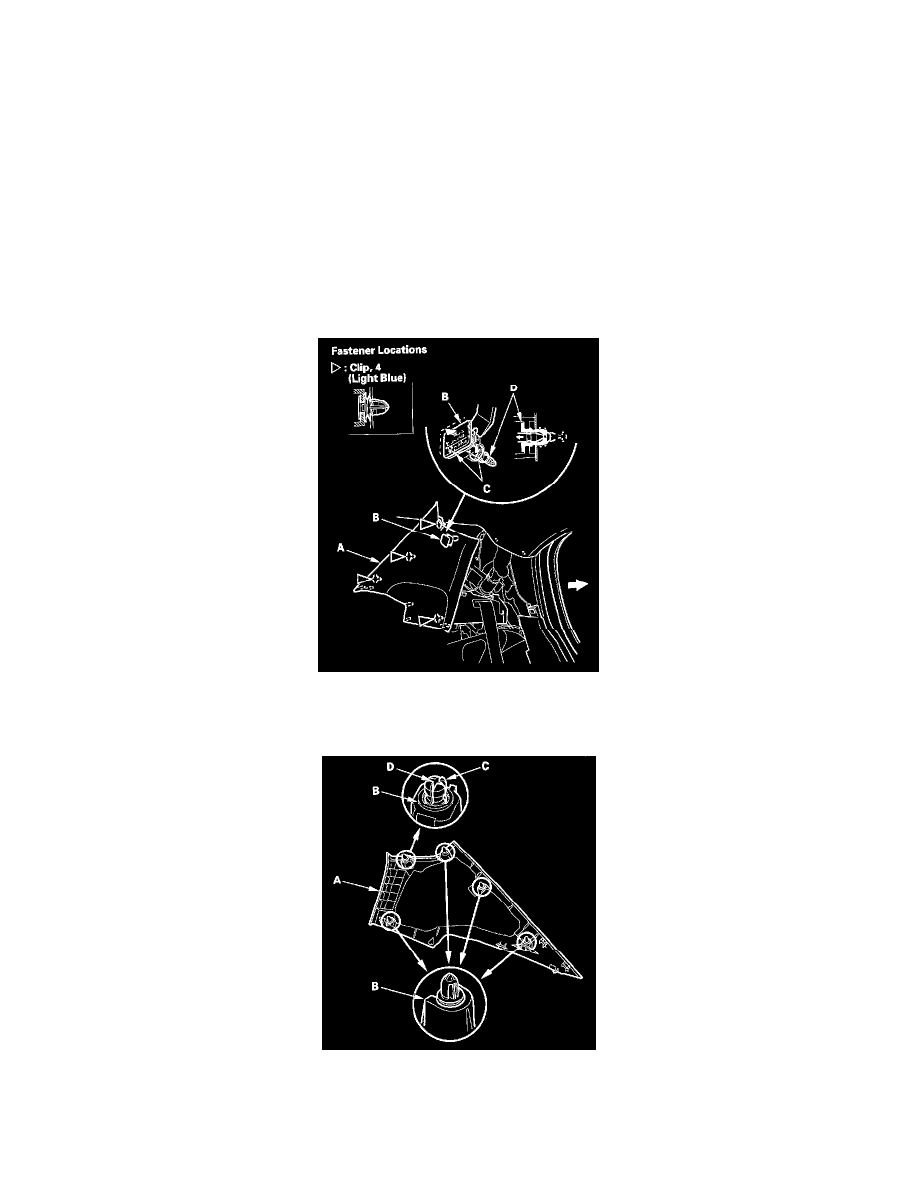
C-Pillar Trim
NOTE:
-
Put on gloves to protect your hands.
-
Use the appropriate tool from the KTC trim tool set to avoid damage when removing components.
-
Take care not to bend or scratch the trim and panels.
1. Pull out the rear door opening trim as needed.
2. Remove the C-pillar trim (A).
1. Pry up on the C-pillar cap (B), release the hooks (C), and pull the cap out so that the tapered pin on the cap releases the grommet (D).
2. Pull the C-pillar trim back by hand to detach the clips, then remove the trim.
3. Install the trim in the reverse order of removal, and note these items:
-
Check it the clips are damaged or stress-whitened, and if necessary, replace them with new ones.
-
Do not reuse the C-pillar cap; always replace it.
-
If the side curtain airbag has deployed, replace the C-pillar trim with a new one.