
TL V6-3.5L (2007)
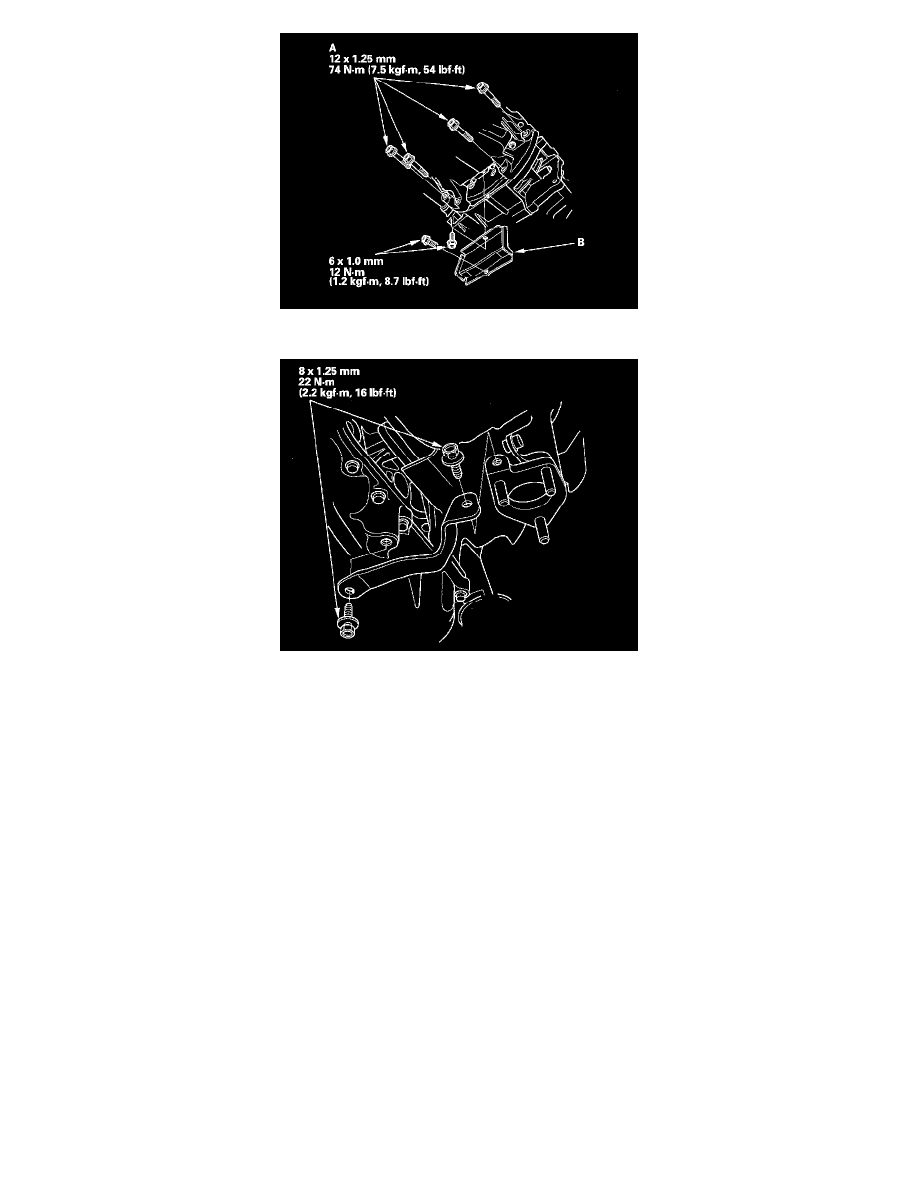
7. Install the rear warm up three way catalytic converter (rear WU-TWC) bracket.
8. If the engine is still in the vehicle, do the following steps.
9. Using the subframe adapter and a jack, loosely install the new front subframe bolt and the stiffeners.
10. Loosely install the subframe middle mount.
11. Remove the jack and front subframe adapter.
12. Align the reference marks with the edge of both rear stiffeners, and tighten the rear subframe mounting bolts, then the front bolts, and finally the
stiffener bolts to the specified torque.
13. Tighten the bolts securing the subframe middle mounts.
14. M/T model: Tighten the nuts securing the transmission lower front mount and transmission lower rear mount.
15. A/T model: Tighten the bolts securing the transmission lower mount.
16. Lower the vehicle.
17. M/T model: Install the shift cable bracket.
18. Install the vacuum hose.
19. Tighten the rear engine mount bolt, then install the rear engine mount stop.
20. M/T model: Install the rear engine damper.
21. Tighten the front engine mount bolt, then install the front engine mount stop and vacuum hose.
22. Remove the engine support hanger and engine hanger balance bar.
23. A/T model: Install the shift cable bracket to the front subframe.
24. Raise the vehicle on the lift to full height.
25. Connect the power steering pressure switch connector.
26. Install the power steering (P/S) hose.
27. Install exhaust pipe A using new gaskets and new self locking nuts.
28. Connect the suspension lower arm ball joints.
29. Connect the tie-rod end ball joints.
30. Install the damper fork.
31. Connect the stabilizer links.
32. Install the splash shield.
33. Install the engine under cover.
34. Install the front wheels.