
TL V6-3.5L (2007)
Control Assembly: Service and Repair
Climate Control Switch Assembly Removal/Installation
Climate Control Switch Assembly Removal/Installation
1. Remove the audio-HVAC display module assembly.
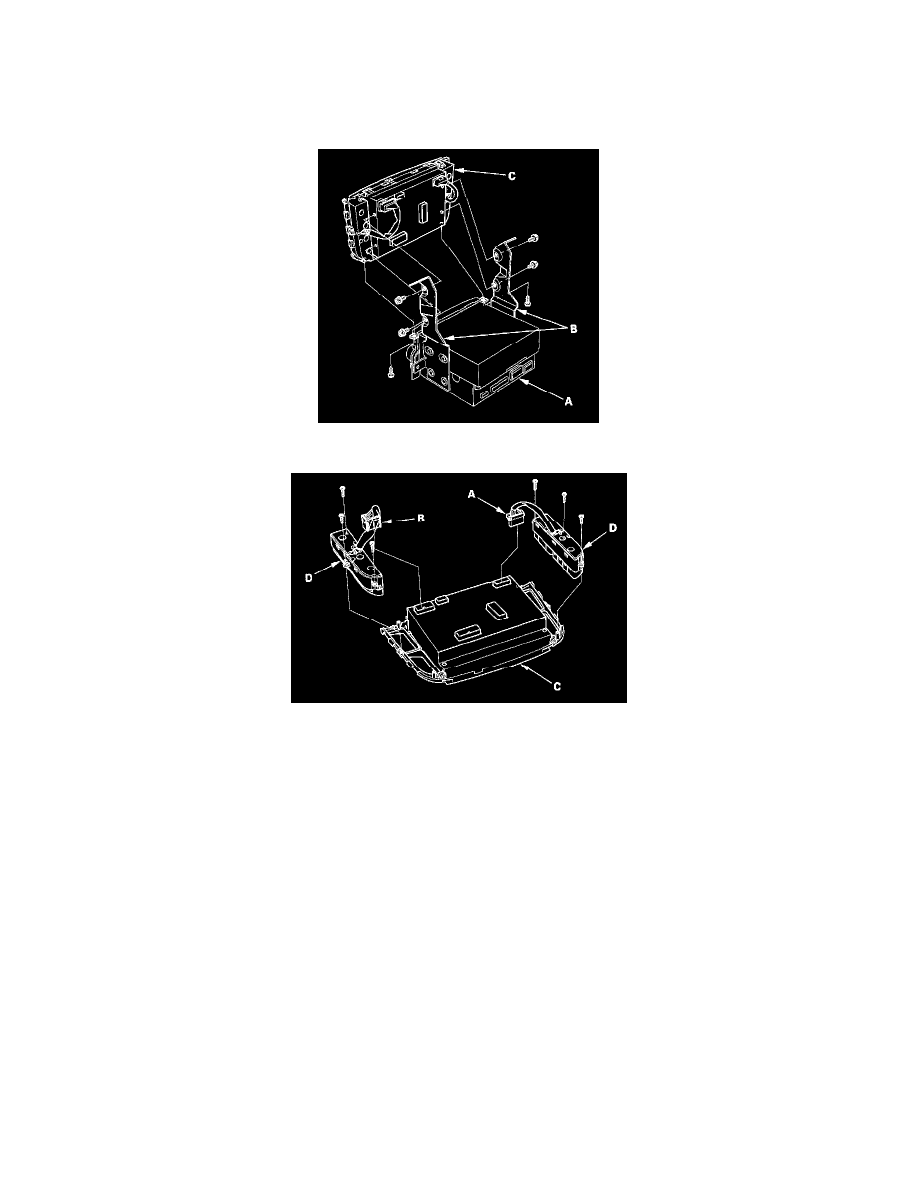
2. Remove the self-tapping screws and the audio unit (A) and bracket (B) from the display panel control unit (C).
3. Disconnect 10P connector (A) and 16P connector (B) from the display panel control unit (C). Remove the self-tapping screws and the climate
control switch assembly (D).
4. Install the control switch assembly in the reverse order of removal. After installation, operate the control switch assembly controls to see if they
work properly.
5. Run the self-diagnostic function to confirm that there are no problems in the system.