
TL V6-3.5L (2007)
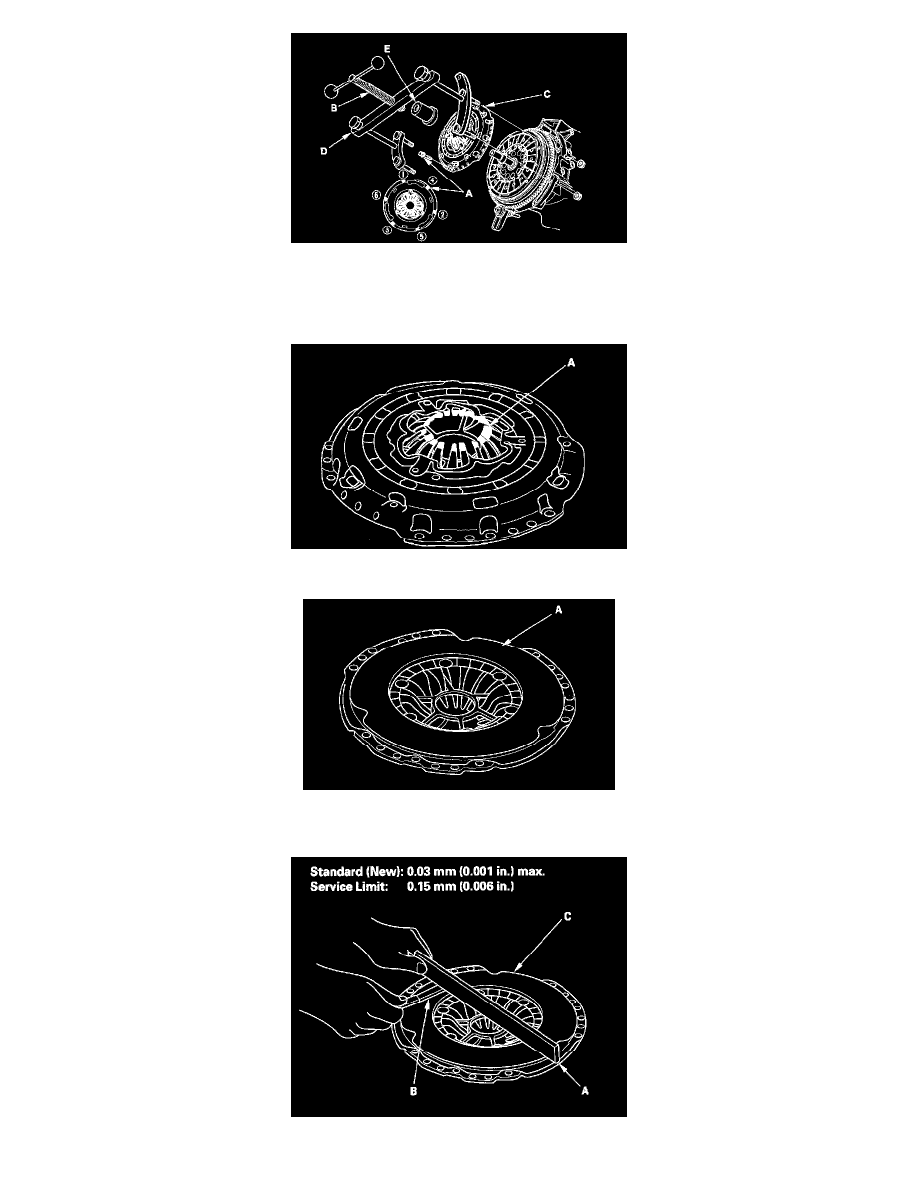
5. Turn the center screw (B) on the pressure plate compressor counterclockwise by hand to release the pressure, then install two pressure plate
mounting bolts, hand-tight, to hold the pressure plate (C). Remove the pressure plate compressor (D), pressure plate compressor adapter (E), and
the pressure plate.
6. Inspect the fingers of the diaphragm spring (A) for wear at the release bearing contact area.
7. Inspect the pressure plate surface (A) for wear, cracks, and burning.
8. Inspect for warpage using a straight edge (A) and a feeler gauge (B). Measure across the pressure plate (C). If the warpage is more than the service
limit, replace the pressure plate and clutch disc as a set.
9. Remove the clutch disc (A) and clutch alignment shaft (B).