
TL V6-3.5L (2007)
Axle Shaft Assembly: Removal and Replacement
Driveshaft Removal
Driveshaft Removal
1. Raise the vehicle on a lift.
2. Remove the front wheels.
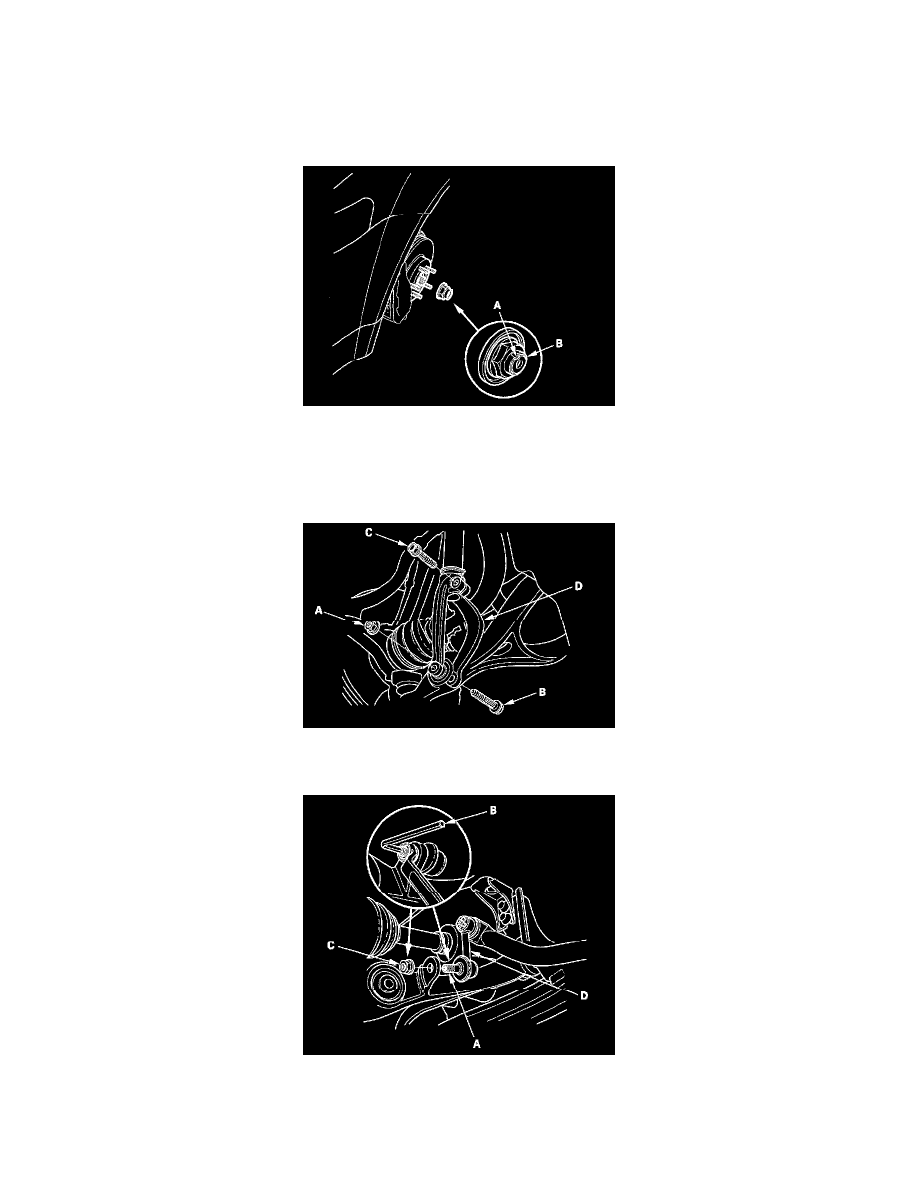
3. Lift up the locking tab (A) on the spindle nut (B), then remove the nut.
4. Remove the splash shield.
5. Drain the transmission fluid, then reinstall the drain plug with a new washer.
6. Remove exhaust pipe A.
7. Remove the self-locking nut (A), 12 mm damper fork mounting bolt (B), and 10 mm damper pinch bolt (C), then remove the damper fork (D).
8. Hold the stabilizer ball joint pin (A) with a hex wrench (B), and remove the flange nut (C). Separate the front stabilizer link (D) from the lower
arm.
9. Remove the cotter pin from the lower arm ball joint castle nut, and remove the nut, then separate the lower ball joint from the lower arm using the
ball joint thread protector and remover.
NOTE: