TL V6-3.5L (2007)

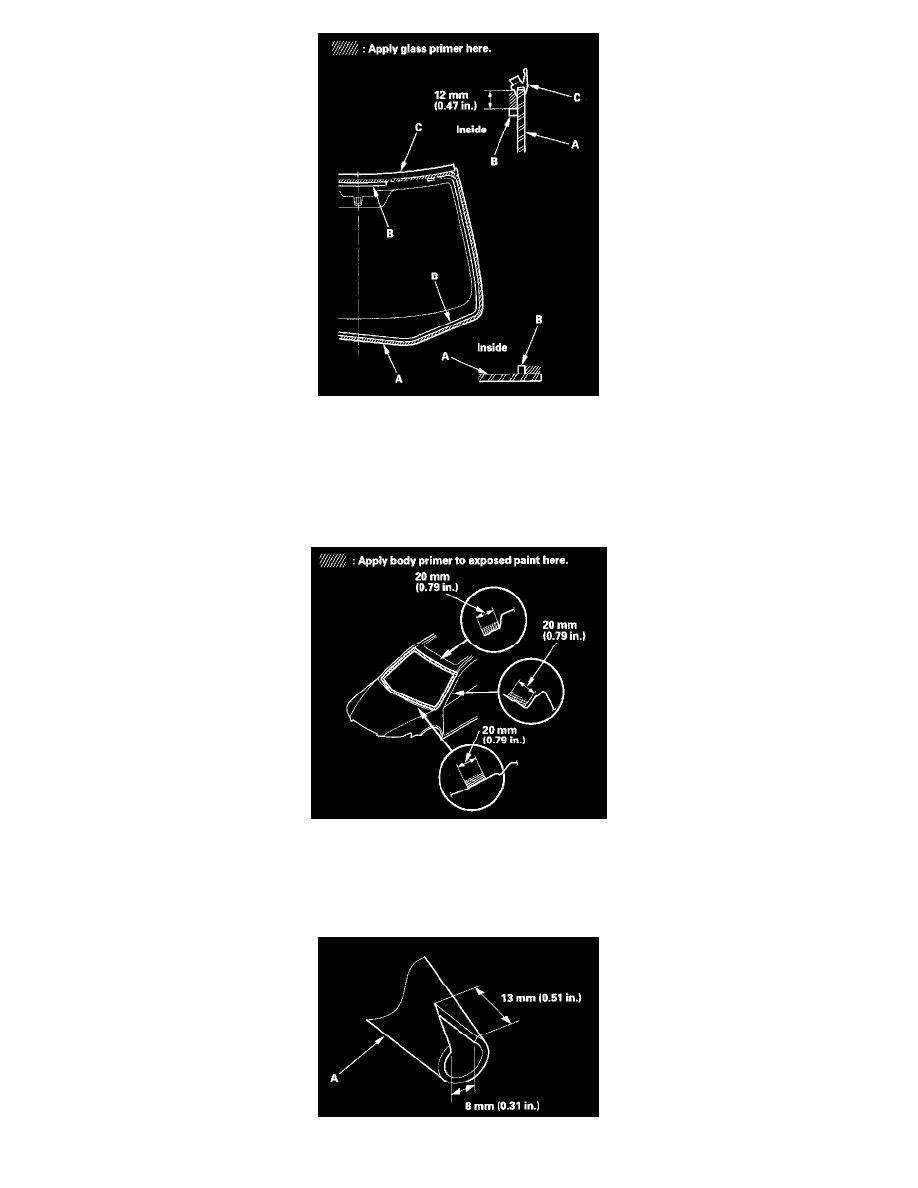
16. With a sponge, apply a light coat of glass primer around the edge of the windshield (A) between the dams (B) and molding (C) as shown, then
lightly wipe it off with gauze or cheesecloth:
-
Apply glass primer to the molding.
-
Do not apply body primer to the windshield, and do not get body and glass primer sponges mixed up.
-
Never touch the primed surfaces with your hands. If you do, the adhesive may not bond to the windshield properly, causing a leak after the
windshield is installed.
-
Keep water, dust, and abrasive materials away from the primed surfaces.
17. With a sponge, carefully apply a light coat of body primer to any exposed paint or metal around the flange where new adhesive will be applied. Let
the primer dry for at least 10 minutes:
-
Do not apply body primer to any remaining original adhesive on the flange.
-
Be careful not to mix up the body and glass primer sponges.
-
Never touch the primed surfaces with your hands.
18. Cut a "V" in the end of the nozzle (A) on the adhesive cartridge as shown.
