
TL V6-3206cc 3.2L SOHC MFI (1998)
Valve Body: Service and Repair
Removal and Installation
REMOVAL/INSTALLATION
WARNING: Make sure lifts, jacks and safety stands are placed properly, and hoist brackets are attached to the correct position on the
engine.
1. Raise the front of the vehicle, and support it with safety stands.
2. Set the parking brake, and block both rear wheels securely.
3. Shift the transmission to the [N position.
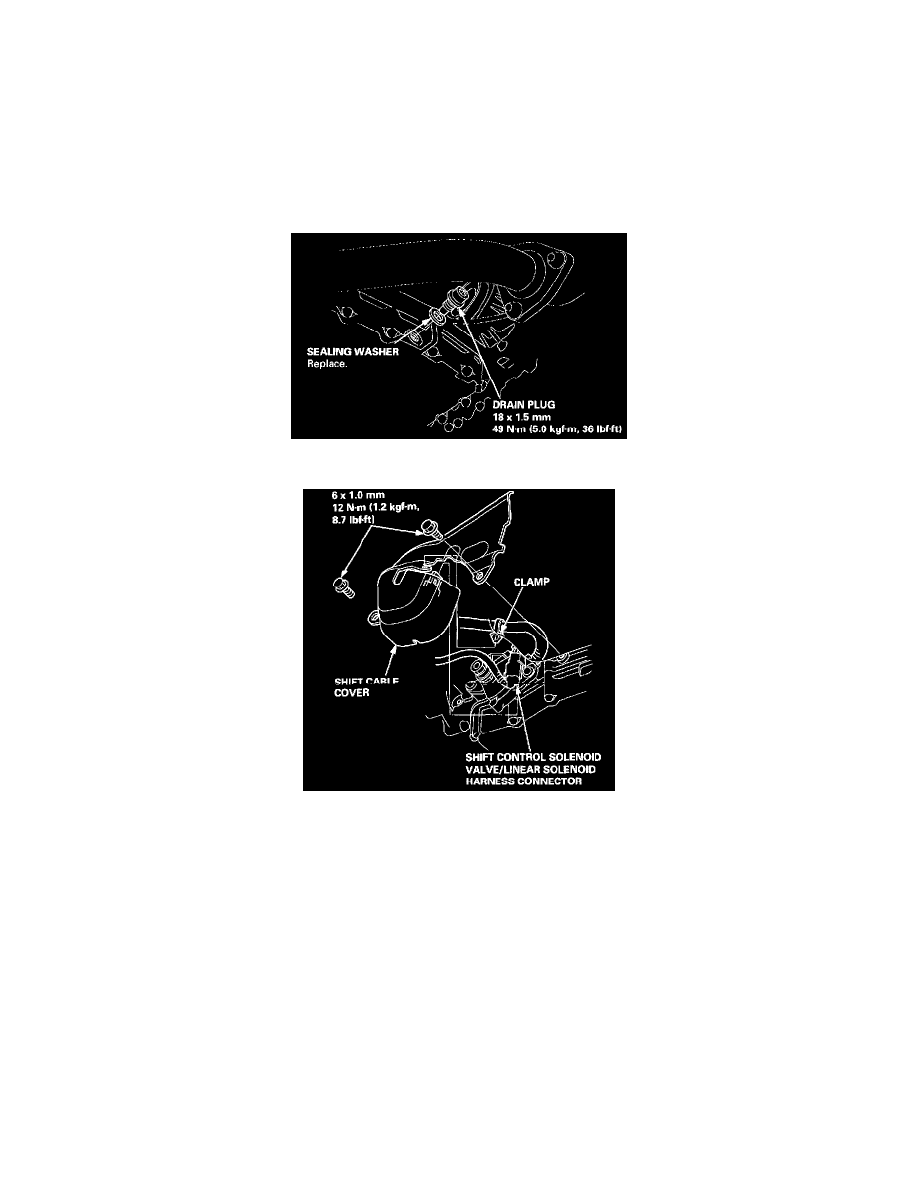
4. Remove the drain plug, and drain the automatic transmission fluid (ATF). Reinstall the drain plug with a new sealing washer.
5. Remove the shift cable cover mounting bolts, then remove the A/T gear position switch harness clamp and the shift control solenoid/linear
solenoid harness connector from the shift cable cover.
6. Remove the shift cable cover from the transmission housing.
7. Disconnect the shift control solenoid/linear solenoid harness connector.