TL AWD V6-3.7L (2010)

Rear Vision Camera: Service and Repair
Rearview Camera Removal/Installation
NOTE:
-
Put on gloves to protect your hands.
-
Take care not to scratch the trunk lid and related parts.
1. Remove the trunk lid trim panel See: Body and Frame/Doors, Hood and Trunk/Trunk / Liftgate/Trunk / Liftgate Interior Trim Panel/Service and
Repair/Interior Trim Removal/Installation - Trunk Area.
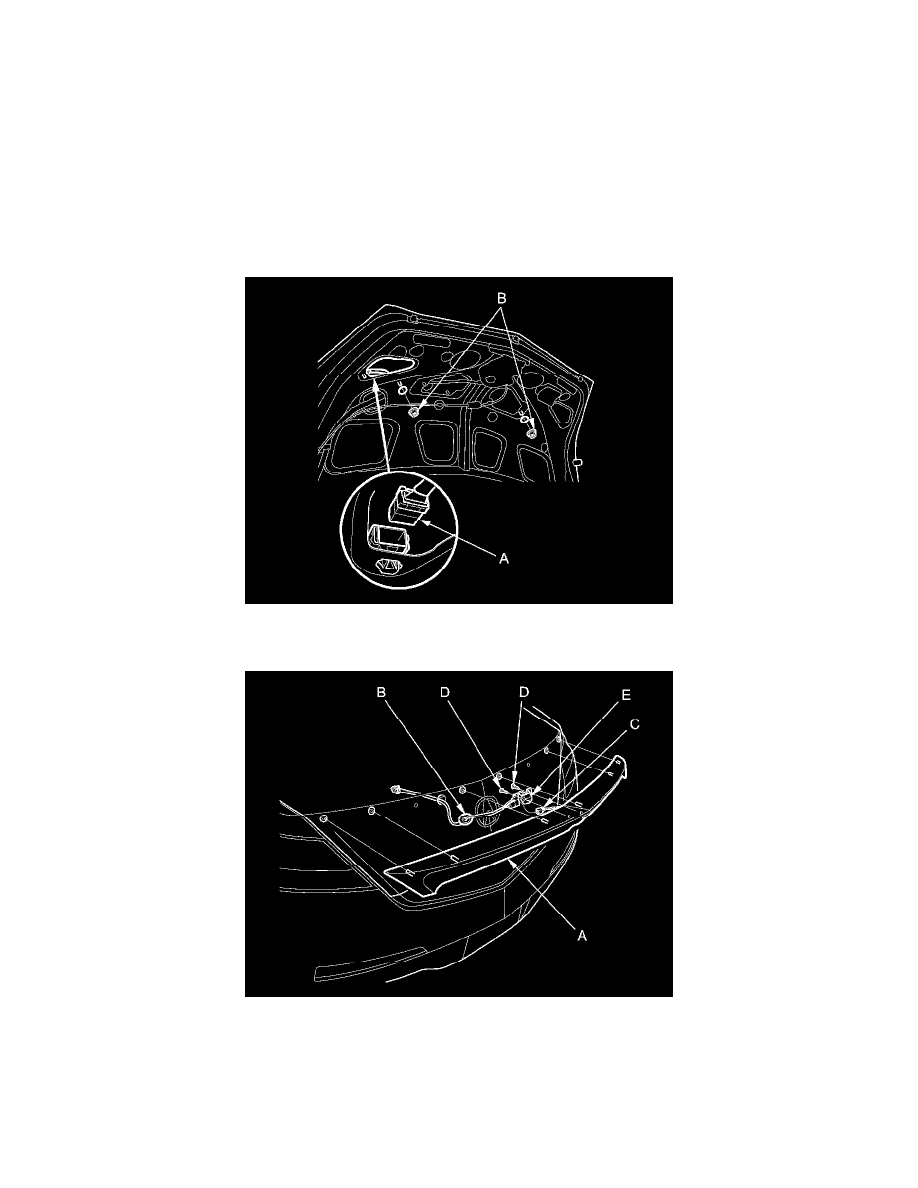
2. Disconnect the rearview camera 12P connector (A) and remove the nuts (B).
3. Pull the rear license trim (A) away from the trunk lid, then remove the grommet (B) from the trunk lid, and carefully pull the connector through the
hole in the trunk lid.
4. Disconnect the connector (C), remove the screw (D) and the rearview camera (E).
5. Install the rearview camera in the reverse order of removal.
