
TL AWD V6-3.7L (2010)
Rear Door Latch: Service and Repair
Rear Door Latch Replacement
NOTE: Put on gloves to protect your hands.
1. Remove these items:
-
Door panel See: Rear Door Panel/Service and Repair/Rear Door Panel Removal/Installation
-
Inner handle See: Rear Door Panel/Service and Repair/Rear Door Panel Removal/Installation
-
Door end trim See: Rear Door Panel/Service and Repair/Rear Door Panel Removal/Installation
2. Raise the glass fully.
3. Remove the plastic cover as needed See: Rear Door Handle/Rear Door Exterior Handle/Service and Repair.
4. Remove the door pad See: Rear Door Panel/Service and Repair/Rear Door Pad Replacement.
5. Release the rod fastener, and disconnect the outer handle rod from the outer handle base See: Rear Door Handle/Rear Door Exterior
Handle/Service and Repair.
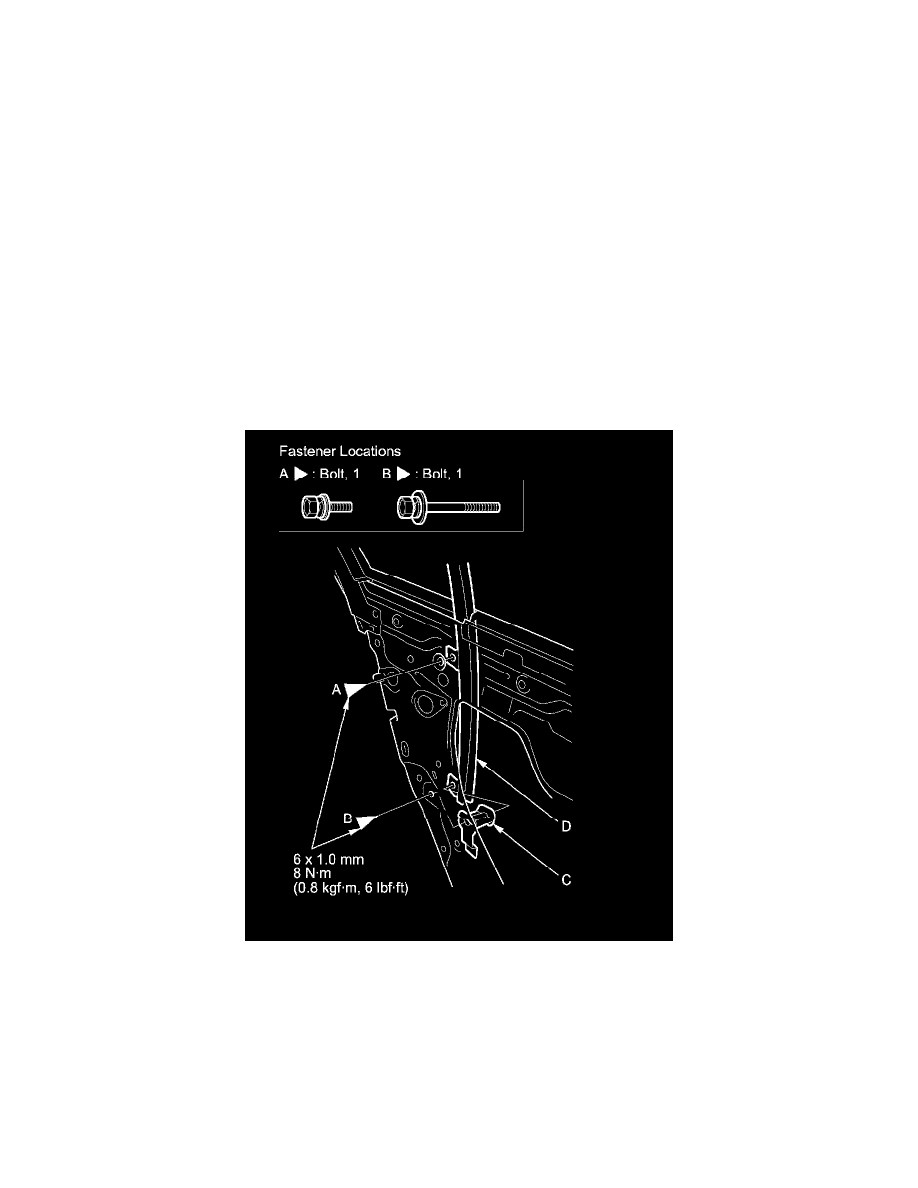
6. Remove the bolts (A, B), then remove the collar (C) from the rear lower channel (D).
7. Remove the screws (A, B) securing the latch (C), then remove the latch through the hole in the door. Take care not to bend the outer handle rod
(D), the latch cable (E), or the inner handle cable (F).