
TL AWD V6-3.7L (2010)
Air Register: Service and Repair
Dashboard Center Vent Removal/Installation
Dashboard Center Vent Removal/Installation
Special Tools Required
-
KTC Trim Tool Set SOJATP2014
*Available through the Acura Tool and Equipment Program
NOTE:
-
Take care not to scratch the dashboard or the panels.
-
Use the appropriate tool from the KTC trim tool set to avoid damage when removing components.
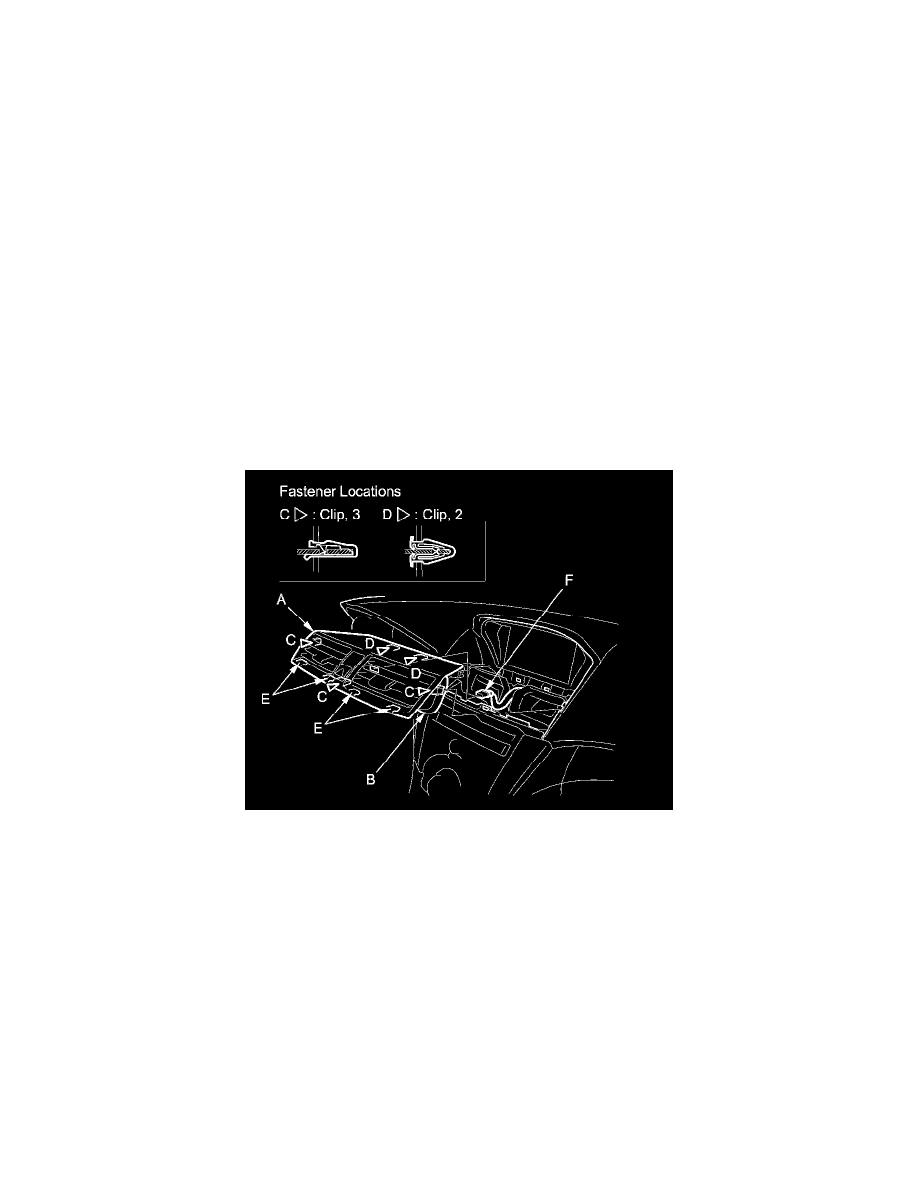
1. Remove the dashboard center vent (A).
1. Insert a hook-shaped tool into one side of the center vent until it hooks to the back edge of the duct (B).
2. Carefully pull out one side of the dashboard center vent partially to release the clips (C, D) and the hooks (E), then do the same on the other
side.
3. Disconnect the hazard warning switch/passenger's airbag cutoff indicator connector (F).
NOTE: Do not pull on the vent louvers or the edge of the vent, or you may damage them.
2. Install the dashboard center vent in the reverse order of removal, and note these items:
-
If the clips are damaged or stress-whitened, replace them with new ones.
-
Make sure the connector is plugged in properly.
-
Push the clips and the hooks into place securely.