
TL AWD V6-3.7L (2010)
Control Arm: Service and Repair
Rear Upper Arm Replacement
Rear Upper Arm Replacement
Special Tools Required
-
Ball Joint Thread Protector, 14 mm 07AAE-SJAA100
-
Ball Joint Remover, 32 mm 07MAC-SL0A102
1. Raise and support the vehicle See: Wheels and Tires/Vehicle Lifting/Service and Repair.
2. Remove the rear wheel.
3. Remove the rear damper/spring See: Suspension Spring ( Coil / Leaf )/Service and Repair/Removal and Replacement/Rear Damper/Spring
Removal/Installation.
4. Release the parking brake lever fully.
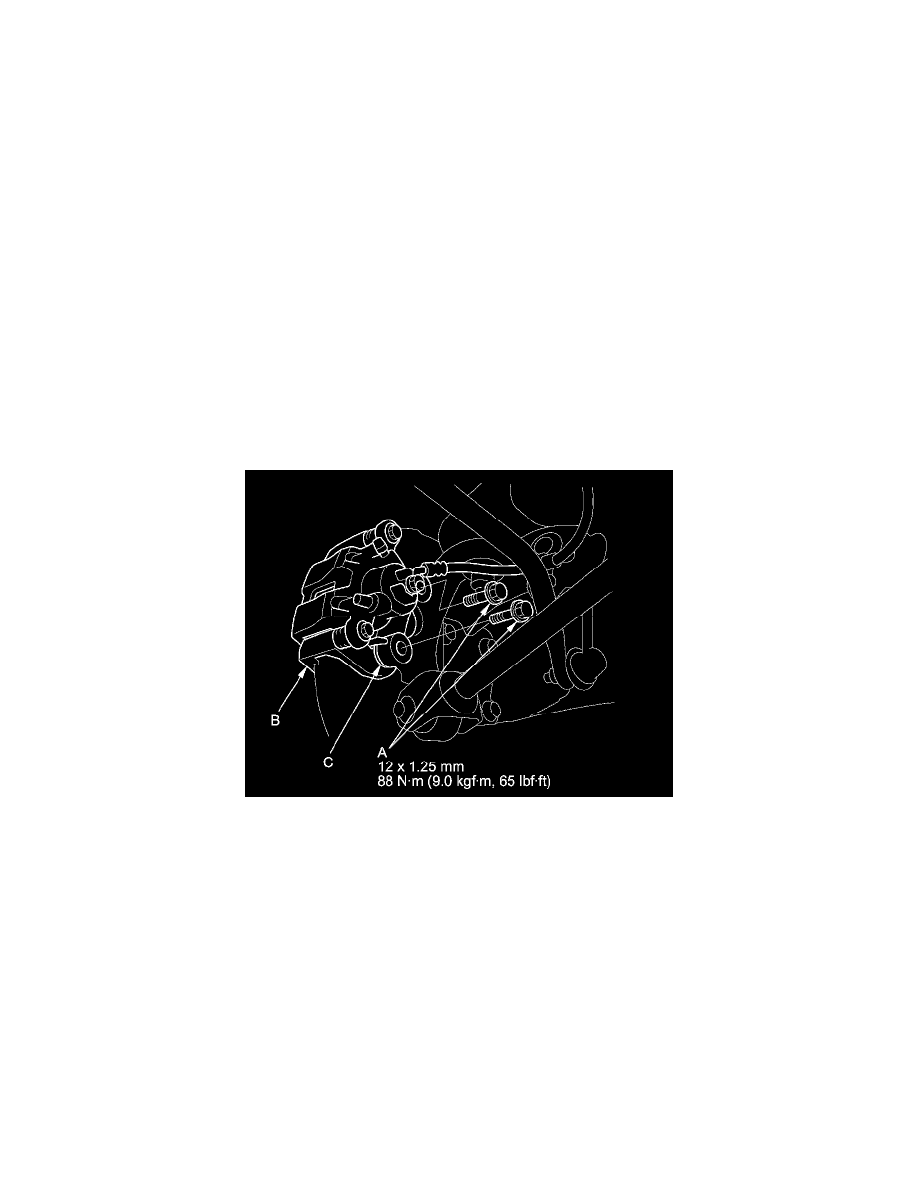
5. Remove the brake caliper bracket mounting bolts (A), then remove the caliper assembly (B) from the knuckle. To prevent damage to the caliper
assembly or the brake hose, use a short piece of wire to hang the caliper assembly from the undercarriage. Do not twist the brake hose excessively.
NOTE: Make sure the washers (C) are reinstalled between the brake caliper bracket and the knuckle, if they are removed See: Rear Knuckle Alignment
Link/Service and Repair.
6. Remove the lock pin (A) from the upper arm ball joint, then remove the castle nut (B).
NOTE: During installation, install the lock pin as shown after tightening the new castle nut.