
TL AWD V6-3.7L (2010)
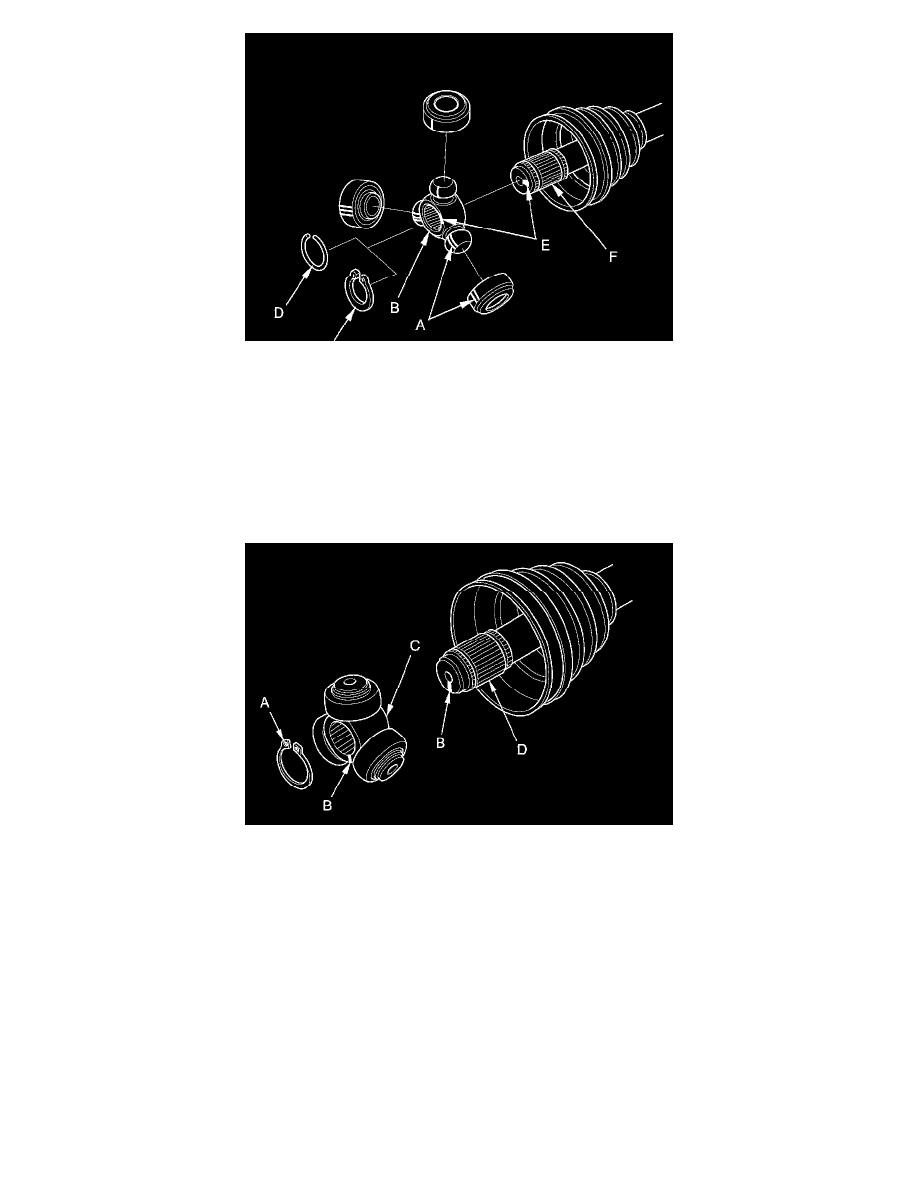
6. M/T model: Remove the snap ring (C).
A/T model: Remove the circlip (D).
7. Make marks (E) on the spider and the driveshaft (F) to identify the position of the spider on the shaft.
8. Remove the spider, then go to step 12.
NOTE: If necessary, use a commercially available bearing puller while being careful not to damage the spider.
9. Remove the snap ring (A).
10. Make marks (B) on the spider (C) and the driveshaft (D) to identify the position of the spider on the shaft.
11. Remove the spider.
NOTE: If necessary, use a commercially available bearing puller while being careful not to damage the spider.
12. Wrap the splines on the driveshaft with vinyl tape (A) to prevent damaging the boot.