
TL AWD V6-3.7L (2010)
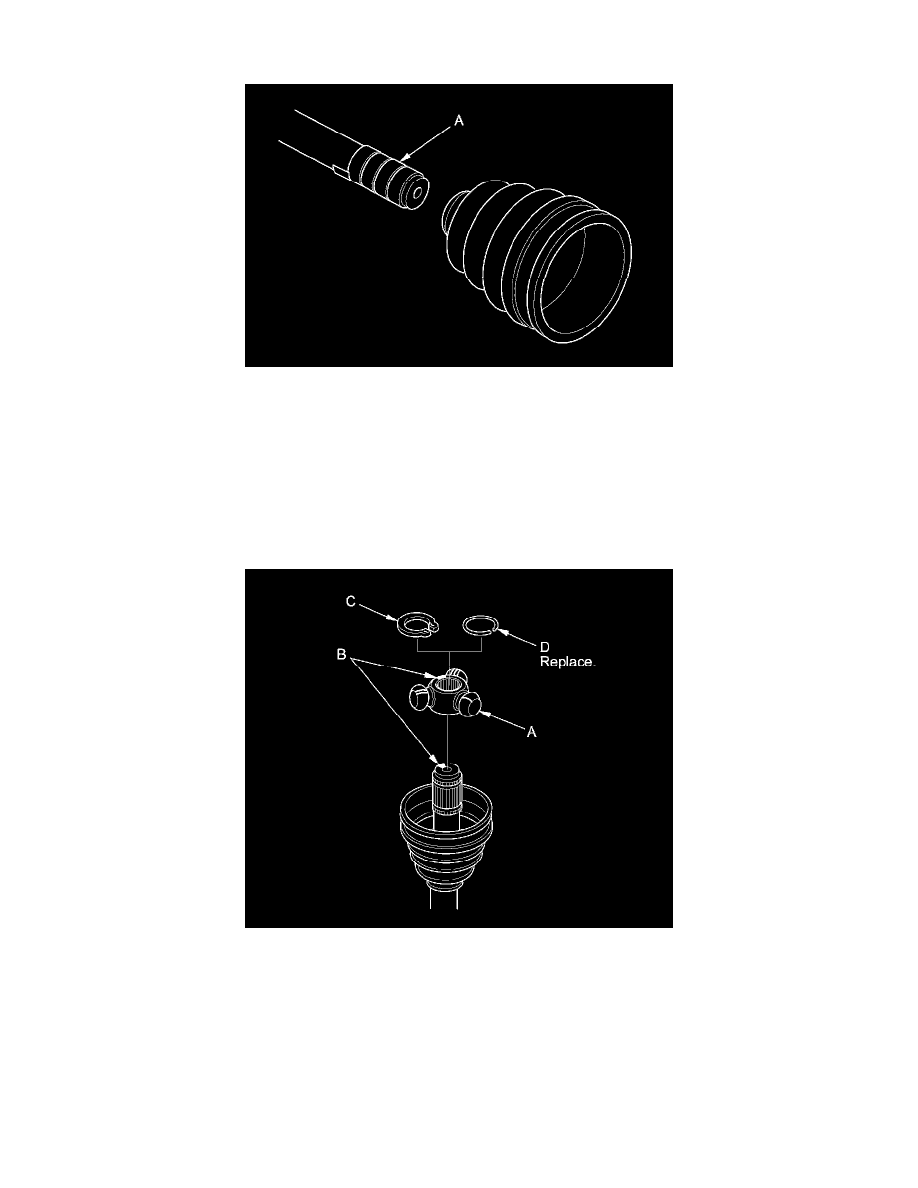
1. Wrap the splines on the driveshaft with vinyl tape (A) to prevent damaging the inboard boot.
2. Install the inboard boot onto the driveshaft, then remove the vinyl tape. Be careful not to damage the inboard boot.
NOTE: Do not reuse the removed right front driveshaft inboard boot for the SH-AWD model.
3. Install the spider.
-
For the except SH-AWD model right side with M/T, go to step 4.
-
For the SH-AWD model right side with M/T, go to step 7.
4. Install the spider (A) onto the driveshaft by aligning the marks (B) you made on the spider and the end of the driveshaft.
5. M/T model:
Install the snap ring (C) into the driveshaft groove.
A/T model:
Install a new circlip (D) into the driveshaft groove.
NOTE: Always rotate the circlip in its groove to make sure it is fully seated.
6. Fit the rollers (A) onto the spider (B) as shown, then go to step 9.
NOTE:
-
Reinstall the rollers in their original positions on the spider by aligning the marks (C) you made.