
TL FWD V6-3.5L (2009)
Trim Panel: Service and Repair
Interior Trim Removal/Installation - B-Pillar Upper/Lower Trim
Interior Trim Removal/Installation - B-Pillar Upper/Lower Trim
Special Tools Required
-
KTC trim tool set SOJATP2014*
*Available through the Acura Tool and Equipment Program.
B-Pillar Upper/Lower Trim
SRS components are located in this area. Review the SRS component locations See: Restraint Systems/Air Bag Systems/Locations and the precautions
and procedures See: Dashboard / Instrument Panel/Air Bag(s) Arming and Disarming/Service and Repair before doing repairs or service.
NOTE:
-
Put on gloves to protect your hands.
-
Take care not to bend or scratch the trim or the panels.
-
Use the appropriate tool from the KTC trim tool set to avoid damage when removing components.
1. Remove these items:
-
Front door sill trim See: Scuff Plate/Service and Repair/Interior Trim Removal/Installation - Front Door Sill Area
-
Rear door sill trim See: Scuff Plate/Service and Repair/Interior Trim Removal/Installation - Rear Door Sill Area
2. Slide the front seat forward fully.
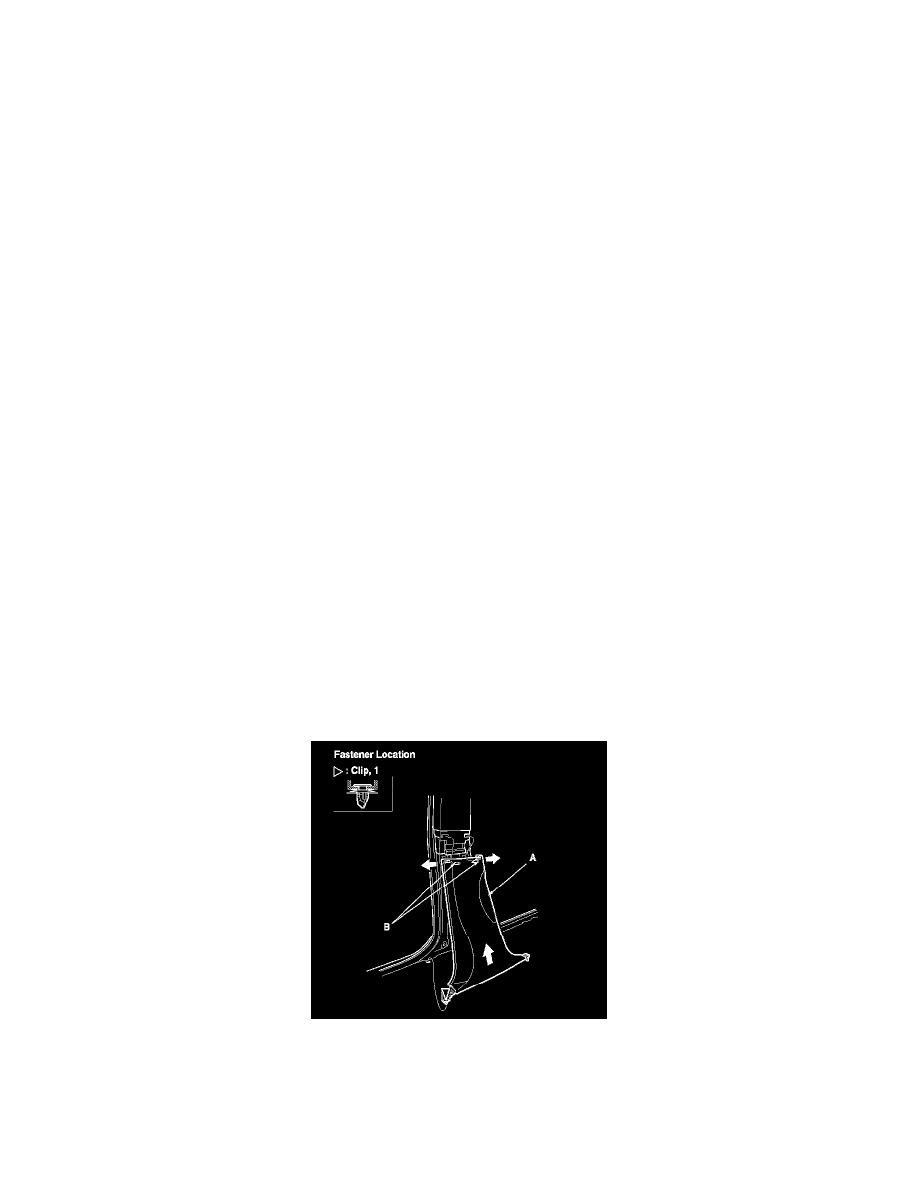
3. Remove the B-pillar lower trim (A).
-1 Pull the upper portion of the trim back to detach the upper hooks (B).
Detach the lower clip by pulling the bottom of the trim back by hand.
4. Remove these items:
-
Front seat belt lower anchor See: Restraint Systems/Seat Belt Systems/Seat Belt/Service and Repair/Front Seat Belt Replacement
-
Front door opening seal, as needed See: Scuff Plate/Service and Repair/Interior Trim Removal/Installation - Front Door Sill Area
-
Rear door opening seal, as needed See: Scuff Plate/Service and Repair/Interior Trim Removal/Installation - Rear Door Sill Area
5. Remove the B-pillar upper trim (A).
-1 Pull the bottom of the trim back by hand to detach the lower hooks (B).
Pull the bottom of the trim back to release the clip.
-3 Pull the trim down to release the upper hooks (C) from the holes in the body.