
TL FWD V6-3.5L (2009)
9. Remove the driver's dashboard undercover. See: Body and Frame/Interior Moulding / Trim/Dashboard / Instrument Panel/Service and
Repair/Driver's Dashboard Undercover Removal/Installation
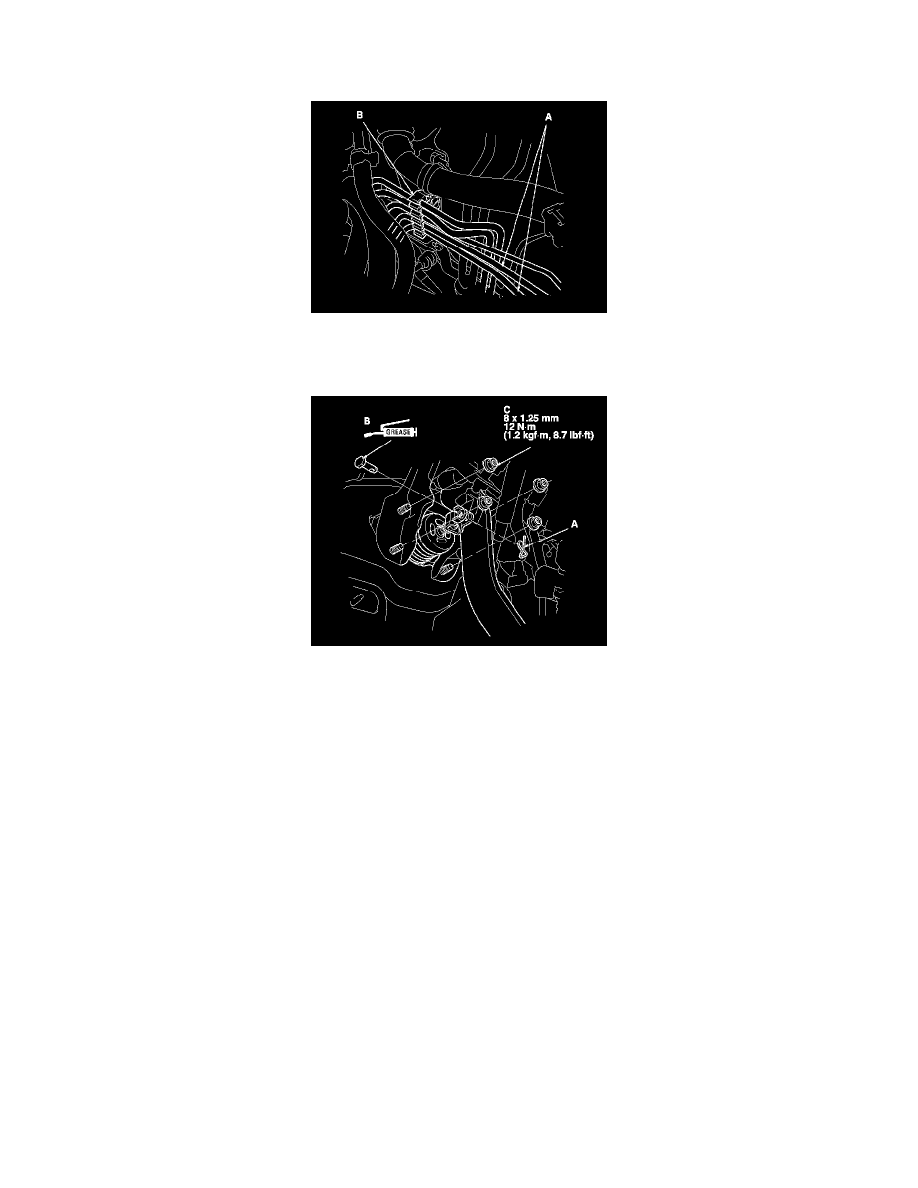
10. Remove the lock pin (A) and the clevis pin (B), then disconnect the yoke from the brake pedal.
11. Remove the brake booster mounting nuts (C).
12. Remove the brake booster (A) from the engine compartment.
NOTICE:
-
Be careful not to damage the brake booster mounting surfaces and the threads on the booster stud.
-
Be careful not to bend or damage the brake lines.
NOTE: Use a new brake booster gasket (B) during reassembly.
13. Install the brake booster in the reverse order of removal, and note these items:
-
Install the master cylinder after installing the brake booster. See: Hydraulic System/Brake Master Cylinder/Service and Repair
-
Check the brake pedal height and free play after installing the master cylinder, and adjust it if necessary. See: Brake Pedal Assy/Adjustments
-
Bleed the brake system. See: Brake Bleeding/Service and Repair
14. Do the battery terminal reconnection procedure. See: Starting and Charging/Battery/Service and Repair/Procedures