
TL FWD V6-3.5L (2009)
Coolant: Service and Repair
Coolant Replacement
1. Remove the engine compartment covers. See: Engine/Access Cover/Service and Repair
2. Wait until the engine is cool, then carefully remove the radiator cap.
3. Start the engine. Set the heater temperature control to maximum heat, then turn the ignition switch to LOCK (0), or press the engine start/stop
button to select the OFF mode. Make sure the engine and the radiator are cool to the touch.
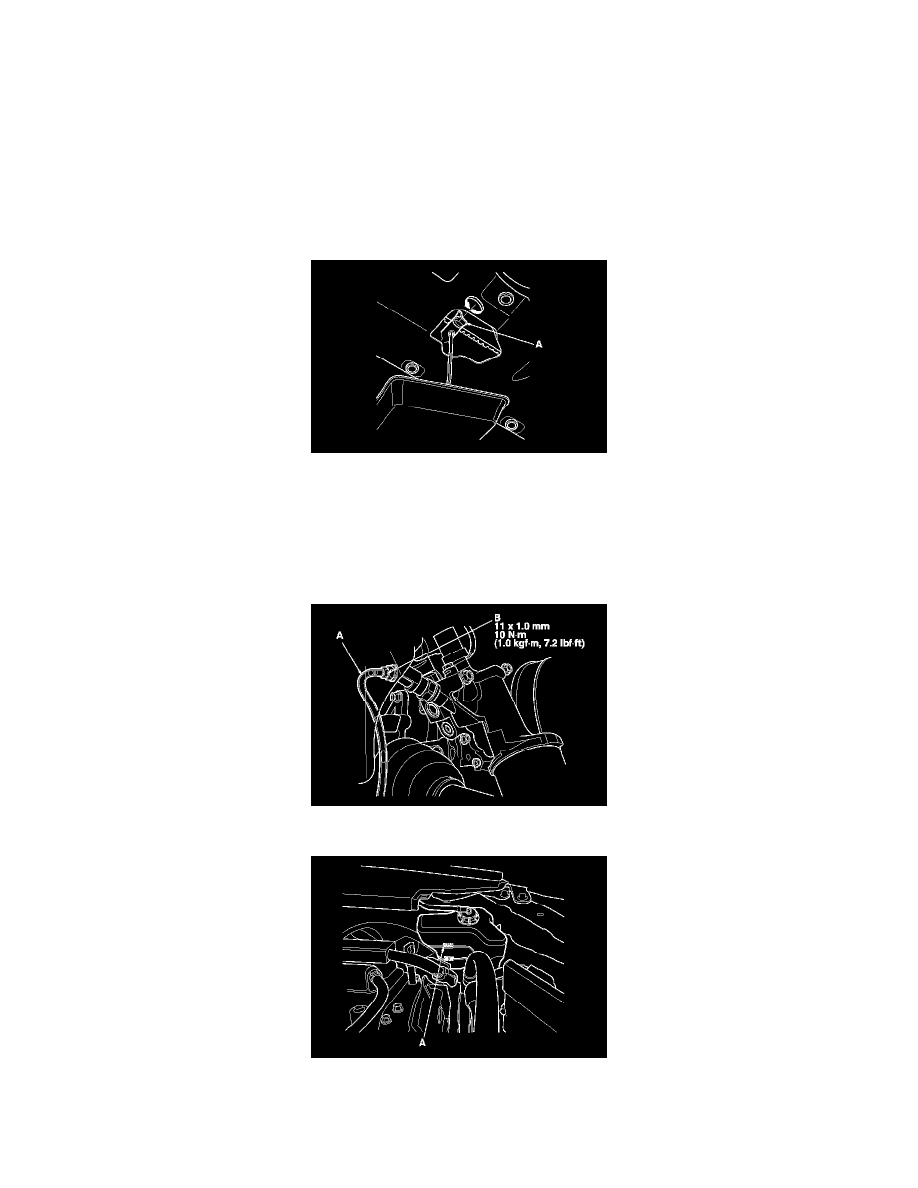
4. Loosen the drain plug (A), and drain the coolant.
5. Install a rubber hose (A) on the drain bolt (B) located at the rear of the engine block, then loosen the drain bolt.
6. When the coolant stops draining, tighten the drain bolt. Remove the rubber hose.
7. Tighten the radiator drain plug securely.
8. Remove, drain, and reinstall the coolant reservoir.
9. Fill the coolant reservoir to the MAX mark (A) with Acura Long Life Antifreeze/Coolant Type 2 (P/N OL999-9011A).
10. Pour Acura Long Life Antifreeze/Coolant Type 2 into the radiator up to the base of the filler neck.
NOTE:
-
Always use Acura Long Life Antifreeze/Coolant Type 2. Using a non-Acura coolant can result in corrosion, causing the cooling system to