
TL FWD V6-3.5L (2009)
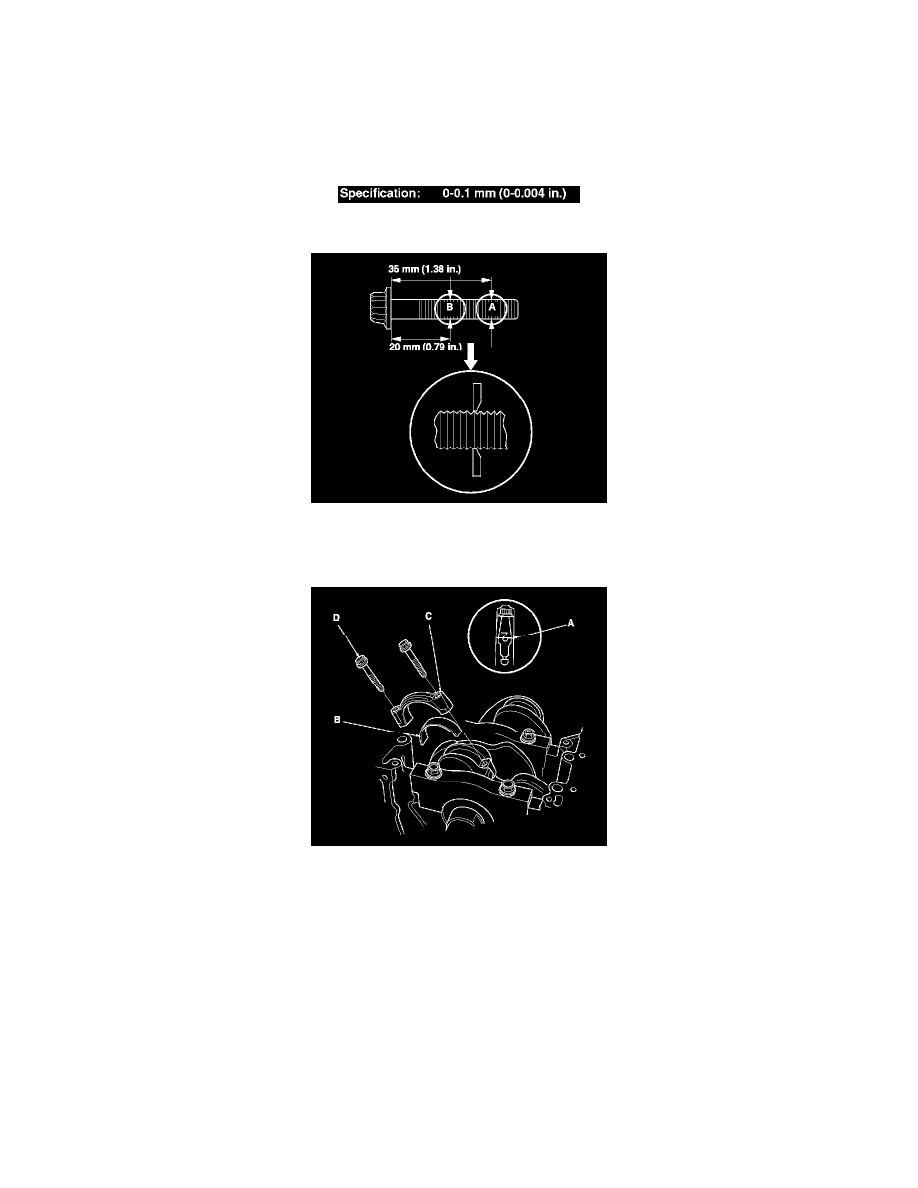
17. Calculate the difference in diameter between point A and point B.
Point A-Point B = Difference in Diameter
Difference in Diameter
18. If the difference in diameter is out of tolerance, replace the connecting rod bolt.
19. Line up the mark (A) on the connecting rod and the cap, then install the bearing (B) and the cap (C).
20. Apply new engine oil to the bolt threads and flanges. Tighten the bolts (D) to 20 N-m (2.0 kgf-m, 14 lbf-ft).
21. Mark the connecting rod (A) and the bolt head (B) as shown.
22. Tighten the bolt until the mark on the bolt head lines up with the mark on the connecting rod (turn the bolt 90 °).
NOTE: Remove the connecting rod bolt if you tightened it beyond the specified angle, and go back to step 16 of the procedure. Do not loosen it
back to the specified angle. Repeat step 10 to 22 for the remaining cylinders.