
TL FWD V6-3.5L (2009)
2. Make marks (A) on each roller (B) and the inboard joint (C) to identify the locations of the rollers to the grooves in the inboard joint.
NOTE: Do not engrave or scribe any marks on the rolling surface.
3. Remove the inboard joint on a clean shop towel (D). Be careful not to drop the rollers when separating them from the inboard joint.
4. Make marks (A) on the rollers (B) and the spider (C) to identify the locations of the rollers on the spider, then remove the rollers.
NOTE: Do not engrave or scribe any marks on the rolling surface.
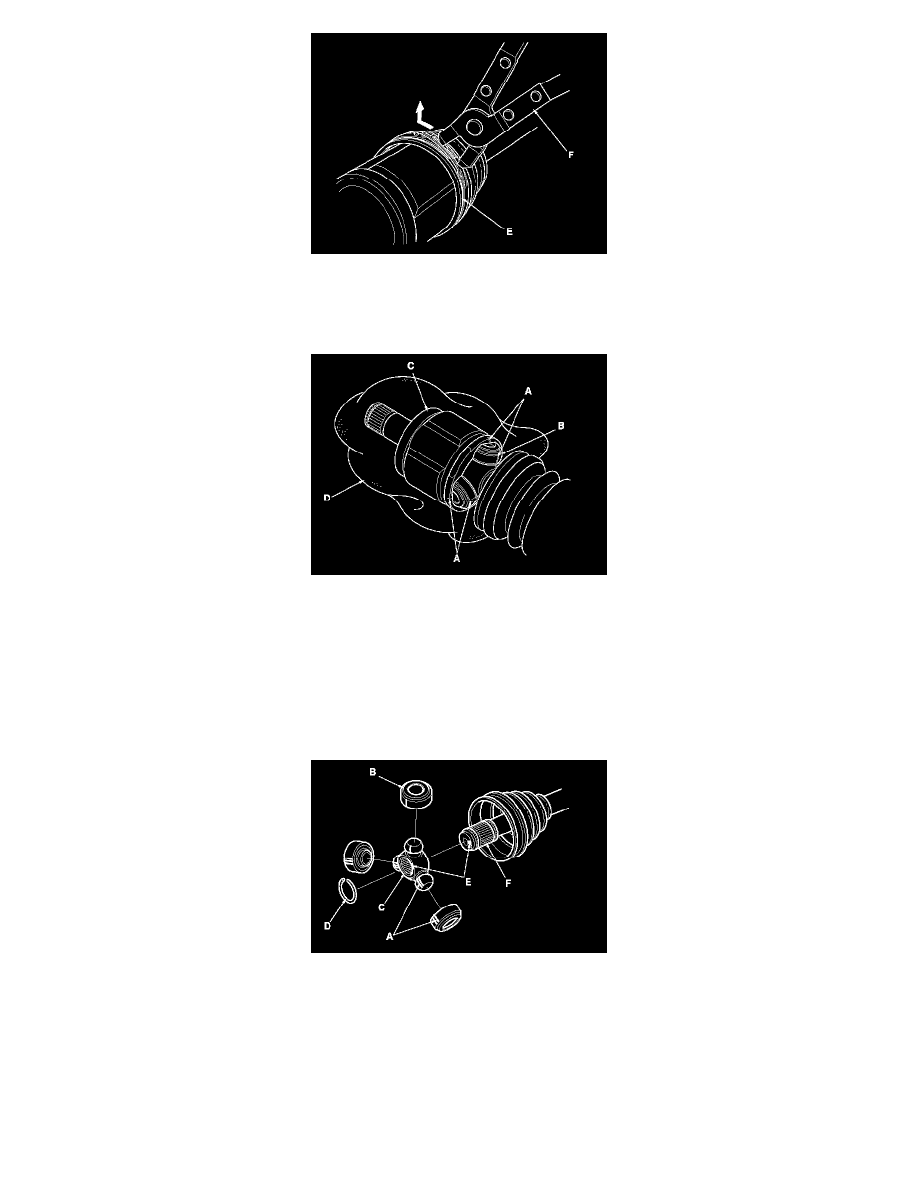
5. Remove the circlip (D).
6. Make marks (E) on the spider and the driveshaft (F) to identify the position of the spider on the shaft.
7. Remove the spider.
NOTE: If necessary, use a commercially available puller.
8. Wrap the splines on the driveshaft with vinyl tape (A) to prevent damaging the boot.
9. Remove the inboard boot. Be careful not to damage the boot.
10. Remove the vinyl tape.