
TSX L4-2.4L (2005)
Console: Overhaul
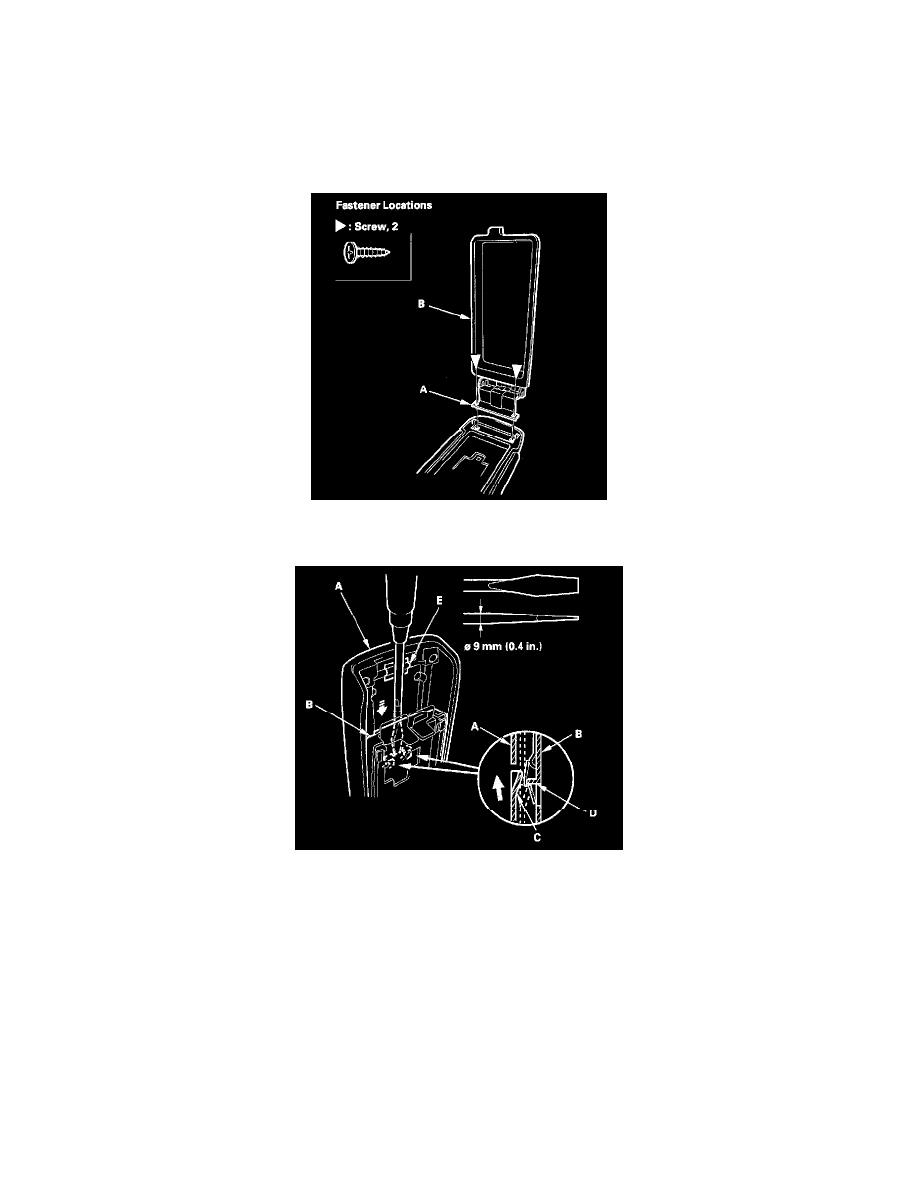
Center Console Armrest Disassembly/Reassembly
NOTE:
-
When prying with a flat-tip screwdriver, wrap it with protective tape to prevent damage.
-
Take care not to scratch armrest.
1. Remove the center console armrest.
2. Remove the screws, then remove the armrest hinge (A) and the console tray (B) as an assembly.
3. Slide the console armrest forward fully.
4. Insert a large flat-tip screwdriver wrapped with protective tape into the center of the gap between the console armrest (A) and the console armrest
base (B), and gently push it straight down until both the inside hooks (C) of the console armrest come off the stop portions (D) of the console base.
NOTE: Apply protective tape (E) to the ridge on the inside of the armrest to prevent scratching.
5. Slightly slide the console armrest forward to get the inside hooks over the stop portions, then remove the flat-tip screwdriver from the gap.