
TSX L4-2.4L (2005)
Trim Panel: Service and Repair
Trim Removal/Installation - Pillar Areas
Trim Removal/Installation - Pillar Areas
Special Tools Required
KTC trim tool set SOJATP2014 *
* Available through the American Honda Tool and Equipment Program.
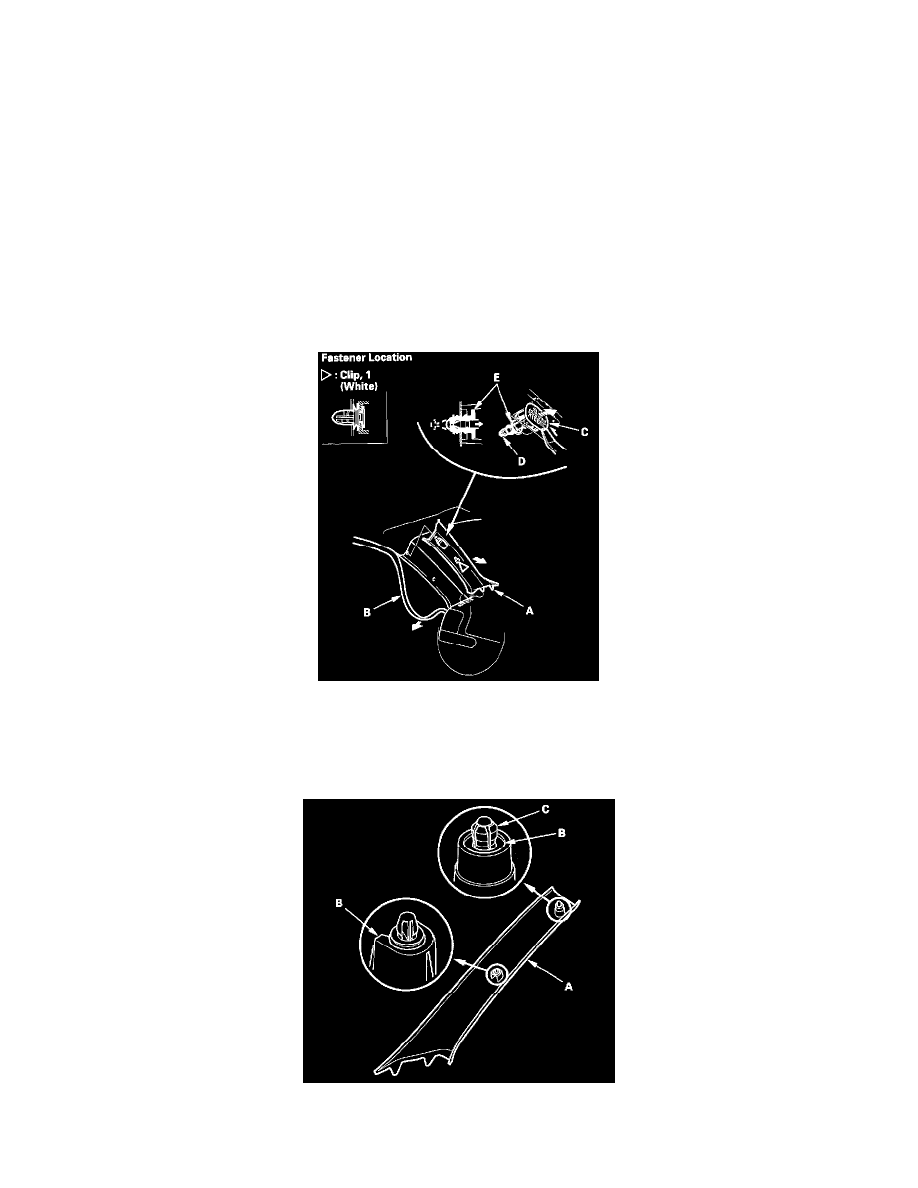
A-pillar
SRS components are located in this area. Review the SRS component locations and the precautions and procedures before performing repairs or service.
NOTE:
-
Put on gloves to protect your hands.
-
Take care not to bend or scratch the trim and panels.
-
Use the appropriate tool from the KTC trim tool set to avoid damage when prying components.
1. Remove the A-pillar trim (A).
1. Pull out the door opening trim (B) as needed.
2. Pry the A-pillar cap (C) out until it is stopped by the hooks (D) in the grommet (E).
3. Pull the trim back by hand to detach the clip, then pull the trim up.
4. Release the hooks on the grommet and pull the cap out. Discard the cap.
2. Install the trim in the reverse order of removal, and note these items:
-
Replace the clip with a new one if it is damaged.
-
Do not reuse the A-pillar cap; always replace it.