
TSX L4-2.4L (2005)
Information Bus: Diagnostic Trouble Code Tests and Associated Procedures
B-CAN System Diagnosis Test Mode 1 and Test Mode 2 (Without the HDS)
Troubleshooting - B-CAN System Diagnosis Test Mode 1 and Test Mode 2 (without the HDS)
Test Mode 1
1. Check the No. 7 (10 A) fuse and No. 21 (7.5 A) fuse in the under-dash fuse/relay box.
Are the fuses OK?
YES - Go to step 2.
NO - Find and repair the cause of the blown fuse.
2. Remove the left kick panel.
3. Turn the ignition switch ON (II).
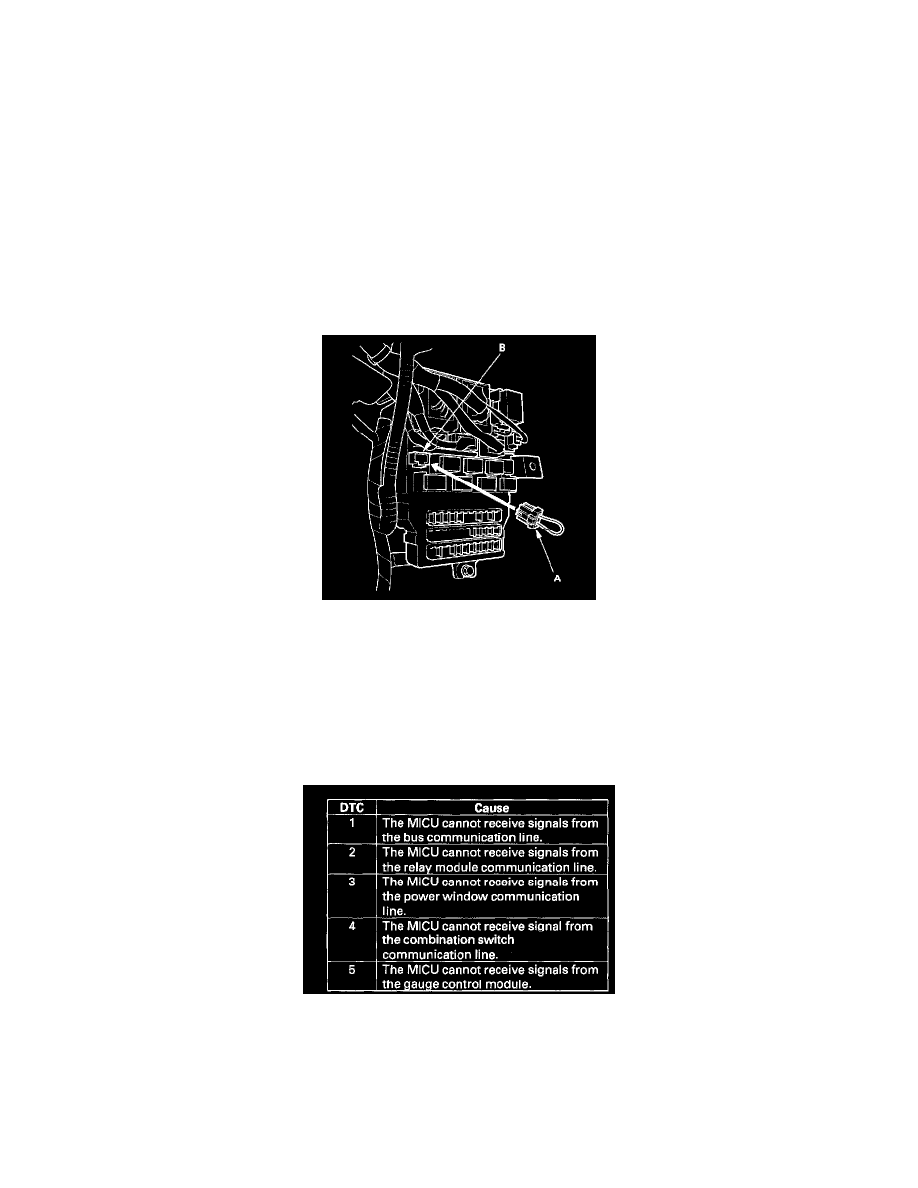
4. Connect the MPCS Service connector (A) to the MCIC socket (B) in the under-dash fuse/relay box.
5. Wait 5 seconds, then watch the ceiling light.
6. If there is a DTC, the ceiling light and ignition switch light will blink, pause, then repeat the DTC as long as the ignition switch ON (II).
Is there a repeating DTC?
YES - Count the blinks, then go to step 7.
NO - Go to step 8.
7. About 1 second after you go into self-diagnosis Mode 1, the ceiling light will indicate the DTC, and repeat it every 3 seconds. If there is more
than one DTC, the system will indicate them in ascending order, beginning from the DTC with the lowest numerical value. Troubleshoot the DTCs
as indicated below:
-
DTC 2, 3, 4 and 5 simultaneously: Check for an open in the BLU wire between multiplex integrated control unit D11 and relay module J7,
BRN/RED wire between multiplex integrated control unit J4 and door multiplex control unit No. 16, LT GRN wire between multiplex
integrated control unit X 27 and combination switch control unit No. 4, BRN/YEL wire between multiplex integrated control unit N28 and
gauge B25. If the wire is OK, substitute a known-good under-dash fuse/relay box (multiplex integrated control unit), under-hood fuse/relay