TSX L4-2.4L (2005)

Control Arm: Service and Repair
Upper Arm
Upper Arm Removal/Installation
Special Tools Required
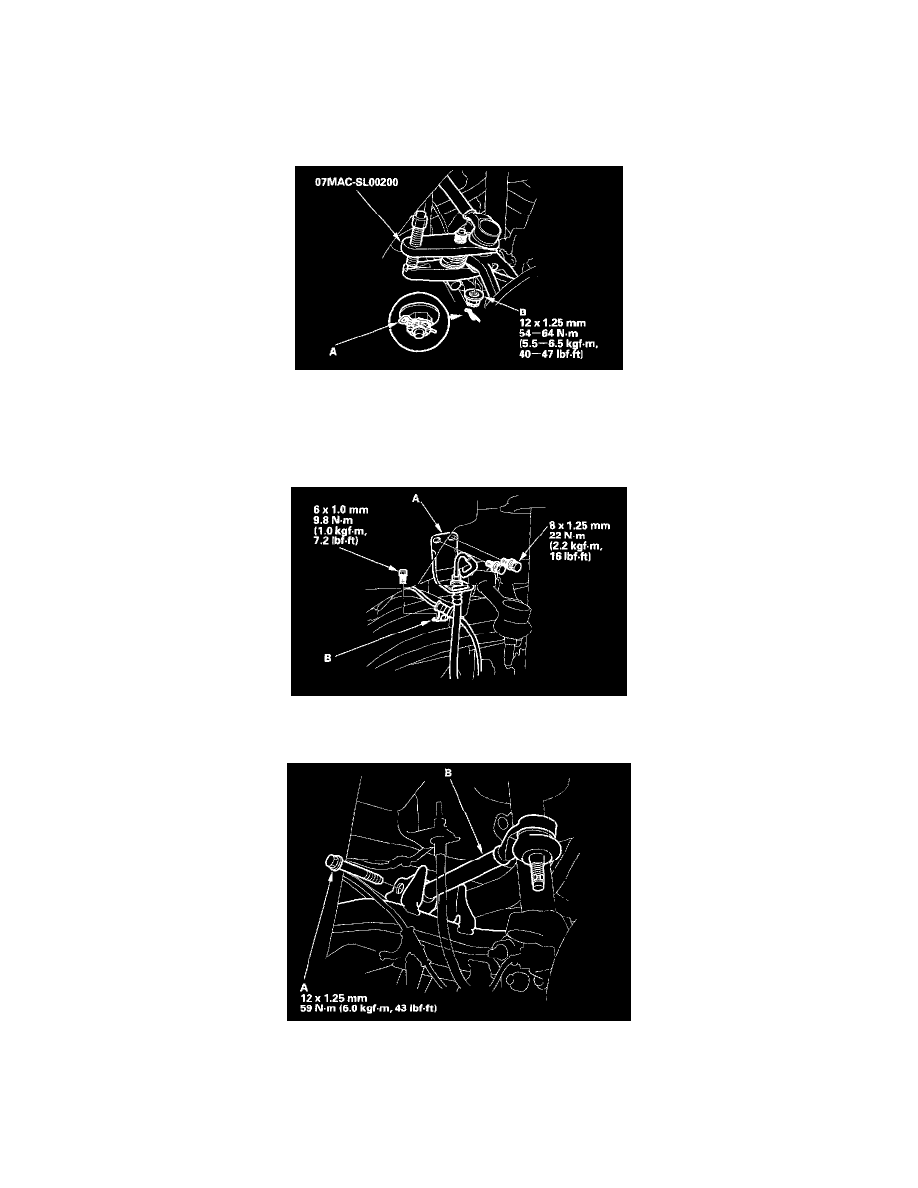
Ball joint remover, 28 mm 07MAC-SL00200
1. Remove the lock pin (A) from the upper arm ball joint, and loosen the nut (B).
NOTE: During installation, install the new lock pin after tightening the nut as shown.
2. Disconnect the upper arm ball joint from the knuckle using the special tool.
3. Remove the brake hose mounting bracket (A). Do not disconnect the brake line.
4. Remove the wheel sensor harness mounting bracket (B).
5. Remove the flange bolt (A), and remove the upper arm (B).
6. Install the upper arm in the reverse order of removal, and note these items;
^
Be careful not to damage the ball joint boot when connecting the upper arm to the knuckle.
^
Tighten all mounting hardware to the specified torque values.
^
Tighten the castle nut to the lower torque specification, then tighten it only far enough to align the slot with the hole in the stud. Do not align
the castle nut by loosening it.
