
ZDX V6-3.7L (2010)
Seat Cover: Service and Repair
Front Seat-Back Cover Replacement
Front Seat-Back Cover Replacement
Special Tools Required
-
KTC Trim Tool Set SOJATP2014
-
Trim Pad Remover Snap-on A 177A or equivalent, commercially available
*Available through the Acura Tool and Equipment Program; call 888-424-6857
SRS components are located in this area. Review the SRS component locations See: Restraint Systems/Air Bag Systems/Locations and the precautions
and procedures See: Interior Moulding / Trim/Dashboard / Instrument Panel/Air Bag(s) Arming and Disarming/Service and Repair before doing repairs
or service.
Do the OPDS sensor initialization See: Restraint Systems/Air Bag Systems/Testing and Inspection/Programming and Relearning/ODS Unit Initialization
after front passenger's seat-back cover replacement.
NOTE:
-
Put on gloves to protect your hands.
-
Take care not to tear or damage the seat covers.
-
Passenger's seat: Do not touch the OPDS sensor in the seat-back cover/pad, and keep it away from oil. Oil can corrode the sensor causing it to fail.
-
Use the appropriate tool from the KTC trim tool set to avoid damage when removing components.
-
The driver's seat is shown; the passenger's seat is similar.
1. Remove the front seat See: Service and Repair/Front Seat Removal/Installation.
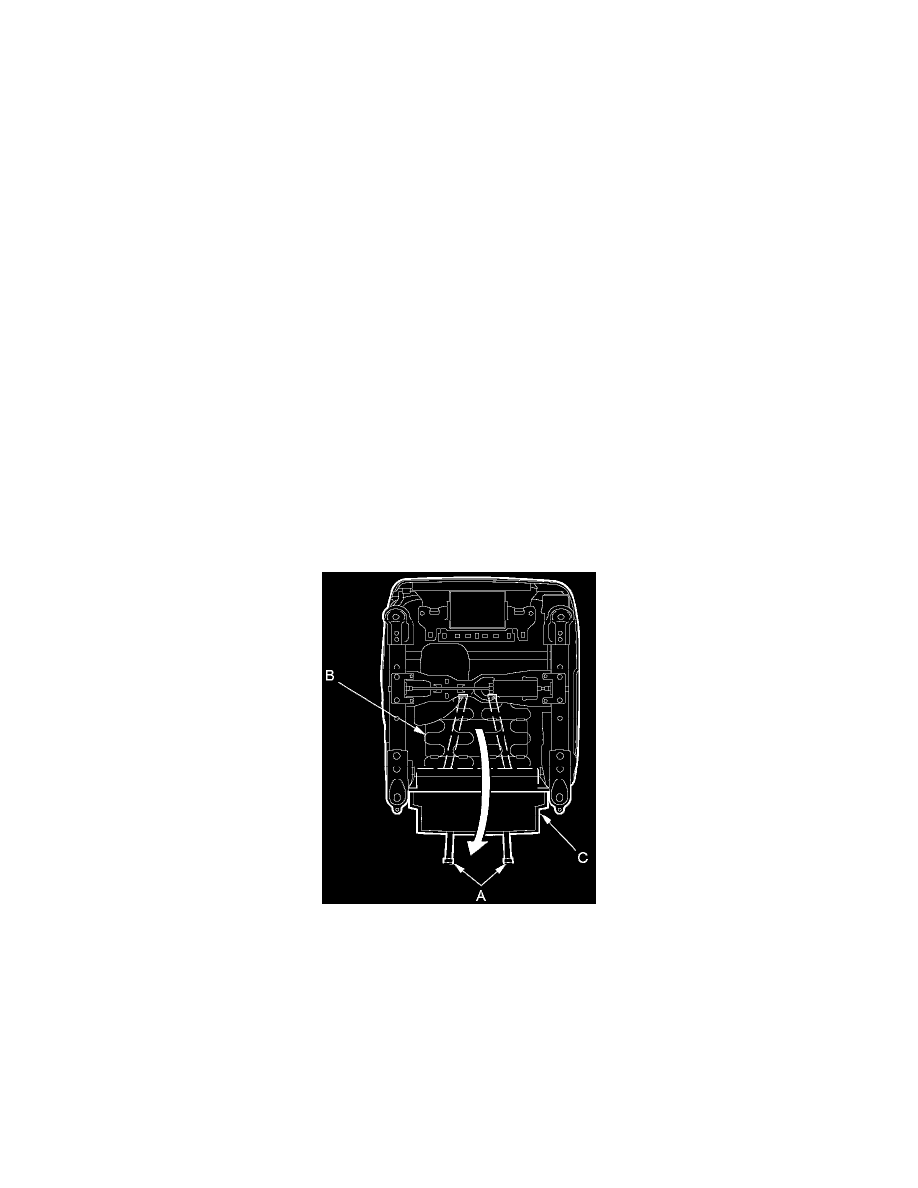
2. From under the seat cushion, release the hooks on the elastic straps (A) from the seat cushion frame springs (B), then pull out the back panel
undercover (C).
3. Insert a trim pad remover between the bottom of the back panel (A) and the seat frame until it squarely engages one of the clips. Gently pry on the
clip until it detaches from the seat frame. Repeat for the other clip. Gently pull the back panel back to release the hooks (B), then pull the panel
down to release the hooks (C).
NOTE:
-
The clips usually break during removal. Always replace the clips with new ones.
-
Detach the clips and the hooks in numbered sequence as shown.
-
Take care not damage the seat-back panel or the clip mounting pads.