
ZDX V6-3.7L (2010)
2. Remove the two screws, and the seat heater switch from the trim.
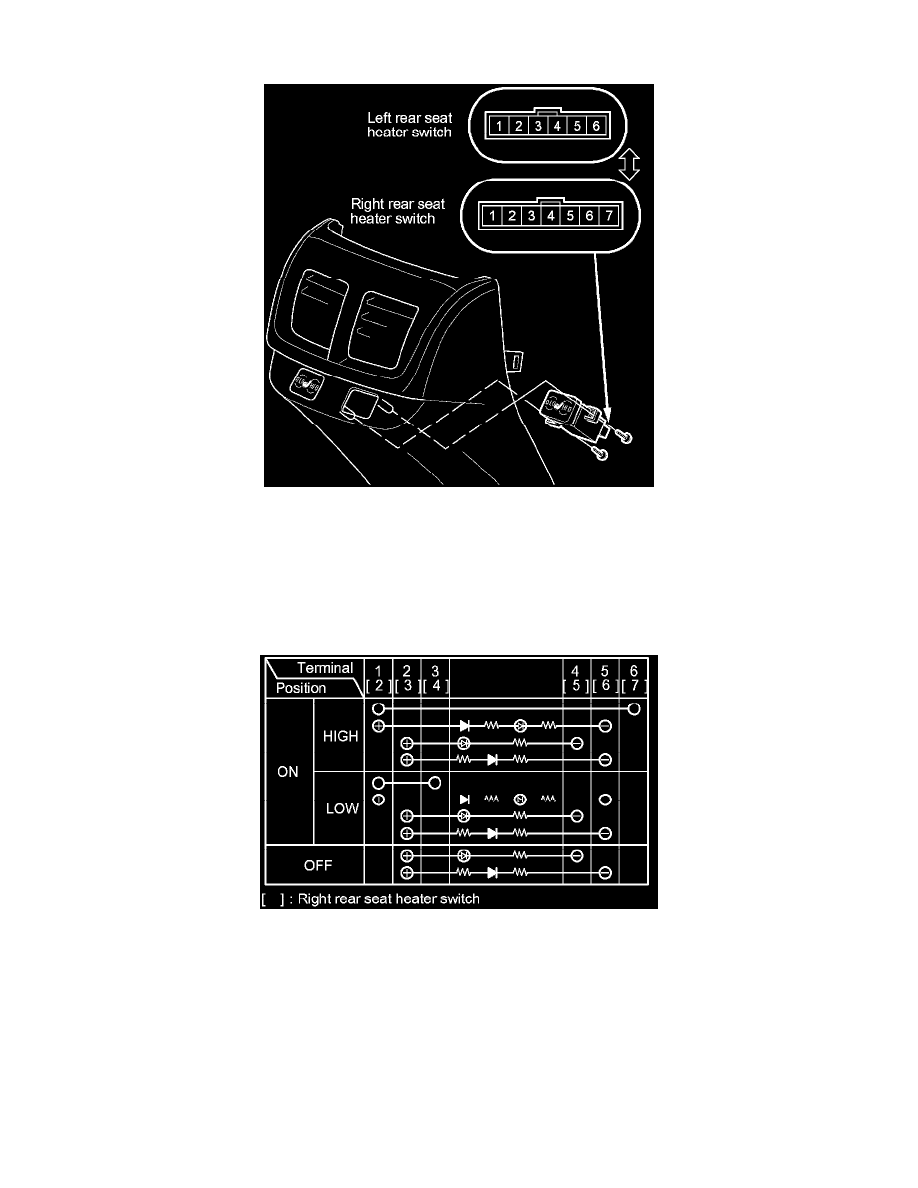
3. Check for continuity between the terminals in each switch position according to the table.
NOTE:
-
Make sure the correct test lead (+ or -) is placed on the terminal.
-
When check for continuity across the diode, use the diode setting () on the digital volt/ohm meter to check the diode bias.
-
Be careful of the diode's current flow direction (Diodes allow current to flow in one direction (forward), but not in the opposite direction
(reverse)).
4. If the continuity is not as specified, replace the switch.