
ZDX V6-3.7L (2010)
Stabilizer Link: Service and Repair
Rear Stabilizer Link Removal/Installation
Rear Stabilizer Link Removal/Installation
1. Raise and support the vehicle See: Wheels and Tires/Vehicle Lifting/Service and Repair.
2. Remove the rear wheel.
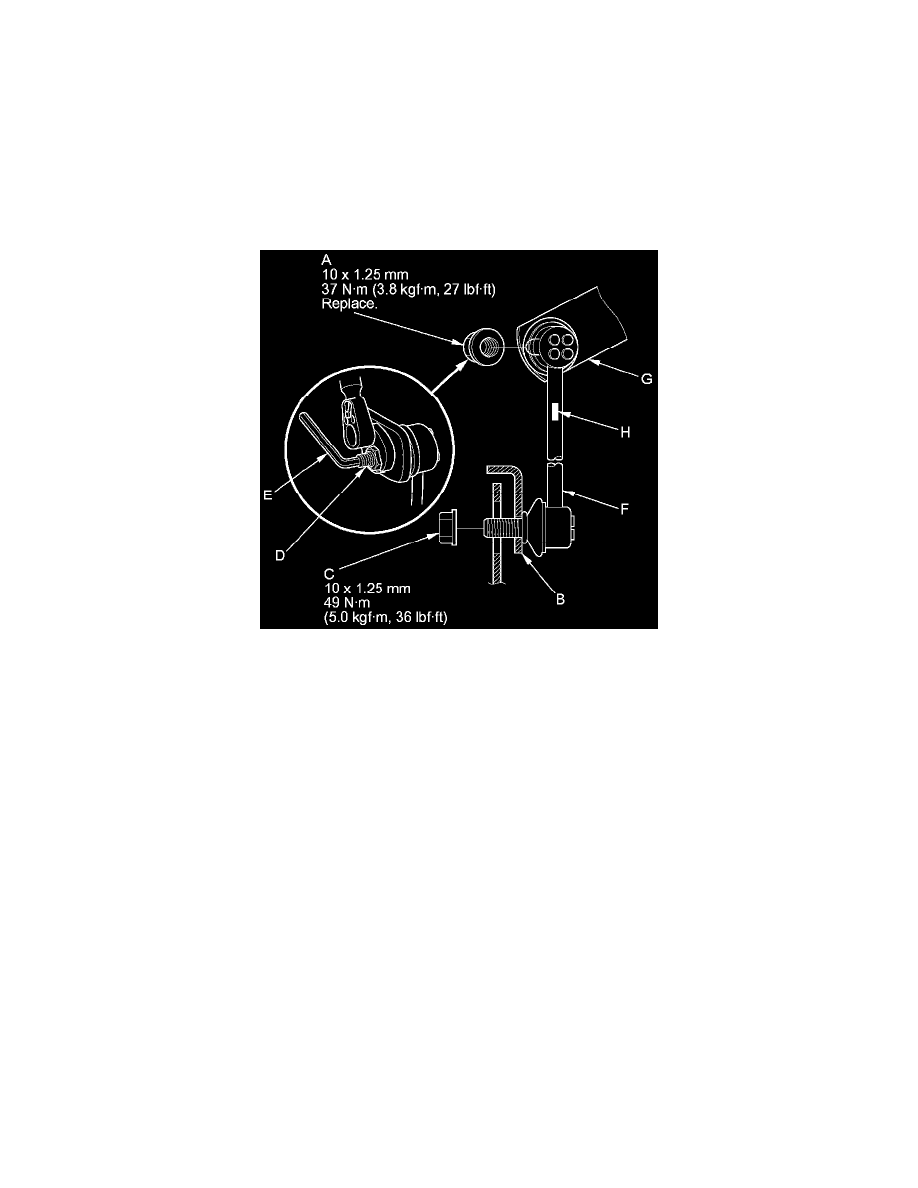
3. Remove the self-locking nut (A) and the flange nut (C) while holding the respective joint pin (D) with a hex wrench (E), then remove the stabilizer
link (F).
4. Install the stabilizer link on the stabilizer bar (G) and lower arm B with the joint pins set at the center of their range of movement.
NOTE:
-
The stabilizer link has a paint mark (H). The paint mark indicates the difference between the left and right stabilizer links.
-
Install the end of the stabilizer link with the paint mark in the upper position.
5. Install a new self-locking nut and the flange nut, and tighten them to the specified torque while holding the respective joint pin with a hex wrench.
6. Clean the mating surfaces of the brake disc/drum and the inside of the wheel, then install the rear wheel.
7. Test-drive the vehicle.
8. After 5 minutes of driving, tighten the self-locking nut again to the specified torque.