
ZDX V6-3.7L (2010)
Subframe: Service and Repair
Subframe Replacement
Special Tools Required
-
Subframe Alignment Pin 070AG-SJAA10S
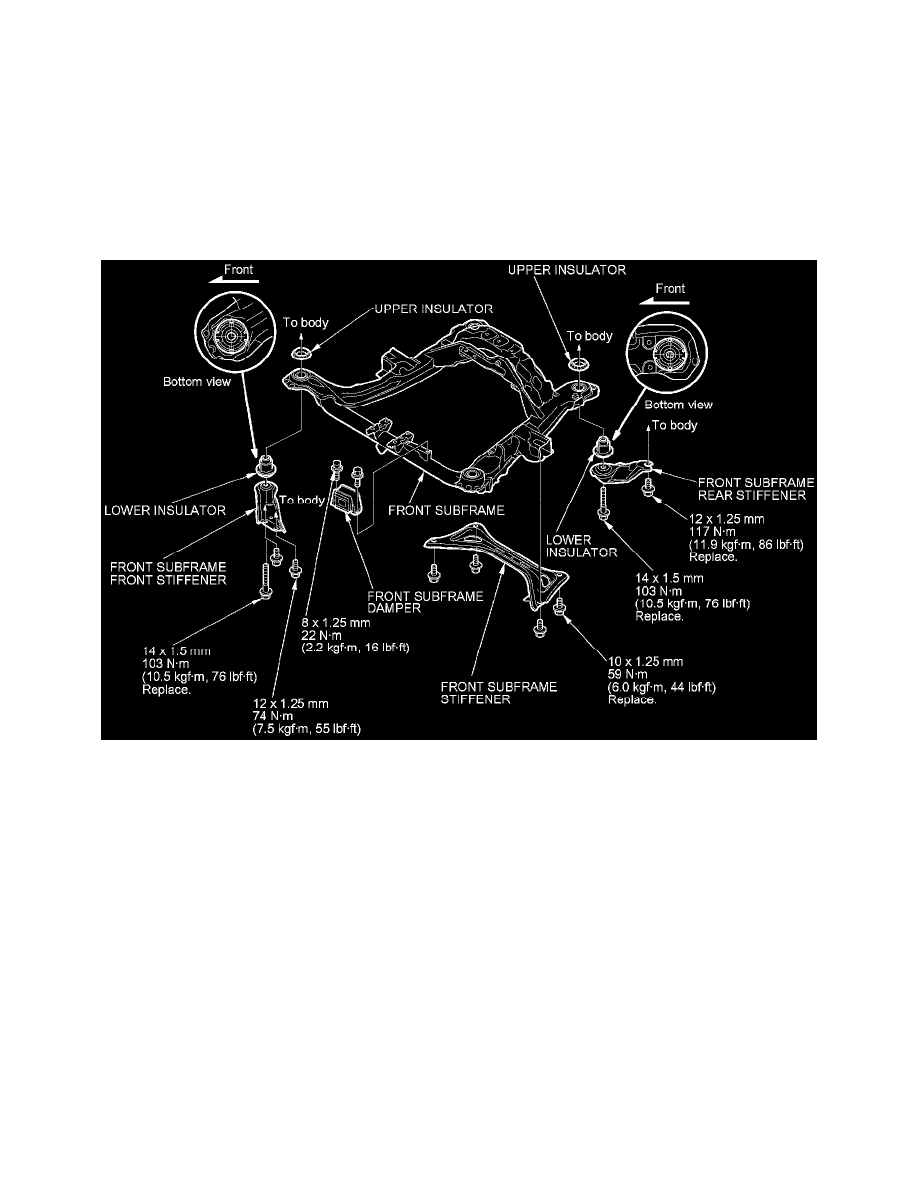
Front Subframe Torque
After removing the subframe mounting bolts, the front subframe stiffener mounting bolts, the front subframe front stiffener mounting bolts, and the front
subframe rear stiffener mounting bolts, be sure to replace them with new ones.
Front Subframe Alignment
NOTE: Align the front subframe with the subframe alignment pin.
1. Align the front subframe (A) in the following sequence.
1. Lift the front subframe up to the body, and loosely install the new subframe mounting bolts (B), the front stiffener mounting bolts (C), the new
rear stiffener mounting bolts (D) and the stiffeners (E).
2. Insert the subframe alignment pin (F) through the positioning slot (G) on the right rear stiffener, through the positioning hole (H) on the
subframe, and into the positioning hole (I) on the body, then loosely tighten the subframe right rear mounting bolt.
3. Insert the subframe alignment pin through the positioning slot on the left rear stiffener, through the positioning hole on the subframe, and into
the positioning hole on the body, then loosely tighten the subframe left rear mounting bolt.
4. Tighten the subframe mounting bolts to the specified torque values starting with the right rear subframe mounting bolt. Use the subframe
alignment pin when tightening the rear side subframe mounting bolts.
NOTE: Tighten the bolts in the sequence shown.
5. Check all of the subframe mounting bolts, and retighten if necessary.