
ZDX V6-3.7L (2010)
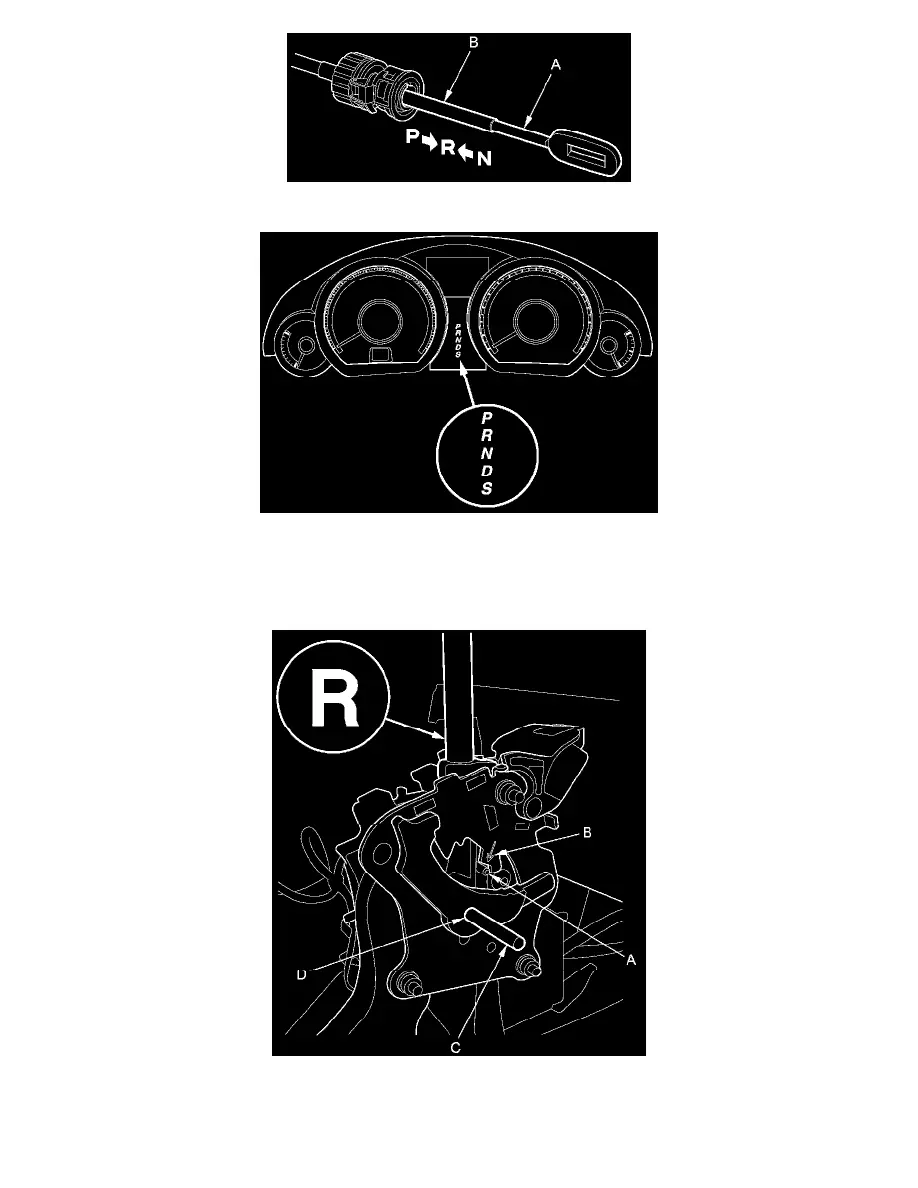
5. Turn the ignition switch to ON (II), or press the engine start/stop button to select the ON mode, and check that the R position indicator comes on.
6. Turn the ignition switch to LOCK (0), or press the engine start/stop button to select the OFF mode.
7. Place the shift lever in R; the lock pin (A) must be in the position of the arrow marked (B), then insert a 6.0mm(0.236 in) pin (C) into the
positioning hole (D) on the shift lever positioning guide, and into the positioning hole on the shift lever bracket. Use only a 6.0 mm (0.236 in) pin
with no burrs.
8. Align the shift cable slot (A) between the socket holder (B) and the socket holder retainer (C) with the opening (D) in the shift cable bracket (E),
then slide the holder into the bracket while installing the shift cable end (F) over the mounting stud (G) by aligning its square hole with the square
fitting (H) at the bottom of the stud. Do not install the shift cable by holding the shift cable guide (I).