
ZDX V6-3.7L (2010)
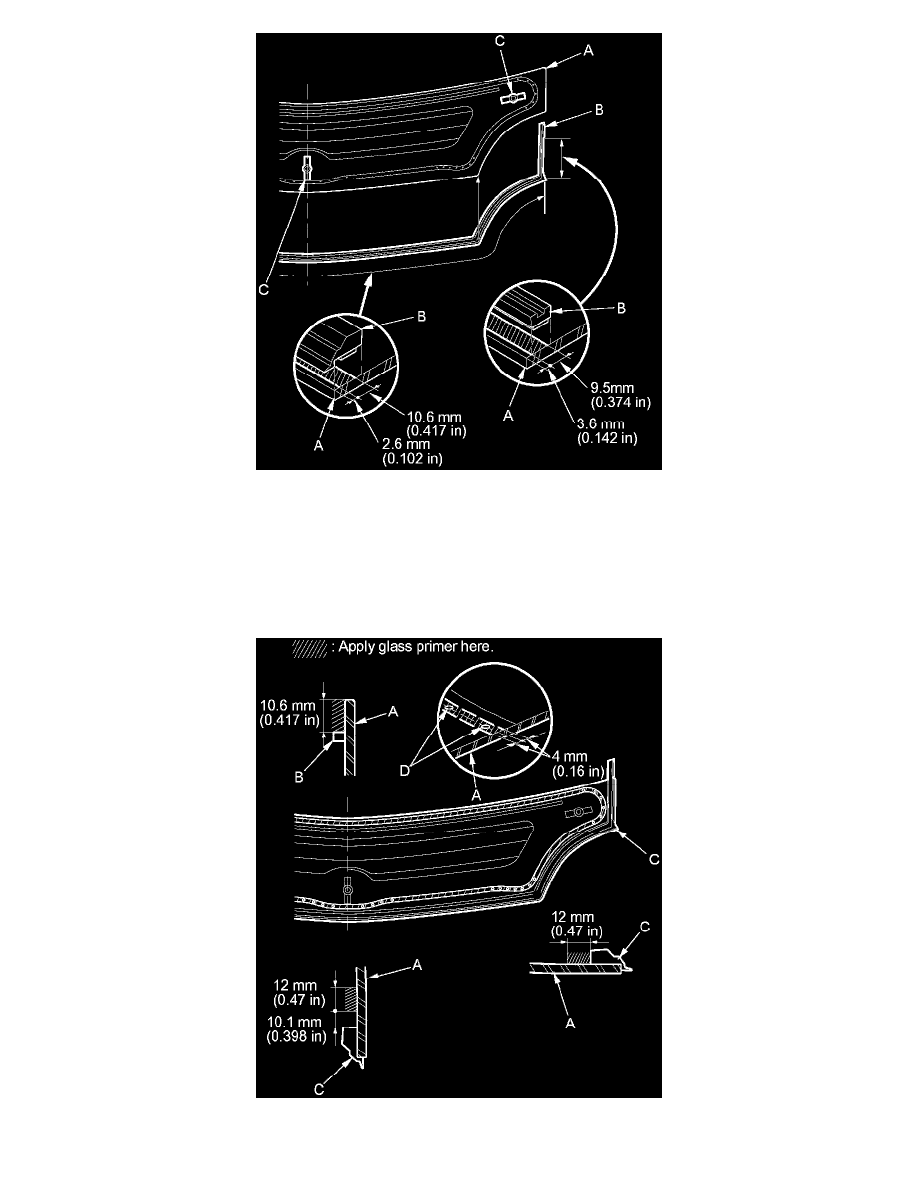
11. Apply a light coat of glass primer to the lower rear window (A) along the edge of the rubber dam (B) and the glass molding (C) as shown, then
lightly wipe it off with gauze or cheesecloth:
-
Apply the glass primer to the corner areas of the lower rear window using the printed dots (D) on the lower rear window as a guide.
-
Do not apply body primer to the lower rear window, and do not mix up the body and the glass primer applicators.
-
Never touch the primed surfaces with your hands. If you do, the adhesive may not bond to the lower rear window properly, causing a leak after
the rear window is installed.
-
Keep water, dust, and abrasive materials away from the primed surfaces.
12. Carefully apply a light coat of body primer to any exposed paint or metal around the flange where the new adhesive will be applied. Let the body
primer dry for at least 10 minutes: