
2. Head-welding.
- Make
- Alfa Romeo
- Model
- 155 Factory Service Manual
- Year
- 1992–1998
- Section
- Welding procedures › 2. Head-welding.
Bodywork2. Head-welding.
Position the blowpipe at right angles to the sheet and fill the hole. At each interruption in the welding process an oxide coating is formed on the surface which causes blistering. If this occurs remove the oxide with a brush.
Ensure that welding of the upper and lower sheets is perfect.
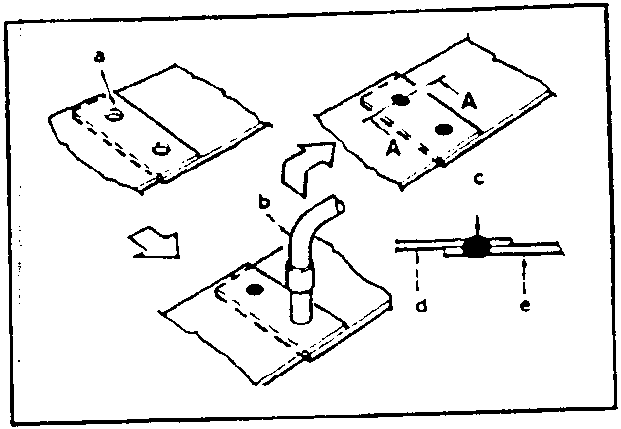
- 5 or 6 mm. hole
- Blowpipe
- Welding point
- Upper sheet
- Lower sheet
2. Head-welding.
- Tack the two surfaces, by welding intermittently, in order to align correctly and prevent buckling. Fill the empty spaces with small welding seams.
NOTE: The correct gap is approx. 1 mm.
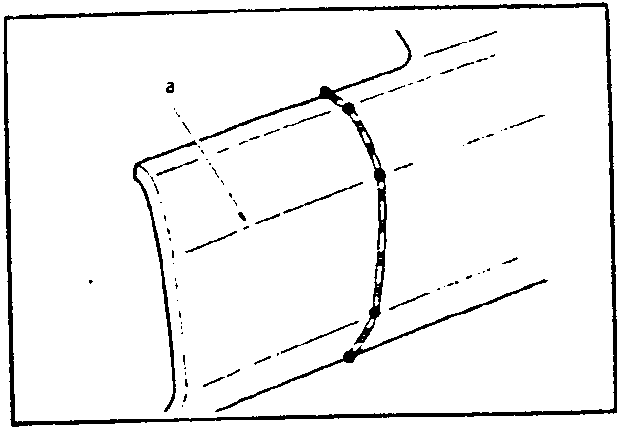
a. Bending line
NOTE: If the welding is intermittent, deformation is less. If welding is continuous, deformation is greater.
- Do not weld a continuous seam as buckling may occur. In order to reduce buckling proceed as shown in the diagram.
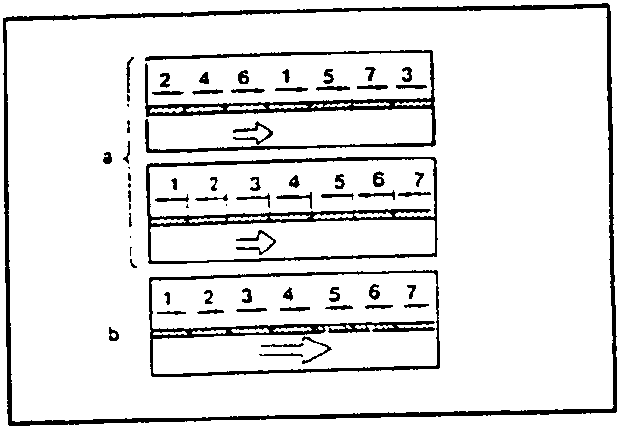
a. Correct
b. Incorrect
- Before filling the empty spaces flush the welding seams with a sander following the shape of the panel. If the seams are not flush, buckling can occur.
Parts & tools for this job For 1992 Alfa Romeo 155
- TOOLTorque wrenchSearch: 3/8 inch torque wrench
- TOOLSocket setSearch: socket set metric
- BOOKHaynes manualSearch: Haynes manual Alfa Romeo 155
Links open Amazon search results in a new tab. As an Amazon Associate I earn from qualifying purchases.