A2
| Removing and installing front door and door subframe |
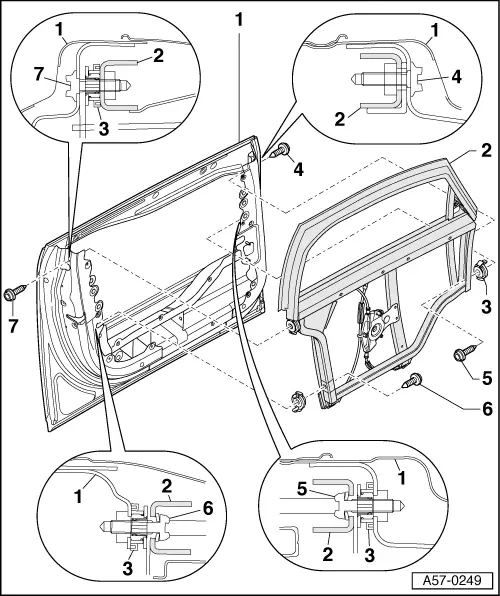
| 1 - | Front door |
| q | Seal on front door/mounting panel is not shown in illustration for reasons of clarity. |
| q | Seal between front door and mounting panel (sealing strip made of PU foam) → Chapter |
| q | Seal for gap between metal panels in area of hinge/side impact bar (butyl strip -AKL 450 005 05-) → Chapter |
| q | Sealing openings in side impact bar with plugs and seal → Chapter |
| 2 - | Door subframe |
| q | Seal on opening for exterior mirror wiring in door subframe is not shown in illustration for reasons of clarity. |
| q | Seal on opening for exterior mirror wiring in door subframe (butyl strip -AKL 450 005 05-) → Chapter |
 Note
Note| Before removing, mark the position of the subframe on the door using a fine felt-tip pen or similar. |
| q | Removing: |
| – | Remove mounting panel → Item. |
| – | Detach wires from door subframe and unclip. |
| – | Remove door seal. |
| – | Unscrew bolts → Item, → Item, → Item and → Item and lift out door subframe. |
| q | Installing: |
| – | Before fitting door subframe, make sure that adjusting elements are completely screwed in. |
| – | The adjusting elements may have to be screwed in by hand. |
| – | Fit subframe in door from above. |
| – | Screw bolts → Item and → Item in loosely. |
| – | Install door seal. |
| – | Close door. |
| – | Align subframe in door opening. |
| – | Screw lower bolts → Item and → Item in loosely. |
| – | Open door. |
| – | Check panel gaps → Chapter. |
| – | You may have to adjust the position of the subframe. |
| – | If panel gaps are OK, tighten bolts in the following sequence: → Item, → Item, → Item and → Item (tightening torque: 30 Nm). |
 Caution
|
| – | Seal opening for exterior mirror wiring with a butyl strip -AKL 450 005 05- from the kit “Fasteners and seals for mounting panel” → Parts Catalogue. |
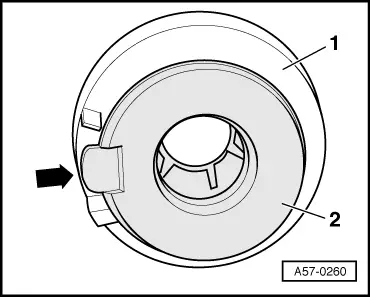
| 3 - | Adjusting element |
| q | When bolts are tightened, adjusting element is automatically set to correct length. |
Caution
|
| 4 - | Torx bolt |
| q | 30 Nm |
| q | When installing, observe tightening sequence for securing bolts. |
| 5 - | Torx bolt |
| q | 30 Nm |
| 6 - | Torx bolt |
| q | 30 Nm |
| 7 - | Torx bolt |
| q | 30 Nm |