| –
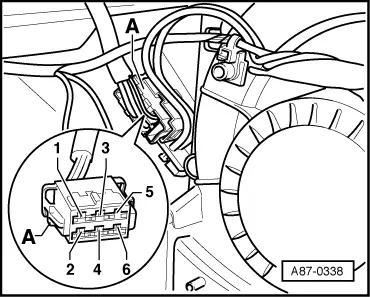
| Unplug connector -A- from the fresh-air blower -V2-. |
| –
| Connect the multimeter leads -VAS 5051/7- to connector -A- |
| –
| Set the vehicle diagnostic, testing and information system -VAS 5051- to “measuring instrument: voltage measurement” mode. |
| –
| Switch on the ignition. |
| –
| Set the operating and display unit for air conditioner/Climatronic -E87- to “Auto” mode. |
| –
| Change the fresh-air blower speed by pressing the “+” and “-” speed control buttons on the operating and display unit for air conditioner/Climatronic -E87-. |
| When the operating and display unit for air conditioner/Climatronic -E87- setting is adjusted, the voltage displayed on the vehicle diagnostic, testing and information system -VAS 5051- changes |

Note | The target fresh-air blower speed appears as a bar chart on the display of the operating and display unit for air conditioner/Climatronic -E87-. |
| –
| In order to ensure that the fresh-air blower -V2- starts up reliably, the first bar corresponds to approx. 3.5 to 4.5 V. |
| –
| The voltage is increased by approx. 0.7 V with each additional bar. |
|
|

|