
A2
| Removing and installing starter and main catalytic converter |

| Special tools and workshop equipment required |
| t | Hose clip pliers -V.A.G 1921- |
| t | Chain-type pipe cutter -VAS 6254- |
| t | Locating pins -T10096- |
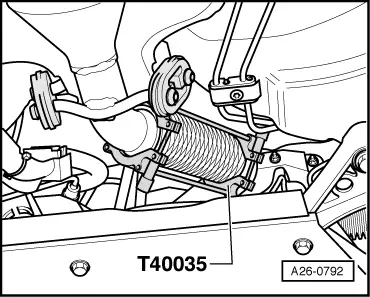
| t | Setting tool -T40035- |
|
|
|
|
|
|
|
|
|

|
|
|
 Note
Note
|
|
Note |
|
|
|
|
|
|
|
|
|
Note
|
|
|
|
|
|
|
|
| Component | Nm | |||||
| Starter catalytic converter to turbocharger | 23 1)2) | |||||
| Bracket for starter catalytic converter to | Starter catalytic converter | 23 | ||||
| Cylinder block | 23 | |||||
| Clamp | 23 | |||||
| Drive shaft heat shield to gearbox | 23 | |||||
| ||||||