audi Workshop Repair Guides

Audi Workshop Service and Repair Manuals

Removing and installing cylinder head > < Cylinder head - exploded view
Removing and installing cylinder head cover
Special tools and workshop equipment required
   
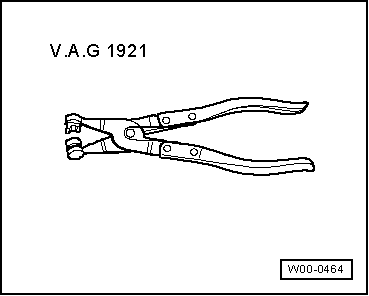
t  Hose clip pliers -V.A.G 1921-
t  Sealant → Parts catalogue
  W00-0464
Removing
–  Remove bonnet → Chapter.
–  If fitted, unclip bracket -1-.
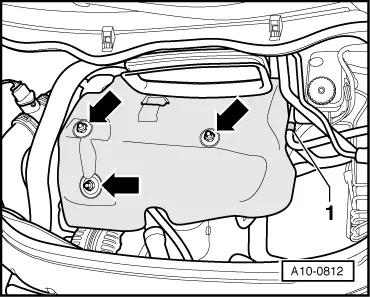
–  Take off engine cover panel -arrows-.
–  Remove noise insulation beneath cover.
  A10-0812
–  Lever off caps -3 and 4- on two-piece windscreen wiper arm with a screwdriver.
–  Slacken nuts on two-piece windscreen wiper arm a few turns.
–  Release arms -1 and 2- one after the other by tilting them slightly on the wiper shafts.
–  Remove nuts completely and take off two-piece windscreen wiper arm.
  Note
Use puller (commercially available) to remove wiper arm if necessary.
  A92-10019
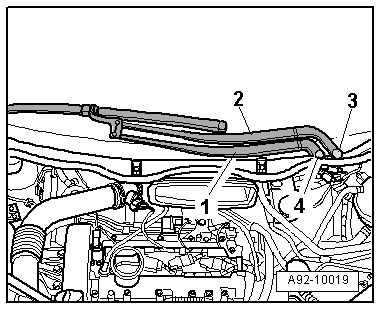
–  Disconnect washer fluid hose -3-.
–  If fitted, unplug electrical connectors -4 and 5- for heated washer jets.
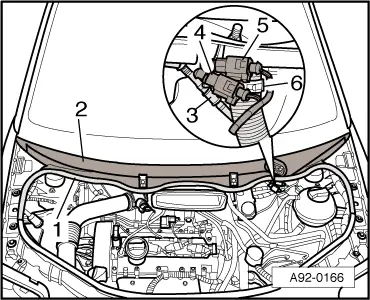
–  Open hose clip -6- using hose clip pliers -V.A.G 1921- and detach water drain hose from cowl panel grille.
–  Pull off rubber seal -1- on cowl panel grille.
–  Disconnect cowl panel grille -2-.
  A92-0166
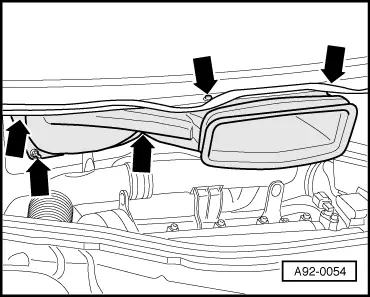
–  Unscrew nuts and bolts -arrows-.
–  Pull fresh air duct forwards and remove by turning it to right side of vehicle.
  A92-0054
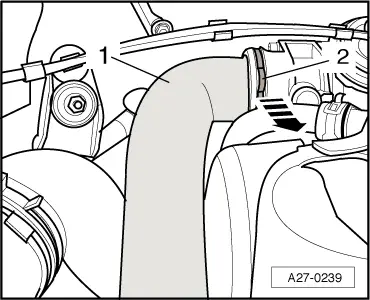
–  Detach air hose -1- from intake manifold; to do this, release retaining clip -2--arrow-, if fitted.
–  Move air hose to front.
  A27-0239
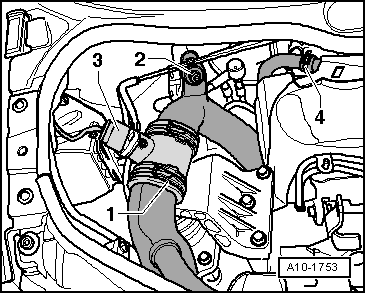
–  Disconnect crankcase breather hose -4- at cylinder head cover.
  Note
Disregard -items 1 ... 3-.
  A10-1753
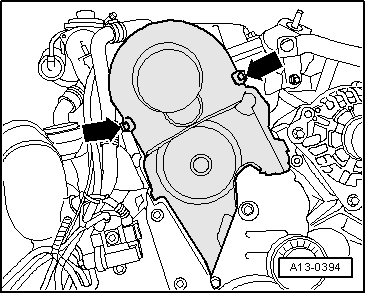
–  Remove toothed belt cover (top section) -arrows-.
  A13-0394
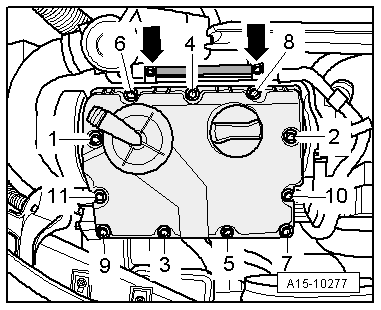
–  Remove cylinder head cover bolts in the sequence -11 ... 1-.
  Note
Disregard -arrows-.
–  Detach bracket with fuel pipes.
–  Remove cylinder head cover.
Installing
Installation is carried out in the reverse order; note the following:
  Note
t  Renew gasket for cylinder head cover if damaged.
t  Renew cylinder head cover bolts if gasket is damaged.
t  Hose connections and hoses for charge air system must be free of oil and grease before assembly. Do NOT use lubricant.
  A15-10277
–  Apply one drop of sealant (Ø approx. 5 mm) to each sealing point at front bearing cap/cylinder head -arrows-; for sealant refer to → Parts catalogue.
  A15-0520
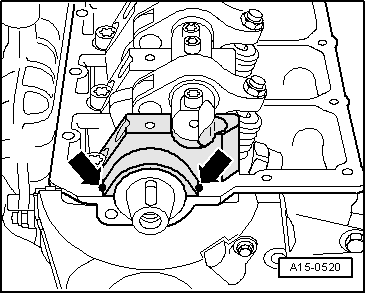
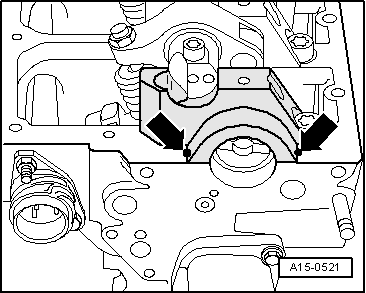
–  Apply one drop of sealant (Ø approx. 5 mm) to each sealing point at rear bearing cap/cylinder head -arrows-; for sealant refer to → Parts catalogue.
  A15-0521
–  Tighten bolts for cylinder head cover to final torque in the sequence -1 ... 11-.
  Note
Disregard -arrows-.
–  Install air pipes/hoses with plug-in connectors → Chapter.
Tightening torques
  A15-10277
ComponentNm
Cylinder head cover to cylinder head10
Engine cover panel to bracket5.5


Removing and installing cylinder head > < Cylinder head - exploded view