audi Workshop Repair Guides

Audi Workshop Service and Repair Manuals

Tightening torques > < Installing
Nut securing drive shaft
  Note!
   
t  
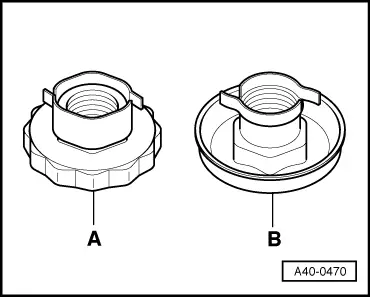
Replace the hexagon socket nut -B- (pressed-steel version) with a 12-point nut -A- on both sides of the vehicle. Do not install the pressed-steel type hexagon socket nut.
t  Degrease thread on outer joint (stub axle) before installing.
–  Always install a new 12-point nut.
Do not apply grease to thread on drive shaft.
Tightening torque → Item
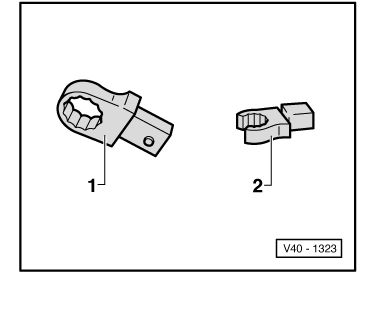
–  Use socket (36 mm) -T10125-
Right drive shaft
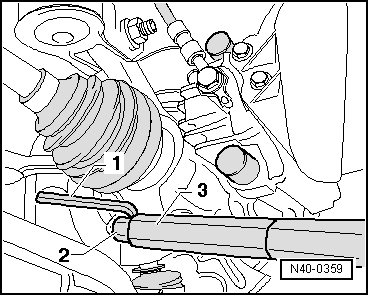
–  If fitted, attach guard plate to pendulum support.
–  If fitted, attach guard plate above drive shaft to engine.
Both sides (continued):
  A40-0470
–  Install new self-locking nut on swivel joint, counterholding with Torx key T40.
1 - Torx key T40
2 - Ring spanner insert or slotted ring spanner insert → Anchor, Fig. V40-1323
3 - Torque wrench -V.A.G 1331-
  N40-0359
–  Ring spanner inserts:
1 - Ring spanner insert (commercial type, 16 mm)
2 - Slotted ring spanner insert (commercial type, 16 mm)
  Note!
Ensure rubber boot on swivel joint is not damaged or twisted.
Remaining installation steps are carried out in reverse sequence.
–  Fit and secure wheel → Chapter.
  V40-1323

Tightening torques > < Installing