audi Workshop Repair Guides

Audi Workshop Service and Repair Manuals

Installing > < Removing and installing drive shafts (vehicles with forged-steel wishbone)
Removing
Removing
–  Lift vehicle far enough to take weight off front wheels.
Vehicles with hexagon socket nut (pressed-steel version) for drive shaft
–  Remove hexagon socket nut from drive shaft with 19 mm hexagon key, e.g. Hazet No. 985.
–  When re-installing, replace pressed-steel hexagon socket nut with 12-point nut on both sides.
Vehicles with 12-point nut
–  Remove 12-point nut from drive shaft with 36 mm socket -T10125-.
All vehicles (continued):
–  Remove wheel.
–  Remove noise insulation.
Right drive shaft (vehicles with petrol engine)
–  If fitted, detach guard plate from pendulum support.
–  If fitted, detach guard plate above drive shaft from engine.
Both sides (continued):
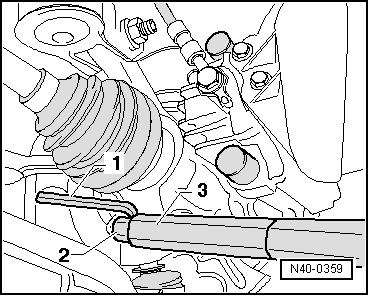
–  Unbolt drive shaft from flange shaft on gearbox.
   
–  Unscrew nut from swivel joint; if necessary counterhold with T40 Torx key.
1 - Torx key T40
2 - Ring spanner insert or slotted ring spanner insert → Anchor, Fig. V40-1323
3 - Torque wrench -V.A.G 1331-
  N40-0359
–  Apply ball joint puller -3287 A--1- as shown in the illustration and press out swivel joint.
  Note!
Take care not to damage rubber boot when inserting ball joint puller.
  A40-0334
–  Press out drive shaft.
  Note!
Ensure sufficient clearance when pressing out drive shaft.
–  Pivot suspension strut outwards and support in position.
–  Take out drive shaft.
  N40-0056

Installing > < Removing and installing drive shafts (vehicles with forged-steel wishbone)