
A2
| Dismantling and assembling drive shaft |
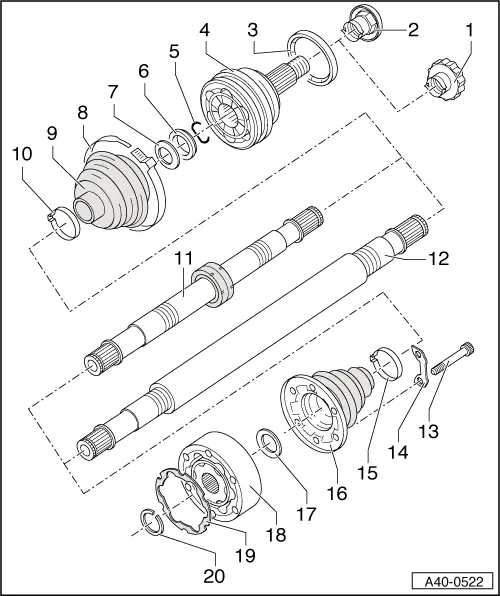
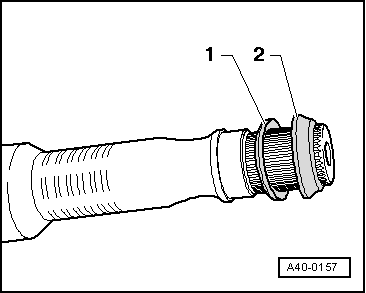
| 1 - | 12-point nut (self-locking) |
| q | Tightening torque → Item |
| q | Always renew if removed |
| q | Colour: silver |
| q | Remove any corrosion on thread of outer joint before fitting nut. |
| q | Tightening: |
| – | Degrease thread on stub axle. |
| – | Install and tighten new 12-point nut using socket -T10125-. |
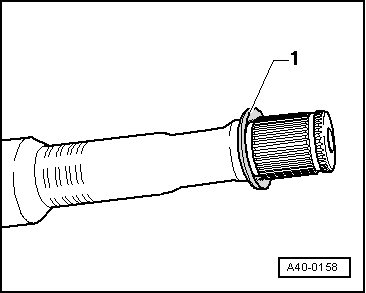
| 2 - | Self-locking hexagon socket nut (pressed steel) |
| q | Pressed-steel hexagon socket nuts are installed on vehicles up to chassis number 8Z-2-015 078. Replace pressed-steel nuts on both sides of vehicle with 12-point nuts → Item. |
| q | Pressed-steel hexagon socket nuts must not be installed. |
| 3 - | Deflector ring |
| q | Only installed with basic running gear |
| q | Colourless |
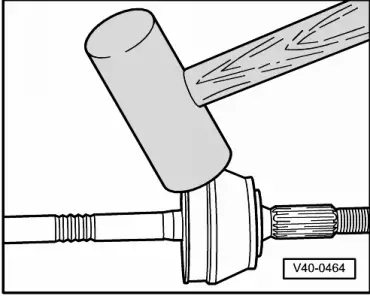
| 4 - | Outer constant velocity joint |
| q | Renew only as complete unit |
| q | Removing → Fig. |
| q | Installing: drive onto shaft with plastic hammer until compressed circlip seats |
| q | Greasing → Chapter |
| q | Checking → Chapter |
| q | Apply locking fluid -D 185 400 A2- to splines before inserting in wheel hub → Anchor or → Anchor |
| q | Degrease thread on stub axle |
| 5 - | Circlip |
| q | Always renew |
| q | Insert in groove on shaft |
| 6 - | Spacer ring (plastic) |
| q | Installation position → Fig. |
| 7 - | Convex washer |
| q | Installation position → Fig. |
| 8 - | Hose clip |
| q | Always renew |
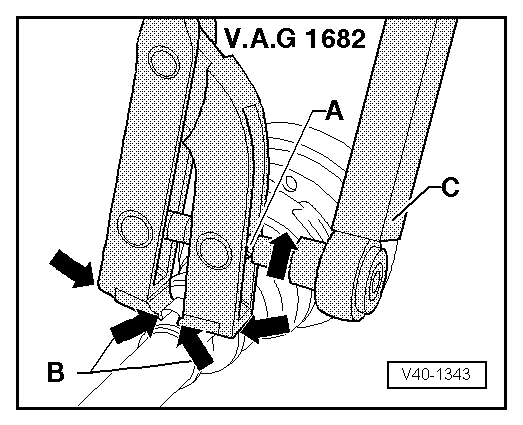
| q | Use clamp tensioner -V.A.G 1682- to tighten → Fig. |
| 9 - | Boot for constant velocity joint |
| q | Check for splits and chafing |
| q | Material: Hytrel (polyelastomer) |
| 10 - | Hose clip |
| q | Always renew |
| q | Use clamp tensioner -V.A.G 1682- to tighten → Fig. |
| 11 - | Left drive shaft (solid shaft) |
| 12 - | Right drive shaft (tubular shaft) |
| 13 - | Multi-point socket-head bolt, M8 x 48 |
| q | Pre-tighten to 10 Nm in diagonal sequence |
| q | Tighten to 40 Nm |
| q | Always renew if removed |
| 14 - | Lock plate |
| 15 - | Hose clip |
| q | Always renew |
| q | Tightening → Fig. |
| 16 - | Boot for inner constant velocity joint |
| q | Check for splits and chafing |
| q | Material: Hytrel (polyelastomer) |
| 17 - | Convex washer |
| q | Installation position → Fig. |
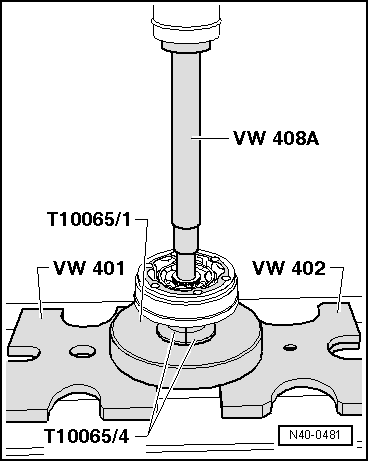
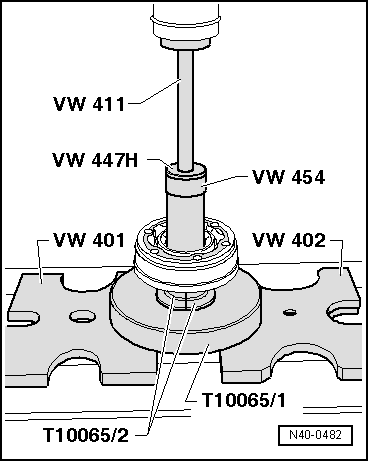
| 18 - | Inner constant velocity joint |
| q | Renew only as complete unit |
| q | Pressing off → Fig. |
| q | Pressing on → Fig. |
| q | Greasing → Chapter |
| q | Checking → Chapter |
| 19 - | Gasket |
| q | Adhesive surface on constant velocity joint must be free of oil and grease |
| q | Renew |
| q | Pull off protective foil and stick into joint. |
| 20 - | Circlip |
| q | Always renew |
| q | Remove and install using circlip pliers -VW 161 A- |
|
|
 Note!
Note!
|
|
Note!
|
|
|
|

|
|
|
|