audi Workshop Repair Guides

Audi Workshop Service and Repair Manuals

Windscreen washer system > < Adjusting wiper arm
Removing and installing wiper motor with wiper frame
Special tools and workshop equipment required
   
t  Pressing-off lever -80 - 200-
  W00-0353
t  Hose clamp fitting tool -V.A.G 1921-
  W00-0464
Removing
–  Remove the wiper arm → Chapter.
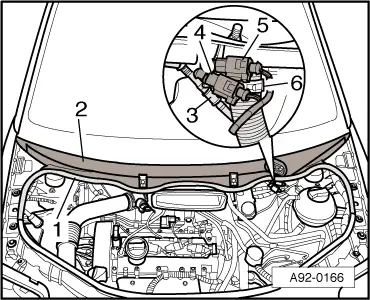
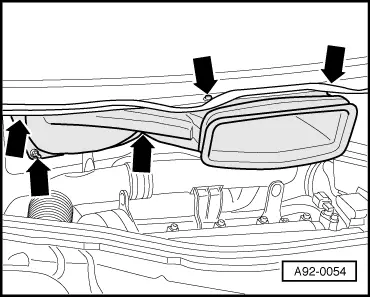
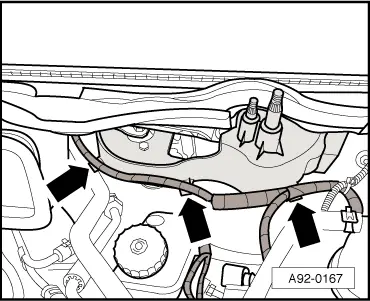
–  Detach washer fluid pipe -3-.
–  If fitted, detach electrical connectors -4- and -5- for heated washer jets.
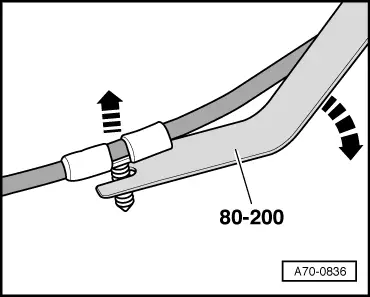
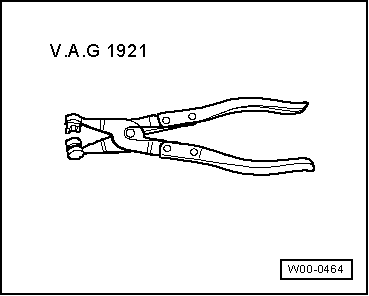
–  Release hose clamp -6- with hose clamp fitting tool -V.A.G 1921- and detach water drain hose from cowl panel grille.
–  Detach rubber seal -1- for cowl panel grille.
  Caution
To stop the cowl panel grille -2- being torn on removal, apply a small quantity of soap solution to the transition between the windscreen and cowl panel grille and pull the cowl panel grille vertically upwards out of the fastening strip, starting at the edge of the windscreen.
–  Detach the cowl panel grille -2-.
–  Set the washer fluid pipe aside.
  A92-0166
–  Remove the hexagon nuts and bolts -arrows-.
–  Pull out the fresh air duct forwards.
–  Swivel the fresh air duct to the right side of the vehicle.
  A92-0054
–  Remove nut -arrow- from bottom of coolant expansion tank.
–  Detach electrical connector -1- for coolant shortage indicator switch -F66- at expansion tank.
–  Remove coolant expansion tank upwards from bracket and lay aside with connected coolant pipes.
  A92-0179
–  Press off the wiring harness holders -arrows- at the wiper motor.
  A92-0167
–  Unclip the holder using the pressing-off lever -80 - 200-.
  Note
Use silicone-free lubricating spray to facilitate removal, if necessary.
  A70-0836
–  Remove the nuts and bolts -arrows-.
–  Carefully pull out the wiper motor mounting frame to the left.
–  Unplug the connector.
  A92-0168
–  Prise the wiper linkage -3- off the ball head.
–  Unscrew the nut -1- and detach the crank -2- from the wiper motor.
–  Unscrew bolts -arrows-.
–  Detach the wiper motor from the wiper frame.
Installing
Install in reverse order, paying attention to the following:
  A92-0169
–  Screw the wiper motor without crank to the wiper frame -arrows-.
–  Plug in the connector at the wiper motor.
–  Switch on ignition.
–  Actuate the “Flick wipe” function and allow the wiper motor to move to its end position.
–  Switch off ignition and remove ignition key.
–  Fit the crank -3- with wiper linkage loosely in position on the wiper shaft.
–  Align the crank with the wiper frame.
l  The crank must be positioned between marks -1- and -2-.
–  Hold the crank in position and start by hand-tightening the nut -4- so that the setting is not altered.
–  Then hold the crank in position with an open-ended spanner and finish-tighten the nut.
–  Switch on ignition.
–  Actuate the “Flick wipe” function and allow the wiper motor to move to its end position.
–  Check whether crank is positioned between marks -1- and -2- and re-align if necessary.
–  Switch off ignition and take out ignition key.
–  Fit the wiper motor with wiper frame in the vehicle.
–  Adjust the wiper arm → Chapter.
Tightening torques
  A92-0170
ComponentNm
Wiper motor to wiper frame9
Crank to wiper motor18
Wiper frame to body9
Wiper arm at bottom to wiper shaft10
Coolant expansion tank to body6


Windscreen washer system > < Adjusting wiper arm