audi Workshop Repair Guides

Audi Workshop Service and Repair Manuals

Removing and installing pendulum support > < Exploded view - subframe
Removing and installing gearbox mounting
Special tools and workshop equipment required
   
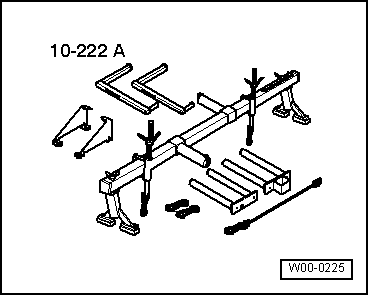
t  Support bracket -10 - 222 A-
  W00-0225
Removing
–  Remove engine cover panel.
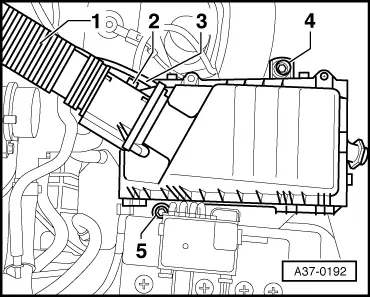
–  Remove air hose -1-.
–  Vehicles with TDI engine: detach breather hose -3-.
–  Unplug electrical connector -2- from air mass meter -G70-.
–  Remove bolts -4- and -5-, detach air cleaner housing.
  Caution
Follow steps required when disconnecting battery → Rep. Gr.27.
–  Remove battery → Rep. Gr.27.
  A37-0192
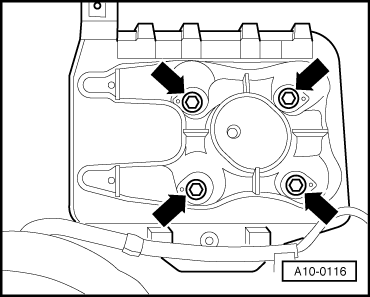
Vehicles with battery carrier (version 1):
–  Remove battery tray -arrows-.
  A10-0116
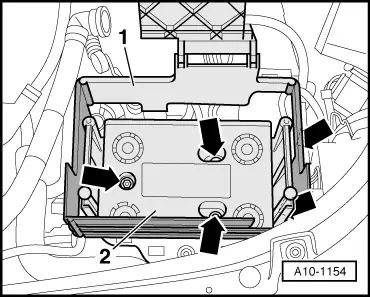
Vehicles with battery carrier (version 2):
–  Lift off side wall -1- together with main fuse box.
–  Remove battery tray -arrows-.
  A10-1154
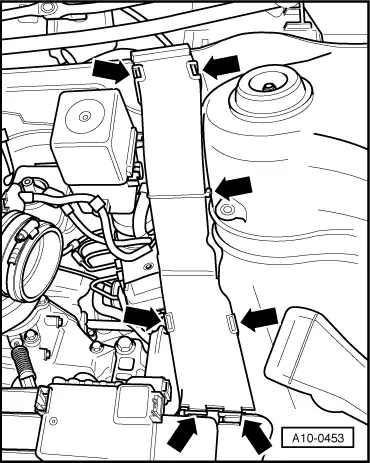
–  Open wiring duct on left in engine compartment -arrows-.
–  Unclip wiring duct and push to side.
  A10-0453
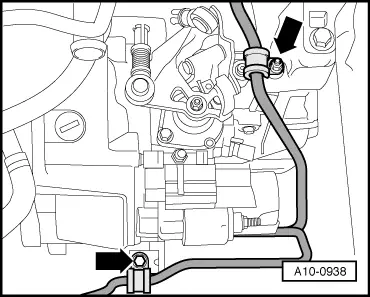
–  Unbolt power steering pressure pipe from gearbox -arrows-.
  A10-0938
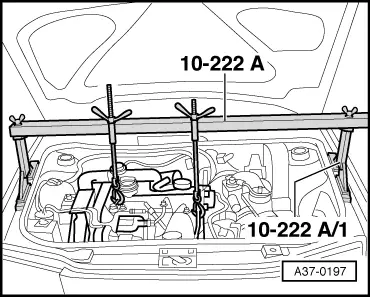
–  Set up support bracket -10 - 222 A- with adapters -10 - 222 A /3- on wing mounting flanges (left and right), as shown in illustration.
–  Hook spindles into engine lifting eyes and slightly take up weight of engine/gearbox assembly via the spindles.
  A37-0197
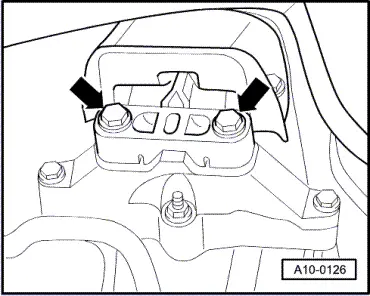
–  Remove bolts -arrows-.
  A10-0126
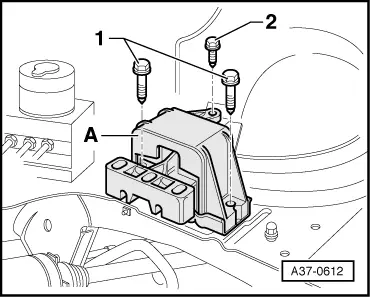
–  Remove bolts -1- and -2- and detach gearbox mounting -A-.
Installing
l  Tightening torques → Chapter
  Note
Renew bolts which are tightened by turning through a specified angle.
–  Secure gearbox mounting to body.
  A37-0612
–  Hand-tighten bolts -arrows- securing gearbox mounting to gearbox support initially.
The remaining installation steps are carried out in reverse sequence; note the following:
–  Install battery → Rep. Gr.27.
  A10-0126

Removing and installing pendulum support > < Exploded view - subframe