audi Workshop Repair Guides

Audi Workshop Service and Repair Manuals

Removing and installing oil pump > < Removing and installing parts of the lubrication system
4-Cylinder engine (2-valve, roller rockers), Mechanics
Removing and installing parts of the lubrication system
Removing and installing oil sump

Special tools, workshop equipment, testers, measuring instruments and auxiliary items required
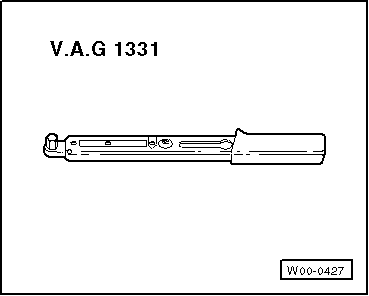
 
W00-0427
  • ◆ → V.A.G 1331 Torque wrench (5...50 Nm)
  • ◆ Hand drill with plastic brush
  • ◆ Flat scraper
  • ◆ Silicone sealant D176404 A2
  • ◆ Protective glasses

Work sequence

  • ‒ Remove noise insulation tray:

=> General body repairs, exterior; Repair group 50; Front body; Noise insulation - Assembly overview

Vehicles with drive unit protection plate

  • ‒ Remove drive unit protection plate:

=> General body repairs, exterior; Repair group 50; Front body

Continuation for all vehicles

  • ‒ Separate front exhaust pipe from exhaust manifold , exhaust manifold, front exhaust pipe and catalytic converter with attachments.
  • ‒ Drain engine oil.

Note:

Observe disposal regulations!
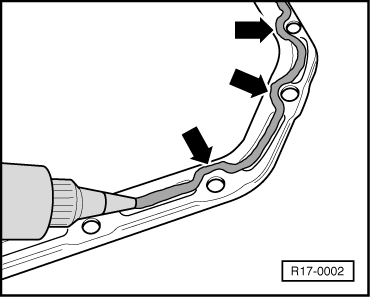
  • ‒ Remove sump tray from sump.
  • ‒ Unscrew securing bolts for sump at belt pulley side (4 bolts) from inside of sump
  • ‒ Remove the two connecting bolts from gearbox bell housing to sump support.
  • ‒ Unscrew all remaining sump securing bolts.
  • ‒ Remove sump, it may be necessary to release sump by tapping lightly with a rubber head hammer.
  • ‒ Remove sealant residue on cylinder block with a flat scraper.
 
N17-0012
  • ‒ → Remove sealant residue on the sump and the sump tray with a rotating brush, e.g. an electric drill with a plastic brush (wear eye protection).
  • ‒ Clean sealing surface, must be free of oil and grease.

Installing

Notes:

  • ◆ Note the 'use-by' date of the sealant.
  • ◆ Sump and sump tray must be installed within 5 minutes of applying silicone sealing compound.
  • ◆ Sump can be offered up easier and with greater security if, for guide purposes, M6 studs are inserted into the cylinder block flange at two positions.
 
N17-0019
  • ‒ → Cut off tube nozzle at forward marking (nozzle approx. 3 mm ø).
  • ‒ Apply silicone sealing compound, as shown, to clean sump sealing surface. Sealing compound bead must be.
    • ‒ 2...3 mm thick.
    • ‒ and run on inside of bolt holes -arrows-.

Note:

The sealing compound bead must not be thicker, otherwise excessive sealing compound will enter the sump and may block the oil suction pipe strainer.

 
A17-0029
  • ‒ → Apply silicone sealing bead as shown to the clean sealing surface of the sump. (The illustration shows the position of the sealant bead on the cylinder block).
  • ‒ Install sump immediately and tighten all sump bolts lightly.
  • ‒ Tighten new sump bolts to
        10 Nm.
  • ‒ Then tighten all bolts a 1/4 turn (90 °) further.
  • ‒ Tighten sump/gearbox bolts to 40 Nm.
 
R17-0002
  • ‒ → Apply silicone sealing compound, as shown, to clean sump tray sealing surface. Sealing compound bead must be:
    • ‒ 2...3 mm thick.
    • ‒ and run on inside of bolt holes -arrows-.

Note:

The sealing compound bead must not be thicker, otherwise excessive sealing compound will enter the sump and may block the oil suction pipe strainer.

  • ‒ Install sump tray immediately and tighten all bolts lightly.
  • ‒ Then tighten bolts to
        15 Nm.

Note:

After installing sump the sealant must be allowed to dry for approx. 30 minutes before engine oil is replenished.

Removing and installing oil pump > < Removing and installing parts of the lubrication system