audi Workshop Repair Guides

Audi Workshop Service and Repair Manuals

Removing and installing shock absorber > < Exploded view of spring and shock absorber
Running gear, Front-wheel drive and four-wheel drive
Servicing rear axle - Four-wheel drive vehicles
Removing and installing spring
 
W00-0120

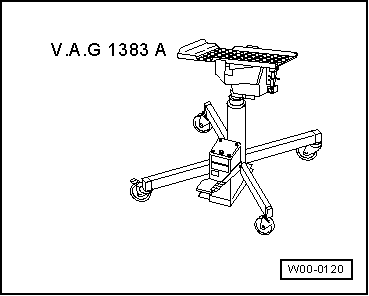
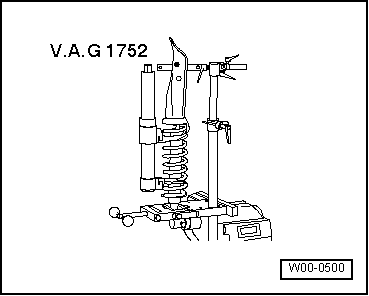
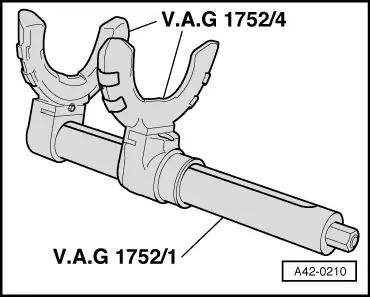
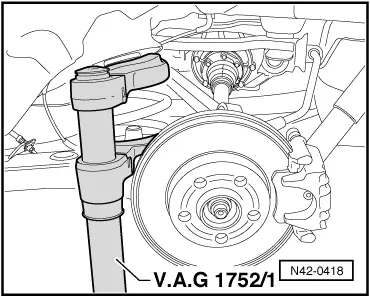
Special tools and workshop equipment required

  • ◆ Engine/gearbox lifter V.A.G 1383 A

 
W00-0500
  • ◆ Suspension strut tensioner V.A.G 1752

Safety precautions

Extremely high forces occur when tensioning springs. Particular attention is therefore to be paid to the following safety precautions.

Attention:
  • ◆ Make sure spring holders are as close as possible to spring windings.
  • ◆ Whilst tensioning, check correct positioning of spring holders at spring windings.
  • ◆ Never use impact screwdriver.
 
A42-0210

Removing

Note:

The following description relates to the left spring. The right spring is removed in the same manner.
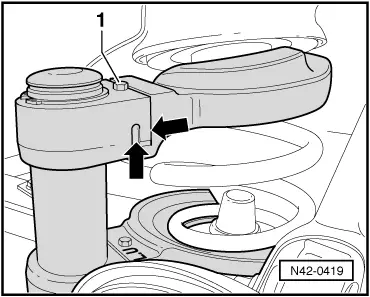
  • ‒ Remove rear wheel.
  • ‒ → Fit spring holders V.A.G 1752/4 at spring tensioner V.A.G 1752/1.
 
N42-0418
  • ‒ → Insert spring tensioner V.A.G 1752/1 with spring holder V.A.G 1752/4 in coil spring.

 
N42-0420
  • ‒ → Turn spindle of spring tensioner until spring is slightly tensioned.
  • Check whether spring holders are properly positioned at spring windings.
  • ‒ Halt tensioning process at the latest when spring windings make contact.
 
N45-0147
  • ‒ → Unclip speed sensor wire from holder.
  • ‒ Open cover -2- for connector -1-.
  • ‒ Pull speed sensor out of trailing arm.
  • ‒ Disengage headlight range control unit .

 
A42-0207
  • ‒ Use engine/gearbox lifter V.A.G 1383 A and universal mount V.A.G 1359/2 to raise wheel bearing housing slightly.
Attention:
Do not raise vehicle further than necessary to prevent it falling off lifting platform.
  • ‒ → Screw out bolt -arrow-.
  • ‒ Slowly lower engine/gearbox lifter again.
  • ‒ Take out spring with spring tensioner.
 
N42-0425

Installing

  • ‒ Insert spring in spring holders.
  • ‒ Turn spindle of spring tensioner until spring is slightly tensioned.
  • Check whether spring holders are properly positioned at spring windings.
  • ‒ Halt tensioning process at the latest when spring windings make contact.

→ Installation position of spring

For vehicles with no stop at buffer stop -2-

    • ‒ Start of spring winding -3- must be in 9o'clock position
  •     1 -    Spring
  •     F -    Direction of travel

For vehicles with stop at buffer stop -2-

    • ‒ Start of spring winding must make contact with stop -arrow-
 
N42-0419
  • ‒ Slacken off spring by turning spindle anti-clockwise.
  • ‒ → Whilst slackening off, check correct installation position of spring.
  • Never use impact screwdriver or the like.

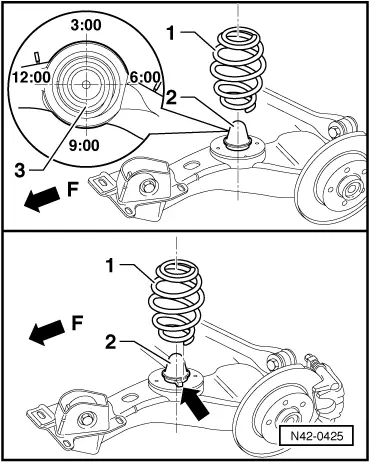
Spring holders will become jammed in spring if spindle is turned too far.

  • ‒ Take spring tensioner out of spring.

 
N42-0340

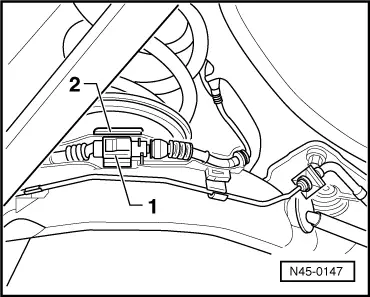
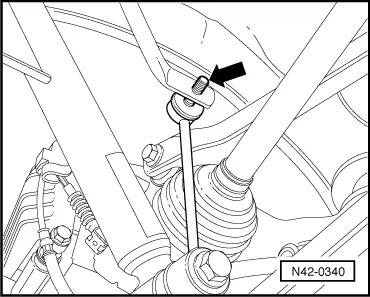
Perform further installation in reverse order, paying attention to the following:

Note:

→ If necessary, unscrew connecting link -arrow- from anti-roll bar. Lower damper bolt is then easier to fit.

Tightening torques

Component

Nm

Shock absorber to trailing arm

110 1)

Connecting link to anti-roll bar

25 1)

    1)    Replace bolts and nuts

Bolted joints with bonded rubber bushes must be tightened when vehicle is standing on its wheels.

Removing and installing shock absorber > < Exploded view of spring and shock absorber