
A3 Mk2
| Removing and installing flange shaft (right-side) |
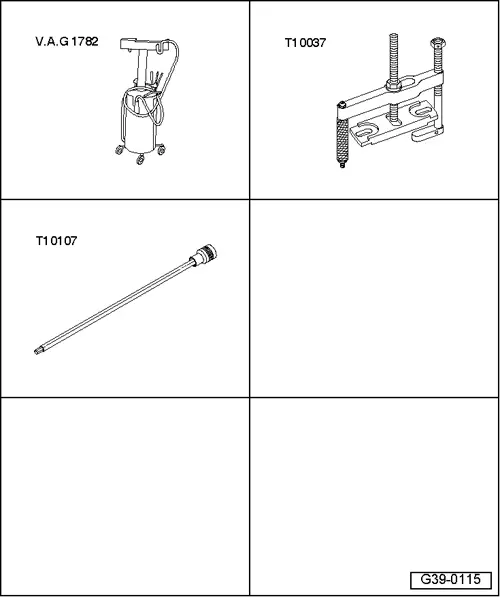
| Special tools and workshop equipment required |
| t | Used oil collection and extraction unit -V.A.G 1782- |
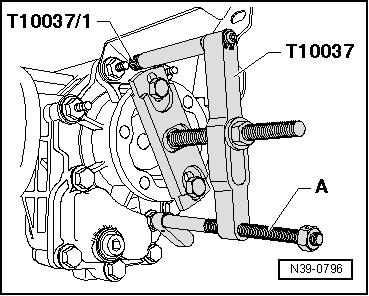
| t | Puller -T10037- |
| t | Socket and extended bit -T10107 A- |
|
|
|
|
 Note
Note
|
|