
A3 Mk2
| Exploded view - Sachs version clutch |
 Note
Note| The dual-mass flywheel, pressure plate and clutch plate are matched together; components from another manufacturer must not be installed on the same vehicle. |

| 1 - | Dual-mass flywheel |
| q | Removing and installing → Engine, mechanics; Rep. Gr.13 |
| q | Ensure that dowel pins fit tightly |
| q | Contact surface for clutch lining must be free of grooves, oil and grease |
| q | Observe instructions for removal → Fig. |
| 2 - | Clutch plate |
| q | Removing and installing → Chapter |
| q | Always renew pressure plate as well |
| q | Installation position → Fig. |
| q | For diameter of clutch plate, refer to → Electronic parts catalogue |
| 3 - | Pressure plate |
| q | With adjustment mechanism |
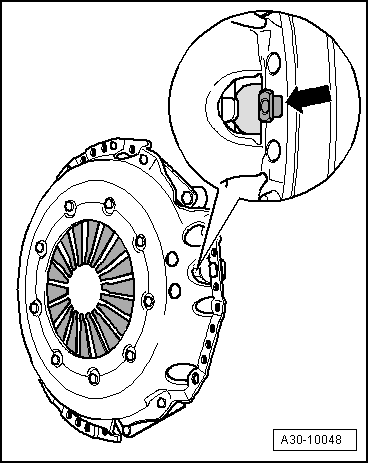
| q | Identification → Fig. |
| q | Removing and installing → Chapter |
| q | Checking ends of diaphragm spring → Fig. |
| q | Checking spring connections and rivets → Fig. |
| q | Always renew clutch plate as well |
| q | For correct version, refer to → Electronic parts catalogue |
| 4 - | Bolt |
| q | M6 - 13 Nm |
| q | M7 - 20 Nm |
| q | Loosen and tighten bolts consecutively in steps of 90° |
|
|
