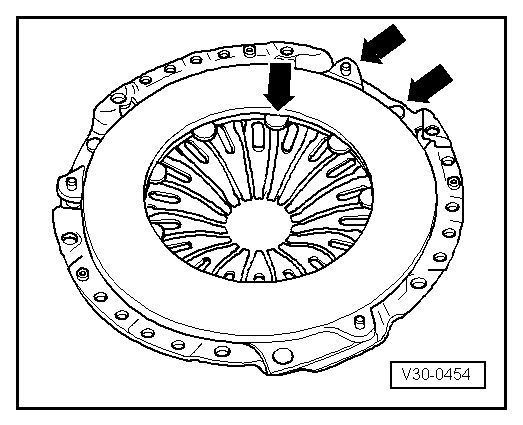
| To prevent the pressure plate from becoming distorted during removal (causes clutch grab when driving off), always adhere to the following procedure when unbolting the pressure plate: |
| –
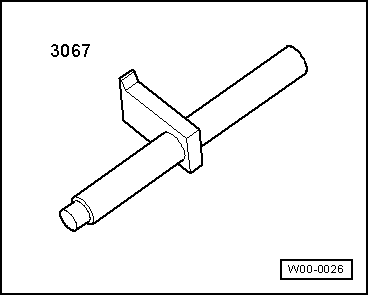
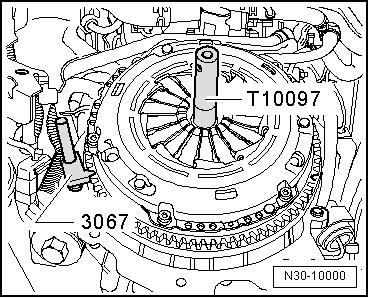
| Apply counter-hold tool -3067- in order to loosen bolts. |
| –
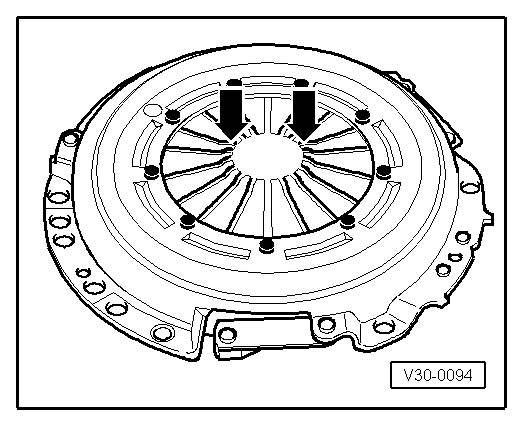
| Working clockwise, loosen all six bolts consecutively in steps of 90° (1/4 turn) until the pressure plate is released. |
| l
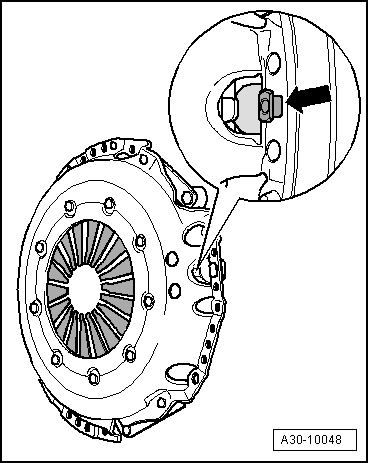
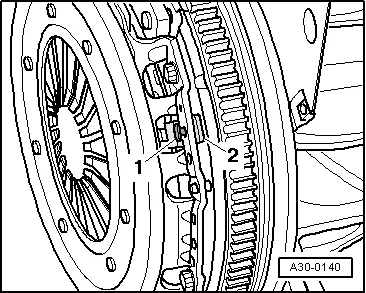
| Stop -2- with pin -1- should come loose when the bolts are slackened. |
| –
| If the stop does not come loose, push the pin towards the dual-mass flywheel. |
| –
| Take off pressure plate and clutch plate. |
| Installation is carried out in reverse sequence; note the following: |

Note | t
| The dual-mass flywheel, pressure plate and clutch plate are matched together; components from another manufacturer must not be installed on the same vehicle. |
| t
| If the clutch has burnt out, thoroughly clean the clutch housing, flywheel and parts of the engine facing the gearbox in order to reduce the smell of burnt linings. |
| t
| Clean input shaft splines and (in the case of a used clutch plate) the hub splines. Remove corrosion and apply only a very thin coating of grease -G 000 100- to the splines. Then move clutch plate backwards and forwards on input shaft until hub moves freely on shaft. It is important to remove excess grease. |
| t
| Pressure plates have an anti-corrosion coating and are greased. With the exception of the friction surface for the clutch plate, the pressure plate may not be cleaned. Otherwise the service life of the clutch will be considerably reduced. |
| t
| The friction surface of the pressure plate and the dual-mass flywheel must be cleaned (degreased) thoroughly. |
| t
| Pressure plate contact surface and clutch plate lining must make full contact with flywheel. Only then insert bolts. |
| t
| Check that dowel sleeves for centralising engine/gearbox are in the cylinder block; install if necessary. |
| t
| If the dowel sleeves are not fitted, this will lead to gear-change problems, clutch malfunction and in some cases gearbox noise (gears will make rattling noises). |
|
|
|