audi Workshop Repair Guides

Audi Workshop Service and Repair Manuals

Removing gearbox on vehicles with 2.0 ltr. TDI engine (unit injector) > < Removing gearbox on vehicles with 1.8 ltr. and 2.0 ltr. FSI turbocharged engine
Installing gearbox on vehicles with 1.8 ltr. and 2.0 ltr. FSI turbocharged engine
   
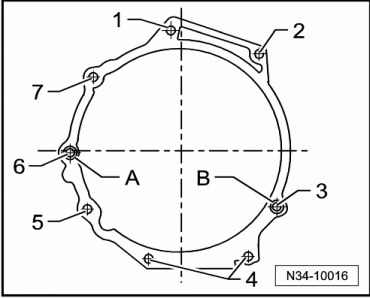
Tightening torques for engine/gearbox joint
  N34-10016
ItemBoltNm
1 ... 2M12×55
t  With stud M8
80
3 M12×70
t  Installed from engine side
80
4 M10×5040
5 M10×10540
6 ... 7M12×165
t  With stud M8
t  Also secures starter to gearbox
80
A, BDowel sleeves for centralising
Renew bolts -1 ... 5-.

Other tightening torques
   
Component Nm
Small cover plate for flywheel10
Heat shield for drive shaft (right-side) to cylinder block 25
Selector cable support bracket to gearbox20
Earth wire to top starter bolt23
Bracket for electrical wiring at bottom starter bolt23

Installing gearbox
Installation is carried out in reverse sequence; note the following:
  Note
t  Renew self-locking nuts and bolts when performing assembly work.
t  Renew oil seals, gaskets, O-rings and bolts which are tightened by turning through a specified angle.
t  Secure all hose connections with the correct hose clips (as original equipment); refer to → Electronic parts catalogue.
t  All cable ties which are released or cut open during removal must be fitted in the same position when installing.
t  Clean input shaft splines and (in the case of a used clutch plate) the hub splines. Remove corrosion and apply only a very thin coating of grease -G 000 100- to the splines. Then move clutch plate backwards and forwards on input shaft until hub moves freely on shaft. It is important to remove excess grease.
t  When renewing the gearbox, the gearbox selector lever must be transferred to the new assembly.
t  Use thread tap to remove any remaining locking fluid from all threaded holes which will accommodate self-locking bolts.
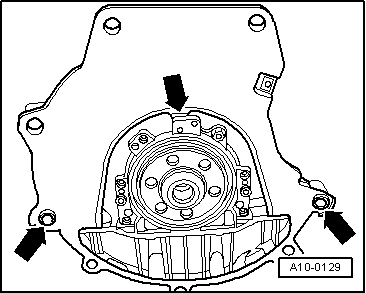
t  Check that dowel sleeves for centralising engine/gearbox are in the cylinder block; install if necessary.
t  If the dowel sleeves are not fitted, this will lead to gear-change problems, clutch malfunction and in some cases gearbox noise (gears will make rattling noises).
   
–  Make sure that the intermediate plate is engaged on the sealing flange and fitted on the dowel sleeves -arrows-.
–  Check release bearing for wear. Renew slave cylinder and release bearing if necessary → Chapter.
–  Check that clutch plate is centralised → Chapter.
  A10-0129
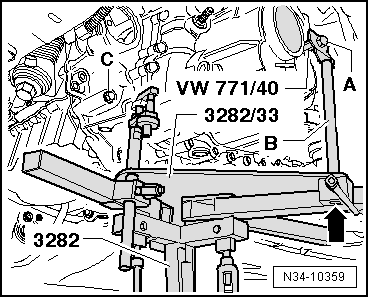
–  Raise gearbox carefully and move to installation position using gearbox support -3282-.
–  Align gearbox with engine and install.
–  Secure gearbox and starter to engine and tighten bolts to specified torque → Anchor.
  N34-10359
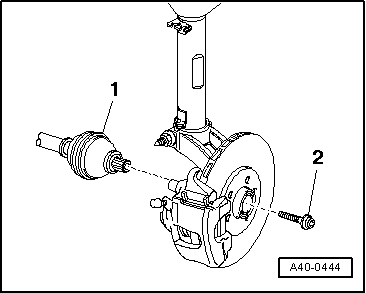
–  Install drive shaft (left-side) -1-.
  A40-0444
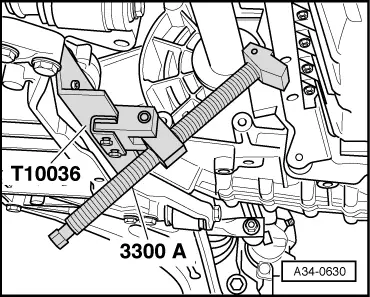
–  Remove engine support -3300 A- and support -T10036-.
  A34-0630
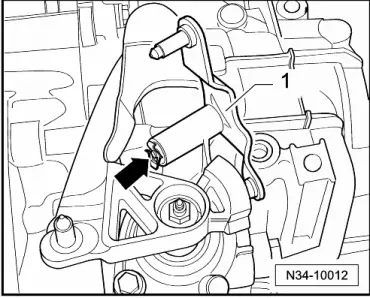
Metal gate relay lever -1-
–  Insert gate relay lever -1- and secure with securing clip -arrow-.
  N34-10012
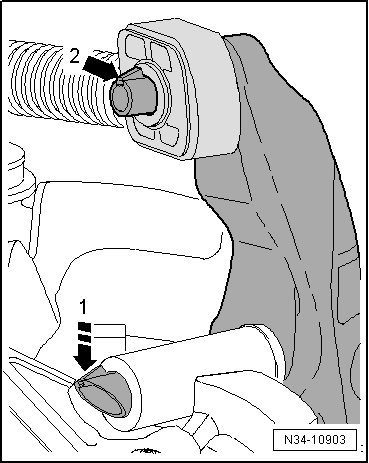
Plastic gate relay lever
–  Insert gate relay lever together with cable end-piece.
l  Gate relay lever is secured by detent -arrow 1-.
l  Ensure that components engage securely.
l  Cable end-piece must be behind detent -arrow 2-.
  N34-10903
Continued for all vehicles
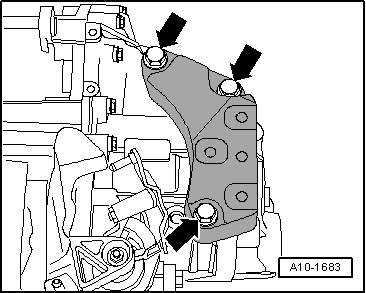
–  Attach gearbox bracket to gearbox with new hexagon bolts -arrows- and tighten to specified torque. Tightening torque → Chapter
  A10-1683
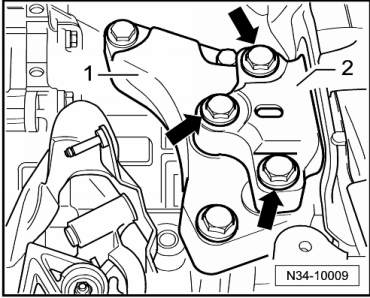
–  Align engine/gearbox in installation position. To do so, raise engine/gearbox until gearbox bracket -1- makes full contact with gearbox mounting (left) -2-.
  Note
Gearbox mounting and gearbox bracket must be parallel to avoid causing damage to thread of gearbox bracket.
–  Secure gearbox bracket -1- to gearbox mounting (left) -2- with new hexagon bolts -arrows-. Tightening torque → Chapter
  WARNING
Do not remove support bracket -10 - 222 A- until all bolts securing the left-hand engine/gearbox mounting have been tightened to the specified torque.
  N34-10009
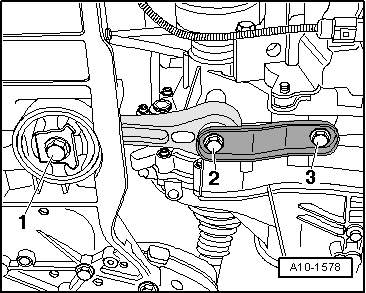
–  Fit pendulum support with new bolts -1 … 3- in accordance with installation instructions → Anchor. Tightening torques → Chapter
–  Check mountings of engine/gearbox assembly for correct adjustment, and re-adjust if necessary → Engine, mechanics; Rep. Gr.10.
  A10-1578
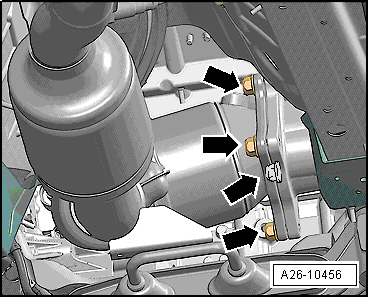
–  Secure catalytic converter to turbocharger -arrows- → Engine, mechanics; Rep. Gr.26.
  A26-10456
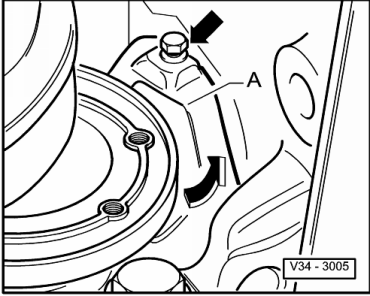
–  If fitted, install small flywheel cover plate -A-.
  V34-3005
–  Secure left and right drive shaft to gearbox → Running gear, front-wheel drive and four-wheel drive; Rep. Gr.40.
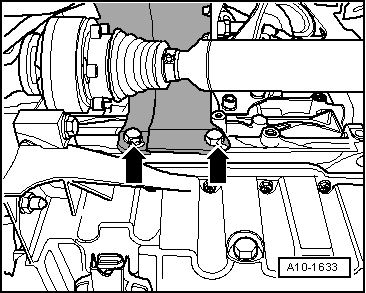
–  Secure heat shield for drive shaft (right-side) -arrows-.
  A10-1633
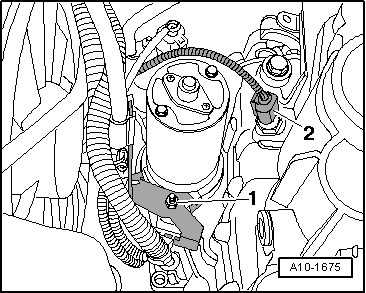
–  Attach bracket -1-.
–  Plug connector -2- onto reversing light switch -F4-.
  A10-1675
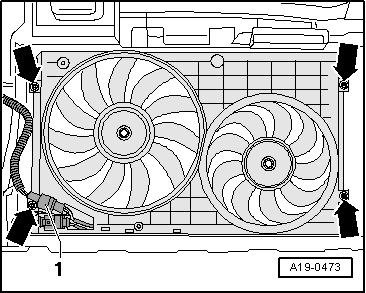
–  Install radiator cowl -arrows- and attach electrical connector -1-.
  A19-0473
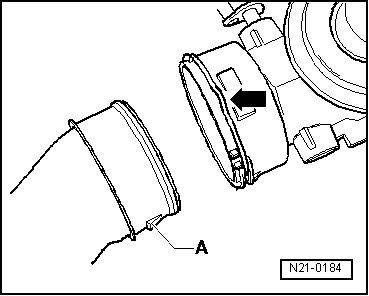
–  Install air intake hose. Make sure retaining clip -arrow- snaps onto retaining lug -A-.
  N21-0184
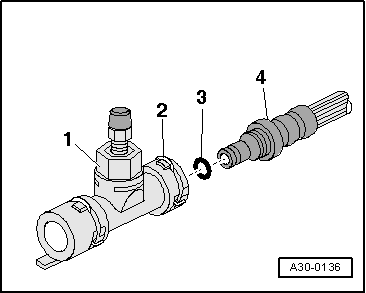
–  Apply a small quantity of brake fluid to new sealing ring -3- and fit on pipe/hose assembly -4-.
–  Push pipe/hose assembly -4- into bleeder connection -1- so that retaining clip -2- snaps into place.
–  Pull on pipe/hose assembly to check it is secure.
–  Bleed clutch system → Chapter.
  A30-0136
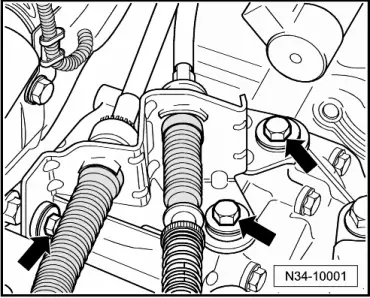
–  Install cable support bracket on gearbox -arrows-.
  N34-10001
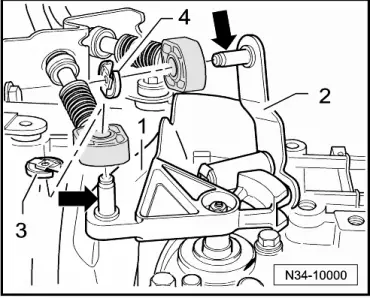
–  Apply a small quantity of grease -G 000 450 02- to pin -arrow- of gearbox selector lever -1-.
–  Push gear selector cable onto pin -arrow- and secure with securing clip -3-.
Metal gate relay lever -2-
–  Apply a small quantity of grease -G 000 450 02- to pin -arrow- of gate relay lever -2-.
–  Push gate selector cable onto pin -arrow- and secure with securing clip -4-.
Plastic gate relay lever -2-
–  Insert gate selector cable in cable end-piece.
Continued for all vehicles
–  Adjust selector mechanism → Chapter.
  N34-10000
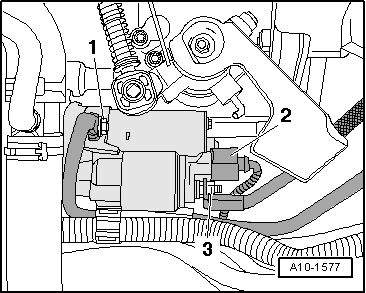
–  Fit earth wire -1-.
–  Install battery tray and battery → Electrical system; Rep. Gr.27.
–  Install engine cover panel.
–  Install complete air cleaner housing → Rep. Gr.24.
–  Check gear oil level in gearbox → Chapter.
  A10-1577
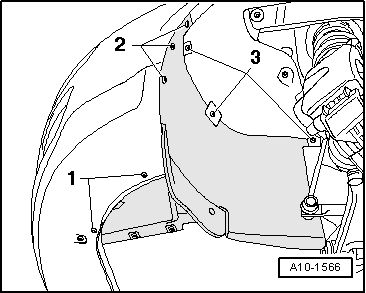
–  Install wheel housing liner (front left) -fasteners 1 ... 3-.
  A10-1566
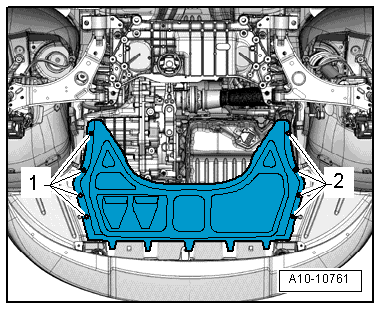
Audi A3
–  Install noise insulation (centre) -fasteners 1 and 2-.
  A10-10761
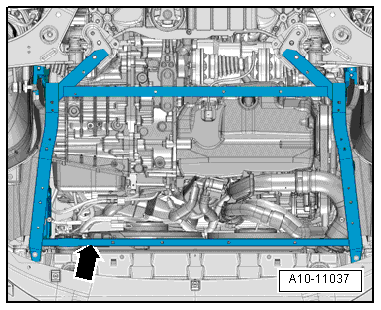
Audi A3 Cabriolet
–  Install noise insulation frame -arrow- → Rep. Gr.50.
  A10-11037
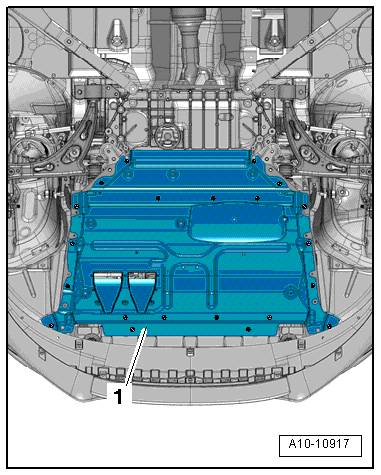
–  Install noise insulation (centre) -1- → Rep. Gr.50.
  A10-10917
Continued for all vehicles
Secure drive shaft (left-side) with new bolt -2- → Running gear, front-wheel drive and four-wheel drive; Rep. Gr.40.
  Note
Wheels must not be in contact with ground when tightening drive shaft as otherwise wheel bearing could be damaged.
  A40-0444

Removing gearbox on vehicles with 2.0 ltr. TDI engine (unit injector) > < Removing gearbox on vehicles with 1.8 ltr. and 2.0 ltr. FSI turbocharged engine