audi Workshop Repair Guides

Audi Workshop Service and Repair Manuals

Removing and installing vacuum unit for turbocharger > < Turbocharger - exploded view
Checking vacuum unit for turbocharger
Special tools and workshop equipment required
   
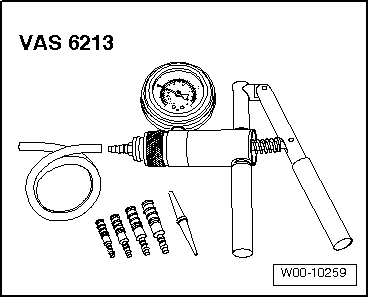
t  Hand vacuum pump -VAS 6213-
  W00-10259
Procedure
l  Hose from turbocharger via charge pressure solenoid valve -N75- to vacuum unit must be airtight and unobstructed.
l  Charge pressure control solenoid valve -N75- OK.
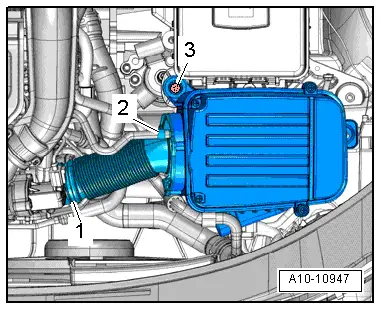
–  Remove air cleaner housing → Rep. Gr.24.
  A10-10947
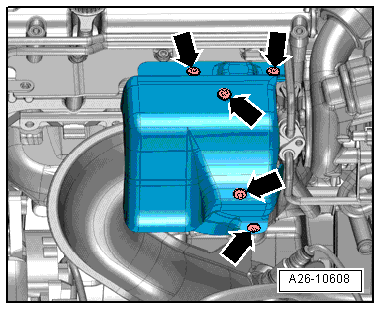
–  Remove bolts -arrows- and detach heat shield for turbocharger.
  A26-10608
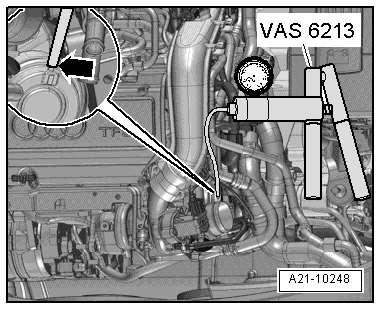
–  Disconnect vacuum hose -arrow- at vacuum unit on turbocharger and attach hand vacuum pump -VAS 6213- instead.
  A21-10248
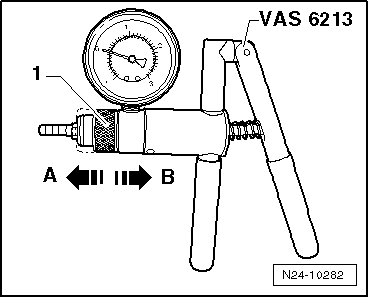
–  Move adjuster ring -1- on hand vacuum pump -VAS 6213- to position -B- to select “pressure”.
–  Operate hand vacuum pump -VAS 6213- several times.
  Caution
Risk of damage to vacuum unit on account of excessive pressure.
The pressure must not exceed 800 mbar.
  Note
  N24-10282
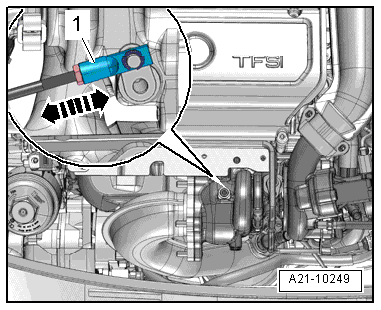
Illustration shows installation position with turbocharger removed.
–  Observe operating rod -1- of vacuum unit for turbocharger.
l  The operating rod should move at a pressure of approx. 300 mbar and above.
l  The operating rod should be at its end position at a pressure of approx. 800 mbar.
  A21-10249
–  Vent hand vacuum pump -VAS 6213--arrow A-.
l  The operating rod should move in the opposite direction.
  Note
Observe the movement of the operating rod over the complete range of travel. It should move steadily and smoothly.
Assembling
l  Tightening torques → Chapter, → Chapter, → Fig..
Installation is carried out in the reverse order; note the following:
–  Install air cleaner housing → Rep. Gr.24.
  N24-10282

Removing and installing vacuum unit for turbocharger > < Turbocharger - exploded view