audi Workshop Repair Guides

Audi Workshop Service and Repair Manuals

Adjusting vacuum unit for turbocharger > < Checking vacuum unit for turbocharger
Removing and installing vacuum unit for turbocharger
   
Removing
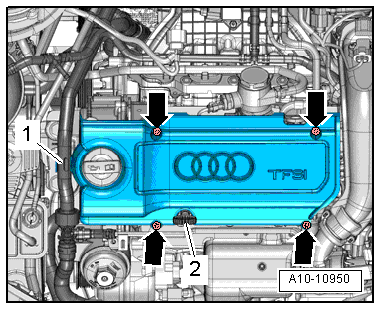
–  Disengage coolant hose -1- at engine cover panel.
–  Pull oil dipstick -2- out of guide tube.
–  Unscrew bolts -arrows- and remove engine cover panel.
  A10-10950
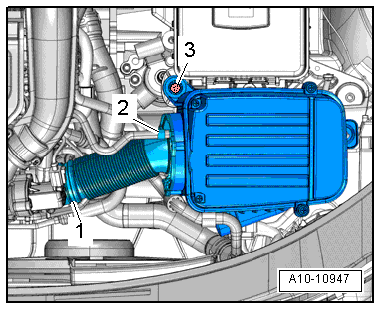
–  Remove air cleaner housing → Rep. Gr.24.
  A10-10947
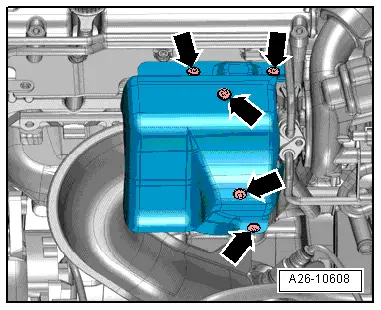
–  Remove bolts -arrows- and detach heat shield for turbocharger.
  A26-10608
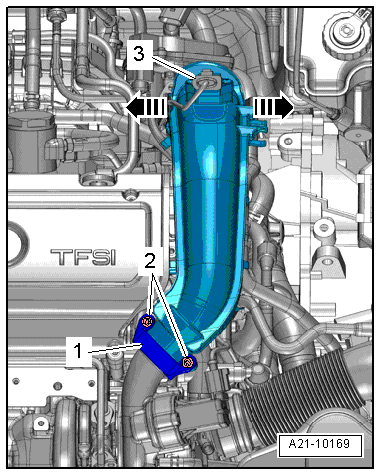
–  Unscrew bolts -2- and detach retaining bracket -1-.
–  Unplug electrical connector -3- at charge pressure sender -G31-.
–  Release retainers -arrows- and detach air pipe first from throttle valve module -J338- and then from turbocharger.
–  Move hoses on air pipe clear.
  A21-10169
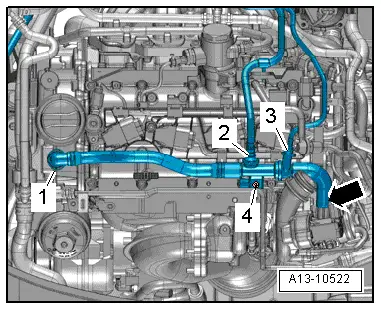
–  Remove bolt -4-, detach crankcase breather hose from turbocharger -arrow- and move clear to one side.
  Note
Disregard -items 1, 2, 3-.
  A13-10522
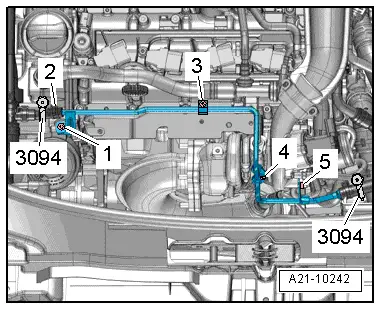
–  Clamp off coolant hoses with hose clamps -3094- as shown in illustration.
–  Remove bolts -1, 3, 4, 5-.
–  Disconnect coolant lines from turbocharger and move clear to one side.
  Note
Disregard -item 2-.
  A21-10242
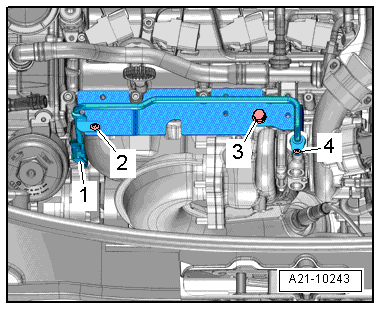
–  Remove bolts -2- and -3- and take off retaining plate.
  Note
Disregard -items 1, 4-.
  A21-10243
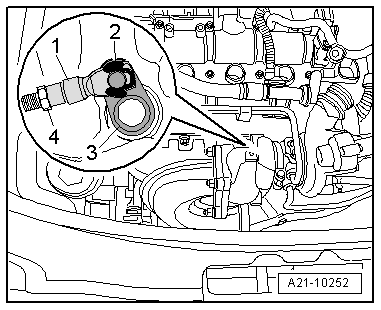
–  Lever off retaining clip -2- and detach threaded collar -1- on operating rod from pin of operating lever -3-.
  Note
Disregard -item 4-.
  A21-10252
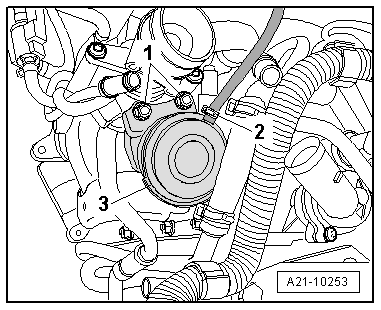
–  Disconnect hose -2- at vacuum unit for turbocharger.
–  Remove bolts -1- and detach vacuum unit -3- for turbocharger.
Installing
l  Tightening torques → Chapter
Installation is carried out in the reverse order; note the following:
  Note
t  Check correct installation of the vacuum unit and its operating rod.
t  Renew retaining clip for operating rod.
–  Adjust vacuum unit for turbocharger → Chapter.
  A21-10253

Adjusting vacuum unit for turbocharger > < Checking vacuum unit for turbocharger