audi Workshop Repair Guides

Audi Workshop Service and Repair Manuals

Removing and installing radiator cowl > < Radiator and radiator fans - exploded view
Removing and installing radiator
Special tools and workshop equipment required
   
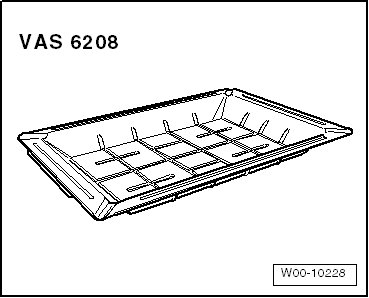
t  Drip tray for workshop hoist -VAS 6208-
  W00-10228
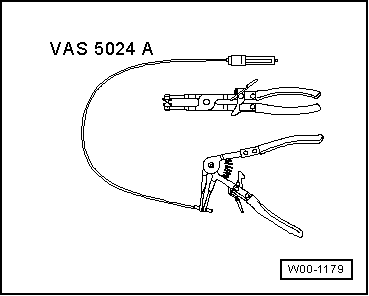
t  Spring type clip pliers -VAS 5024 A-
Removing
  Note
If there are slight impressions on the fins, refer to → Chapter.
  WARNING
Hot steam or hot coolant can escape when expansion tank is opened; cover filler cap with cloth and open carefully.
–  Open filler cap on coolant expansion tank.
  W00-1179
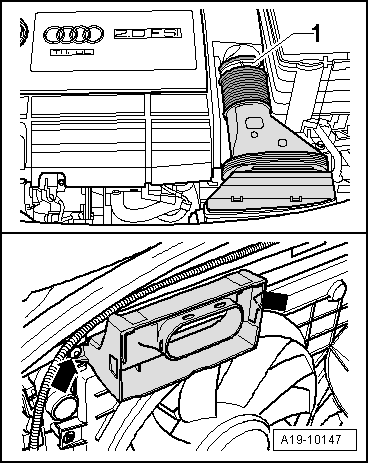
–  Disconnect intake connecting pipe -1- using spring-type clip pliers -VAS 5024 A-.
–  Unscrew intake connecting pipe from lock carrier -arrows- and remove.
  A19-10147
–  Unscrew bolts -1- from above.
–  Remove noise insulation → Rep. gr.50.
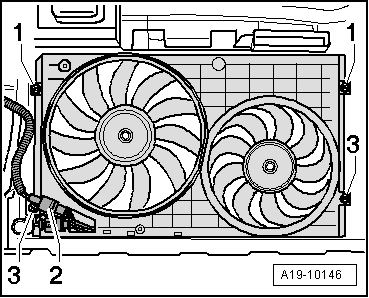
  A19-10146
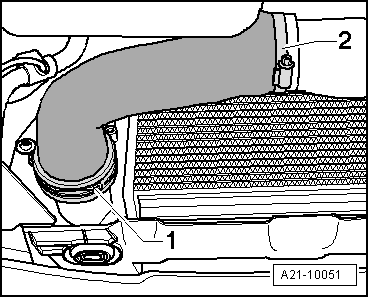
–  Remove air pipe -1 and 2- for charge air cooler.
  A21-10051
–  Unplug electrical connector -2-.
–  Unscrew the bolts -3- and remove radiator cowl from below.
–  Place drip tray for workshop hoist -VAS 6208- beneath engine.
  A19-10146
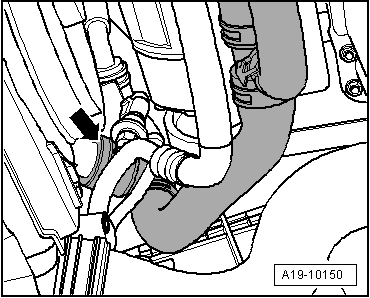
–  To drain off coolant, detach bottom coolant hose -arrow-.
  A19-10150
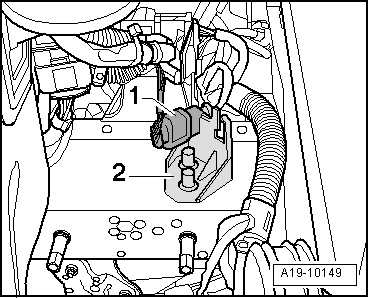
–  Detach electrical connector -1- at longitudinal member (left-side) from bracket.
–  Remove retainer for connector -2-.
  A19-10149
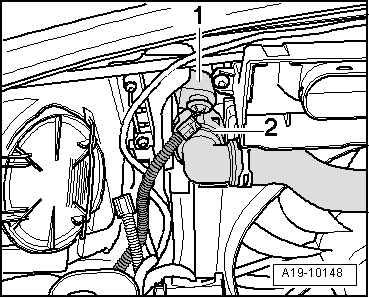
–  Unplug electrical connector at bonnet lock -1-.
–  Detach top coolant hose from radiator -2-.
  A19-10148
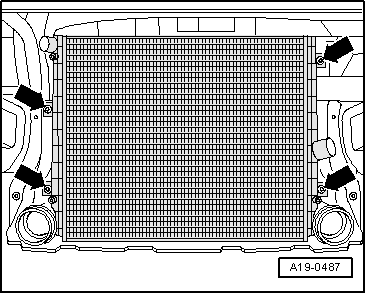
–  Unscrew bolts -arrows- on backside of radiator.
–  Lift up radiator slightly and remove upwards.
Installing
Installation is carried out in the reverse order; note the following:
l  Tightening torques → Chapter
–  Install air pipes with plug-in connectors → Chapter.
–  Fill up with coolant → Chapter.
  A19-0487

Removing and installing radiator cowl > < Radiator and radiator fans - exploded view