Audi Workshop Service and Repair Manuals
HOME
FEATURES
MENU
INDEX
ABOUT US
Removing and installing drive shaft (version with internal splines on inner sliding CV joint) >
< Removing and installing drive shaft with intermediate shaft (version with bolted flange on inner joint)
A3 Mk2
Running gear, front-wheel drive and four-wheel drive
Front suspension, drive shafts
Drive shafts
Removing and installing drive shaft with intermediate shaft (version with splines on inner joint)
Removing and installing drive shaft with intermediate shaft (version with splines on inner joint)
Removing and installing drive shaft with intermediate shaft (version with splines on inner joint)
Removing
–
Remove noise insulation panel
→ General body repairs, exterior; Repair group 50; Removing and installing noise insulation
.
–
Loosen bolt securing drive shaft at wheel hub.
t
→ Chapter „Loosening and tightening hexagon bolt securing drive shaft“
.
t
→ Chapter „Loosening and tightening twelve-point ribbed bolt securing drive shaft“
.
t
→ Chapter „Loosening and tightening twelve-point bolt (without ribbing) securing drive shaft“
–
Remove wheel.
–
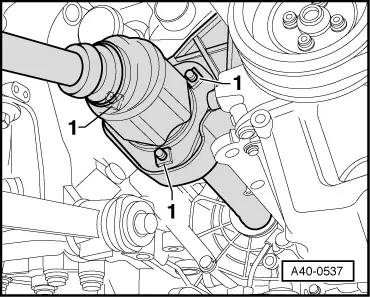
Loosen hexagon flange bolts
-item 1-
.
–
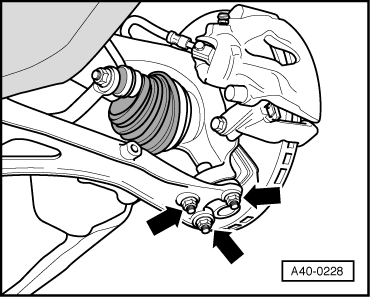
Unscrew hexagon nuts -arrows- at swivel joint.
–
If fitted, unscrew nut from linkage for vehicle level sender.
–
Disengage wishbone from swivel joint.
–
Pivot suspension strut outwards and at the same time push drive shaft out of wheel bearing unit with a brass drift (knock out gently if necessary).
Do not allow the drive shaft to hang down under its own weight; this would bend the inner joint too far and damage it.
–
Pull drive shaft out of splines and take out.
Installing
Installation is performed in reverse sequence; note the following:
–
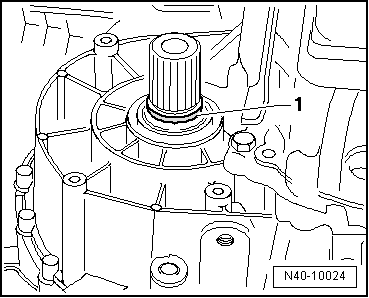
Renew oil seal
-1-
on gearbox shaft.
–
First mount drive shaft on gearbox side.
–
Before fitting the outer joint in the wheel hub, apply a thin coat of assembly paste to the splines on the outer joint
→ Electronic parts catalogue
.
–
Tighten hexagon flange bolts item
-1-
to 20 Nm.
Tightening torques
→ Chapter „Exploded view of wheel bearing housing and wheel bearing unit“
Tightening torques
→ Chapter „Exploded view of subframe, diagonal strut, swivel joint, anti-roll bar, wishbone, suspension bracket and vehicle level senders“
–
Tighten hexagon bolt securing drive shaft
→ Chapter
.
–
Tighten twelve-point ribbed bolt securing drive shaft
→ Chapter
.
–
Tighten twelve-point bolt (without ribbing) securing drive shaft
→ Chapter
.
–
Perform basic setting of headlights on vehicles with automatic headlight range control
→ Vehicle diagnostic tester
.
–
On vehicles with electronic damping control (Audi magnetic ride), re-adapt reference position
→ Vehicle diagnostic tester
.
Running gear, front-wheel drive and four-wheel drive
Front suspension, drive shafts
Drive shafts
Removing and installing drive shaft with intermediate shaft (version with splines on inner joint)
Removing and installing drive shaft (version with internal splines on inner sliding CV joint) >
< Removing and installing drive shaft with intermediate shaft (version with bolted flange on inner joint)