A4 Cabriolet Mk2
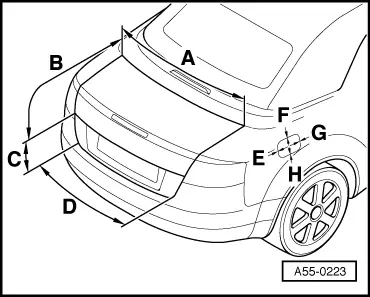
| Removing, installing and adjusting rear lid |

| 1 - | Rear lid |
| q | Removing: |
 Note
Note| A second mechanic is required to support and lift off the rear lid. |
| – | Remove rear lid lining. |
| – | Unplug connectors and pull them out of rear lid. |
| – | Unscrew nuts for connecting both hinges to rear lid → Chapter. |
| q | Install in reverse order. |
| q | Joint dimensions → Anchor |
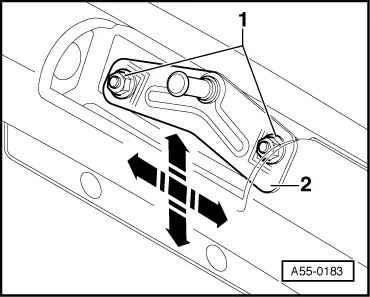
| 2 - | Buffer stop |
| q | Adjusting → Chapter |
| 3 - | Gas-filled strut |
| q | Removing and installing → Chapter |
| 4 - | Rear lid hinge |
| q | Removing and installing → Chapter |
| 5 - | Striker plate |
| q | Removing and installing → Anchor |
| q | Adjusting → Anchor |
| 6 - | Nut |
| q | 8 Nm |
|

|
Note
|
|