audi Workshop Repair Guides

Audi Workshop Service and Repair Manuals

Exploded view - servicing self-adjusting clutch (Sachs version) > < Exploded view - servicing conventional clutch
Removing and installing conventional clutch
Special tools and workshop equipment required
   
t  Counterhold tool -10-201- or -3067-
  W00-0254
t  
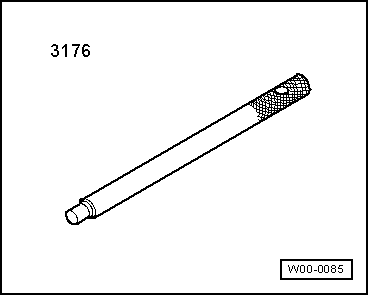
Centring mandrel -3176-
t  Grease for clutch plate splines -G 000 100-
Removing
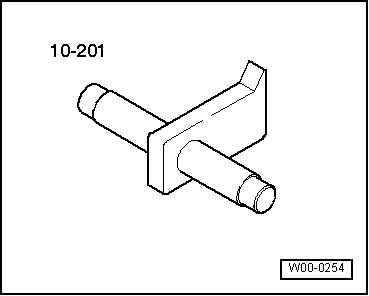
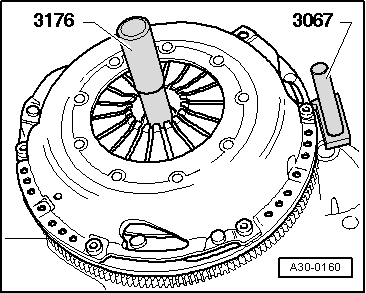
–  Apply counterhold tool -10-201- or -3067- in order to loosen bolts.
To prevent the pressure plate from becoming distorted during removal (causes clutch grab when driving off), always adhere to the following procedure when unbolting the pressure plate:
–  Loosen all bolts consecutively in clockwise direction and in steps of 90° (1/4 turn) until the pressure plate is released.
  W00-0085
Installing
–  Apply counterhold tool -3067- or -10-201- in order to tighten bolts.
l  Installation position of clutch plate: coil springs (damper assembly) or marking „Getriebeseite“ point towards pressure plate and gearbox.
–  Use centring mandrel -3176- to centralise clutch plate.
To prevent the pressure plate from becoming distorted during installation (causes clutch grab when driving off), always adhere to the following procedure when installing the pressure plate:
–  Position pressure plate on centring pins.
–  Screw in all bolts evenly by hand until bolt heads make contact with pressure plate.
–  Tighten all bolts consecutively in clockwise direction and in steps of 90° (1/4 turn) until housing makes contact with flywheel.
–  Tighten all bolts to final torque (22 Nm) consecutively in clockwise direction.
  A30-0160

Exploded view - servicing self-adjusting clutch (Sachs version) > < Exploded view - servicing conventional clutch